
Transform your backyard into a cozy outdoor cinema by installing an outdoor TV safely and correctly. This guide walks you through choosing the right TV, mounting it securely, protecting it from the elements, and setting up your audio and streaming gear for the ultimate movie night under the stars.
Key Takeaways
- Choose an outdoor-rated TV: Not all TVs can handle sun, rain, or temperature changes—pick one specifically designed for outdoor use.
- Mount it securely and at the right height: Use a weatherproof outdoor mount and position the screen at eye level when seated for the best viewing experience.
- Protect all connections from moisture: Use outdoor-rated cables, conduit, and waterproof boxes to prevent damage and ensure safety.
- Optimize audio with outdoor speakers: Built-in TV speakers often aren’t enough—add weatherproof speakers for rich, immersive sound.
- Use a streaming device for easy access: Connect a Roku, Fire Stick, or Apple TV to enjoy Netflix, Disney+, and more without a cable box.
- Plan for power and lighting: Ensure safe electrical access and add soft ambient lighting to reduce glare and enhance the mood.
- Test everything before movie night: Do a full system check a few days in advance to troubleshoot any issues.
How to Install Outdoor TV for Backyard Movie Night
Imagine this: a warm summer evening, the fireflies are out, and your family is lounging on cozy outdoor furniture, popcorn in hand, watching the latest blockbuster under the stars. No need to go to the theater—your backyard is the perfect spot for a magical movie night. And the centerpiece? A high-quality outdoor TV.
Installing an outdoor TV for backyard movie night isn’t just about mounting a screen outside. It’s about creating a safe, weather-resistant, and immersive entertainment experience. Whether you’re hosting friends or enjoying a quiet night with loved ones, a properly installed outdoor TV can elevate your outdoor living space.
In this guide, we’ll walk you through every step—from choosing the right TV to setting up audio and streaming. You’ll learn how to protect your investment from the elements, ensure safe electrical connections, and create a comfortable viewing environment. By the end, you’ll be ready to press play and enjoy your first backyard movie night with confidence.
Step 1: Choose the Right Outdoor TV
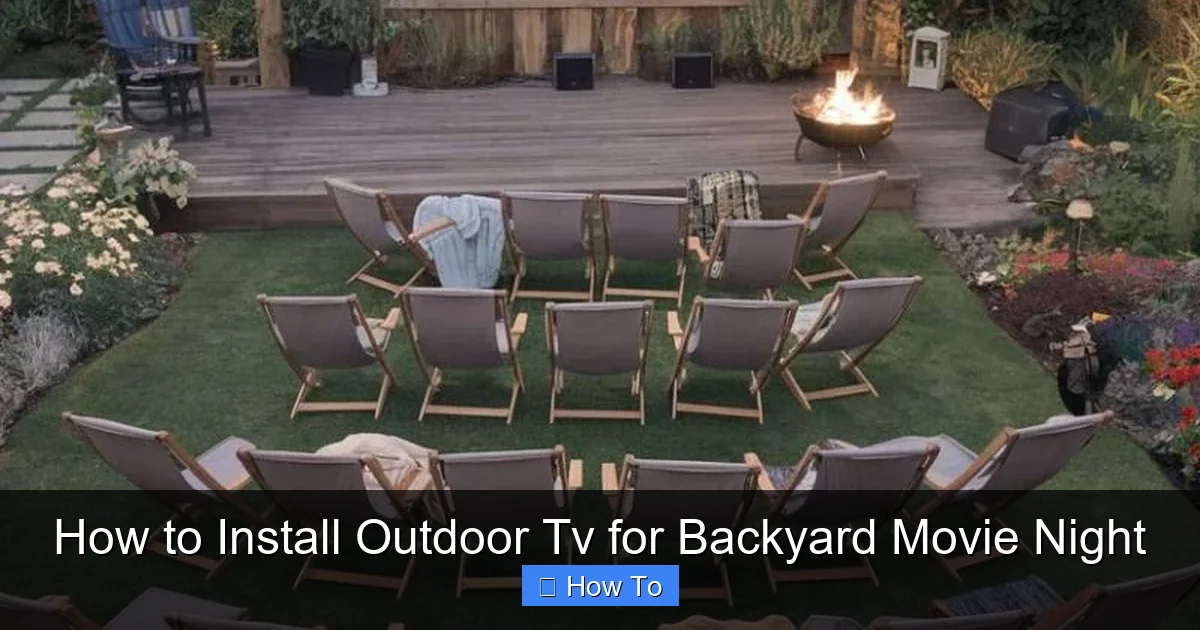
Visual guide about How to Install Outdoor Tv for Backyard Movie Night
Image source: i.pinimg.com
Not all TVs are created equal—especially when it comes to outdoor use. Regular indoor TVs aren’t built to handle temperature swings, humidity, rain, or direct sunlight. That’s why your first step is choosing a TV specifically designed for outdoor environments.
Look for Outdoor-Rated Models
Outdoor TVs are engineered with weatherproof casings, anti-glare screens, and internal cooling or heating systems to handle extreme temperatures. Brands like SunBrite, Samsung Terrace, and Seura offer reliable options. These TVs are rated for full sun, partial shade, or complete shade, so pick one that matches your backyard setup.
For example, if your TV will be under a covered patio, a partial-shade model may suffice. But if it’s fully exposed to the sun, go for a full-sun rated TV with a high brightness level (at least 700 nits) to combat glare.
Consider Screen Size and Viewing Distance
A 55-inch TV is a great starting point for most backyards. If your seating area is 8–10 feet away, a 55- to 65-inch screen offers an immersive experience without overwhelming the space. For larger yards with seating 12+ feet away, consider a 75-inch model.
Use this simple rule: multiply your viewing distance (in inches) by 0.84 to get the ideal screen size in inches. For example, 120 inches (10 feet) × 0.84 = 100.8 inches—so a 75- or 85-inch TV would work well.
Check Smart Features and Connectivity
Most outdoor TVs come with built-in smart platforms like Roku, Android TV, or webOS. This lets you stream directly from apps like Netflix, Hulu, or Disney+ without extra devices. Make sure the TV has Wi-Fi and enough HDMI ports for your needs.
Pro tip: Even if your TV is smart, consider adding a streaming stick (like a Fire Stick or Apple TV) for better performance and app updates.
Step 2: Pick the Perfect Location
Where you place your outdoor TV is just as important as the TV itself. A poor location can lead to glare, poor viewing angles, or even damage from the elements.
Avoid Direct Sunlight and Heat Sources
Even with an outdoor-rated TV, prolonged exposure to direct sunlight can cause overheating and reduce lifespan. Choose a spot under a pergola, covered patio, or awning. If that’s not possible, install a sunshade or retractable awning to protect the screen during peak hours.
Avoid placing the TV near grills, fire pits, or heaters. Heat and smoke can damage internal components and affect picture quality.
Ensure a Clear Viewing Angle
Mount the TV so that viewers can see the screen comfortably from all seating areas. Avoid placing it too high or too low. The center of the screen should be at or slightly below eye level when seated—typically 42 to 48 inches from the ground.
If you have tiered seating (like a small outdoor theater setup), aim for the middle row as your reference point.
Check for Obstructions
Look for trees, railings, or structures that might block the view. Trim branches if needed, or adjust your seating layout. Also, consider the angle of the sun at different times of day—what looks good at 6 PM might be washed out by 8 PM.
Step 3: Select a Weatherproof Mount
A sturdy, outdoor-rated mount is essential for safety and stability. Regular indoor mounts aren’t built to withstand wind, rain, or temperature changes.
Choose a Full-Motion or Fixed Mount
– Fixed mounts hold the TV flat against the wall. They’re simple, secure, and ideal if you don’t need to adjust the angle.
– Full-motion mounts allow you to tilt, swivel, and extend the TV. Great for flexible viewing angles, especially if your seating area changes.
For most backyard setups, a tilt mount (which lets you angle the screen down slightly) offers a good balance of function and simplicity.
Ensure It’s Rated for Outdoor Use
Look for mounts labeled “weatherproof,” “outdoor,” or “all-weather.” These are made from rust-resistant materials like powder-coated steel or aluminum. Check the weight and VESA compatibility to ensure it supports your TV model.
Popular brands include Sanus, Peerless, and Vogel’s. Read reviews and confirm the mount is designed for your TV’s size and weight.
Consider Height and Reach
The mount should allow you to position the TV at the ideal height. If you’re mounting on a wall, make sure the studs are properly aligned. For brick or concrete, use appropriate anchors and a masonry drill.
Pro tip: Use a laser level and measuring tape to mark the mounting points before drilling. Double-check alignment to avoid crooked installation.
Step 4: Prepare for Safe Electrical Installation
Powering your outdoor TV safely is critical. Water and electricity don’t mix, so proper wiring and protection are a must.
Use a Dedicated Outdoor Circuit
Your outdoor TV should be on a dedicated circuit with a Ground Fault Circuit Interrupter (GFCI) outlet. This protects against electrical shocks and trips the power if moisture is detected.
If you don’t already have an outdoor GFCI outlet near your TV location, hire a licensed electrician to install one. Never use indoor outlets or extension cords outdoors.
Run Power Through Conduit
If you’re running new wiring, use weatherproof electrical conduit (like PVC or metal) to protect the cables from moisture, pests, and physical damage. Bury the conduit at least 18 inches underground if running under the yard, or secure it to the wall with outdoor-rated clips.
Label all wires clearly and keep a diagram for future reference.
Protect the Outlet with a Weatherproof Cover
Even with a GFCI outlet, use an in-use weatherproof cover. These allow you to plug in devices while keeping the outlet protected from rain and dust. Look for covers rated for “while-in-use” protection.
Step 5: Install the TV Mount
Now it’s time to mount the bracket. Take your time—this step affects both safety and viewing quality.
Mark and Drill Pilot Holes
Hold the mount against the wall at the desired height. Use a level to ensure it’s straight. Mark the screw locations with a pencil. Drill pilot holes slightly smaller than your screws to prevent splitting.
For wood studs, use wood screws. For brick or concrete, use masonry anchors and a hammer drill.
Secure the Mount
Attach the mount using the provided hardware. Tighten screws firmly, but don’t over-tighten, which can strip the material. Double-check that the mount is level and secure.
If mounting on a post or freestanding structure, ensure it’s anchored into concrete or a stable base to prevent tipping.
Attach the TV Brackets
Most mounts come with brackets that attach to the back of the TV. Follow the manufacturer’s instructions to secure them using the correct VESA pattern (e.g., 200×200, 400×400).
Use a soft cloth to protect the screen during installation. Have a helper hold the TV while you attach it to the mount.
Step 6: Connect Cables and Protect Them
Cables are vulnerable to weather and wear. Proper routing and protection are essential.
Use Outdoor-Rated Cables
Standard indoor HDMI and power cables aren’t built for outdoor use. Invest in weatherproof, UV-resistant cables with sealed connectors. Look for labels like “outdoor,” “burial-rated,” or “all-weather.”
For long runs (over 25 feet), consider HDMI over Ethernet or wireless HDMI extenders to maintain signal quality.
Route Cables Through Conduit or Cable Channels
Run all cables through protective conduit or outdoor cable raceways. This keeps them dry, hidden, and safe from animals or lawn equipment.
If running cables along the wall, use outdoor-rated clips or adhesive channels. Avoid stapling cables directly to surfaces.
Seal All Connections
Use waterproof junction boxes for any splices or connections. Apply silicone sealant around cable entry points to prevent water ingress.
For HDMI and power connections at the TV, use rubber grommets or flexible conduit to create a watertight seal.
Step 7: Set Up Audio and Streaming
Great picture needs great sound. Built-in TV speakers often lack volume and clarity, especially outdoors.
Add Outdoor Speakers
Install weatherproof speakers around your seating area. Options include:
– Rock speakers: Blend into the landscape.
– Wall-mounted speakers: Mounted near the TV or on posts.
– Wireless Bluetooth speakers: Easy to place and move.
Connect them via Bluetooth, RCA, or optical audio. For a cinematic experience, consider a 2.1 or 5.1 surround sound system with a subwoofer.
Connect a Streaming Device
Even if your TV is smart, a streaming stick offers better performance and app support. Plug a Roku, Amazon Fire Stick, or Apple TV into an HDMI port.
Use a short outdoor-rated HDMI cable to connect the device. Keep it in a small weatherproof box or behind the TV to protect it.
Optimize Wi-Fi Signal
Weak Wi-Fi can cause buffering. If your router is far from the TV, use a Wi-Fi extender or mesh network. Place the extender halfway between the router and TV for best results.
Alternatively, run an Ethernet cable through conduit for a wired connection—this offers the most reliable streaming.
Step 8: Add Lighting and Comfort
The right lighting enhances the movie experience and reduces screen glare.
Use Soft, Ambient Lighting
Avoid bright lights near the screen. Instead, use string lights, lanterns, or LED path lights to create a cozy atmosphere. Warm white (2700K–3000K) bulbs work best.
Place lights behind seating or along walkways—never shining directly at the TV.
Reduce Glare
If glare is an issue, install a retractable awning or outdoor screen shade. Some outdoor TVs come with anti-reflective coatings, but extra shading helps on sunny days.
Make It Cozy
Add outdoor cushions, blankets, and seating like Adirondack chairs or a sectional sofa. Provide side tables for snacks and drinks.
Consider a small outdoor fridge or cooler to keep beverages cold.
Troubleshooting Common Issues
Even with careful planning, issues can arise. Here’s how to fix common problems.
TV Won’t Turn On
– Check the GFCI outlet—press the “reset” button.
– Ensure all cables are securely connected.
– Test the power cable with another device.
Poor Picture Quality or Glare
– Adjust the TV’s brightness and contrast settings.
– Reposition the TV or add a sunshade.
– Clean the screen with a microfiber cloth.
Weak or No Audio
– Check speaker connections and volume settings.
– Ensure the audio output is set correctly in the TV menu.
– Test with different content to rule out source issues.
Wi-Fi Keeps Dropping
– Move the router closer or add a Wi-Fi extender.
– Switch to a 5GHz band for less interference.
– Use a wired Ethernet connection if possible.
Moisture in Cables or Connections
– Inspect all seals and conduit for damage.
– Replace any wet or corroded cables.
– Apply dielectric grease to connectors for extra protection.
Conclusion
Installing an outdoor TV for backyard movie night is a rewarding project that brings entertainment, comfort, and style to your outdoor space. By choosing the right TV, mounting it securely, protecting it from the elements, and setting up quality audio and streaming, you create a cinematic experience that rivals any theater.
Remember: safety comes first. Use outdoor-rated equipment, protect all electrical connections, and consult a professional if you’re unsure about wiring. With the right setup, your backyard will become the go-to spot for summer movie nights, game days, and cozy evenings under the stars.
So grab your popcorn, dim the lights, and press play—your outdoor cinema awaits.

