
This guide walks you through how to install a patio TV for a pool area, covering planning, mounting, wiring, and weatherproofing. You’ll learn how to create a safe, durable, and enjoyable outdoor viewing experience with expert tips and practical advice.
Key Takeaways
- Choose a weatherproof outdoor TV: Standard indoor TVs aren’t built for humidity, heat, or rain. Opt for a certified outdoor model designed for poolside use.
- Plan your location carefully: Consider sun exposure, viewing angles, distance from the pool, and proximity to power and Wi-Fi sources.
- Use a sturdy, weather-resistant mount: A full-motion or tilt mount allows flexibility and protects the TV from wind and vibrations.
- Run cables safely and discreetly: Use waterproof conduits and in-wall wiring to prevent tripping hazards and protect against moisture.
- Ensure proper grounding and surge protection: Outdoor electrical setups must be GFCI-protected to prevent shocks near water.
- Test and maintain regularly: Check seals, connections, and screen clarity seasonally to extend your TV’s lifespan.
- Enhance with outdoor audio: Pair your TV with weatherproof speakers for a complete poolside entertainment system.
How to Install Patio TV for Pool Area: A Complete Step-by-Step Guide
Imagine lounging by the pool on a sunny afternoon, sipping a cold drink, and watching your favorite show or a live sports game on a crisp, clear screen. With the right setup, this dream can become your reality. Installing a patio TV for your pool area transforms your outdoor space into a true entertainment hub. Whether you’re hosting a summer party or enjoying a quiet evening under the stars, a properly installed outdoor TV adds comfort, convenience, and value to your home.
But unlike setting up a TV indoors, installing one by the pool comes with unique challenges. You’re dealing with weather, moisture, electrical safety, and mounting in potentially tricky locations. That’s why it’s essential to follow a detailed, safety-first approach. This guide will walk you through every step of how to install a patio TV for a pool area—from choosing the right TV to final testing and maintenance.
By the end of this guide, you’ll know exactly how to pick the best outdoor TV, select the perfect spot, mount it securely, run cables safely, and protect your investment from the elements. We’ll also cover common mistakes to avoid and how to enhance your setup with sound and smart features. Let’s dive in!
Step 1: Choose the Right Outdoor TV
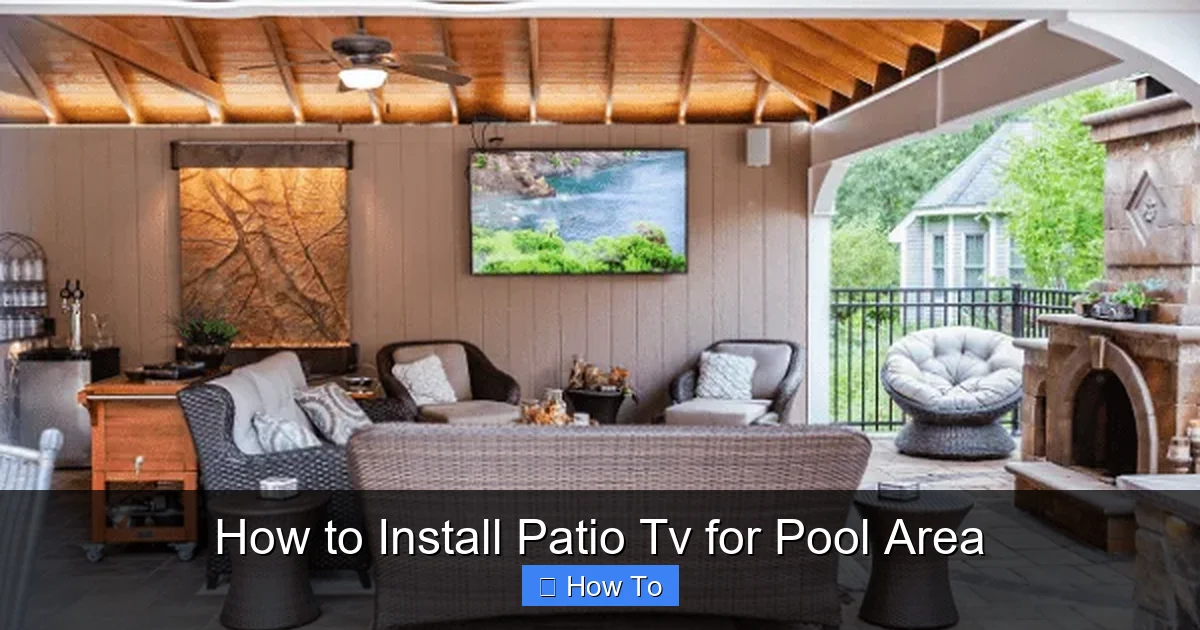
Visual guide about How to Install Patio Tv for Pool Area
Image source: thepatiocompanyma.com
The first and most important step in installing a patio TV for your pool area is selecting the right television. Not all TVs are created equal—especially when it comes to outdoor use. Indoor TVs are not designed to handle the humidity, temperature swings, dust, and UV exposure that come with poolside environments. Using one outdoors can lead to overheating, screen damage, or even electrical hazards.
Look for Weatherproof Ratings
When shopping for an outdoor TV, prioritize models with official weatherproof certifications. The most common standard is the IP (Ingress Protection) rating. For pool areas, look for a TV with at least an IP54 rating, which means it’s protected against dust and splashing water. Higher-end models may offer IP65 or IP66 ratings, providing even better protection against jets of water and dust.
Brands like SunBrite, Seura, and Samsung offer outdoor-specific TVs designed for patios, decks, and pool areas. These models come with sealed casings, anti-glare screens, and internal cooling systems to prevent overheating.
Consider Screen Brightness and Viewing Angle
Outdoor lighting can be harsh, especially during the day. A standard indoor TV may appear washed out in direct sunlight. Outdoor TVs typically have higher brightness levels—measured in nits—to combat glare. Aim for a screen with at least 700 nits, though 1000+ nits is ideal for bright pool areas.
Also, consider the viewing angle. If your seating area is spread out or at an angle, choose a TV with wide viewing angles (178 degrees or more) to ensure everyone gets a clear picture.
Size and Resolution Matter
The size of your TV should match the distance from the seating area. A general rule is to sit about 1.5 to 2.5 times the screen’s diagonal measurement away. For example, a 55-inch TV is best viewed from 6.5 to 11 feet away.
For resolution, 4K Ultra HD is the standard for outdoor TVs. It delivers sharp, vibrant images even in bright conditions. Some models also support HDR (High Dynamic Range) for better contrast and color.
Smart Features and Connectivity
Many outdoor TVs come with built-in smart platforms like Android TV, Roku, or webOS. This allows you to stream content directly without needing an external device. Make sure the TV has Wi-Fi and Bluetooth connectivity. Also, check for HDMI ports, USB inputs, and audio outputs if you plan to connect speakers or a soundbar.
Step 2: Plan the Installation Location
Once you’ve chosen your TV, it’s time to decide where to install it. The location will affect visibility, safety, and ease of wiring. A poor choice can lead to glare, obstructed views, or water damage.
Assess Sun and Shade Patterns
Observe your pool area throughout the day to understand how sunlight moves across the space. Avoid placing the TV in direct sunlight, as this can cause screen glare and overheating. A shaded area—such as under a pergola, awning, or covered patio—is ideal.
If shade isn’t available, consider installing a retractable awning or outdoor shade sail. Some outdoor TVs come with optional sun hoods or glare shields to improve visibility.
Check Viewing Angles and Distance
Position the TV so that it’s easily visible from your primary seating areas—loungers, outdoor sofas, or dining chairs. The center of the screen should be at or slightly below eye level when seated. This reduces neck strain and improves comfort.
Avoid placing the TV too high or too low. A good rule is to mount it so the center is about 42 to 48 inches from the ground. This works well for most outdoor furniture heights.
Ensure Safe Distance from Water
Safety is critical near pools. The TV should be installed at least 6 to 8 feet away from the pool edge to prevent accidental splashing or electrical hazards. If your local building codes specify a minimum distance (many require 6 feet), follow them strictly.
Also, avoid mounting the TV directly above the pool or in areas where water might splash during cleaning or storms.
Proximity to Power and Wi-Fi
Your TV needs a reliable power source and strong Wi-Fi signal. Choose a location near an outdoor electrical outlet or plan to install one. For Wi-Fi, test the signal strength with your phone or tablet. If the signal is weak, consider installing a Wi-Fi extender or mesh network node nearby.
Step 3: Select the Right Mounting Hardware
A sturdy, weather-resistant mount is essential for securing your outdoor TV. The mount must support the TV’s weight, resist rust, and allow for adjustments.
Choose a Weatherproof Mount
Standard indoor mounts are not suitable for outdoor use. Look for mounts specifically labeled as “outdoor” or “weatherproof.” These are typically made from powder-coated steel or aluminum and include rubber gaskets to prevent moisture intrusion.
Popular brands include Peerless, Sanus, and Vogel’s. Many outdoor TV manufacturers also sell compatible mounts.
Decide on Mount Type
There are three main types of mounts:
- Fixed Mount: Keeps the TV flush against the wall. Best for permanent, straight-on viewing.
- Tilt Mount: Allows you to angle the TV up or down. Useful if the TV is mounted high or in a shaded area.
- Full-Motion (Articulating) Mount: Lets you swivel, tilt, and extend the TV. Ideal for flexible viewing from multiple seating areas.
For pool areas, a tilt or full-motion mount is often the best choice, as it allows you to adjust the screen to avoid glare or improve viewing angles.
Check Weight and VESA Compatibility
Make sure the mount supports your TV’s weight and VESA pattern (the screw hole layout on the back). Most outdoor TVs list compatible VESA sizes in the manual. Common patterns include 200×200, 400×400, and 600×400 mm.
Step 4: Prepare for Installation
Before mounting, gather your tools and prepare the site. Rushing this step can lead to mistakes or safety issues.
Gather Tools and Materials
You’ll need:
- Drill and drill bits
- Level
- Measuring tape
- Screwdriver or impact driver
- Stud finder
- Outdoor-rated screws and anchors
- Waterproof conduit (for cables)
- Cable clips or raceways
- GFCI outlet (if installing new power)
Turn Off Power
If you’re working near electrical outlets or running new wiring, turn off the power at the circuit breaker. Use a voltage tester to confirm the circuit is dead.
Locate Wall Studs
Use a stud finder to locate the studs in the wall where you’ll mount the TV. Mounting into studs provides the strongest support. If studs aren’t aligned with your desired location, use heavy-duty toggle bolts or masonry anchors for concrete or brick walls.
Step 5: Install the Mount
Now it’s time to secure the mount to the wall.
Mark and Drill Holes
Hold the mount against the wall in the desired position. Use a level to ensure it’s straight. Mark the screw holes with a pencil. Drill pilot holes into the studs or wall surface.
Secure the Mount
Attach the mount using outdoor-rated screws. For wood studs, use lag screws. For concrete or brick, use masonry anchors. Tighten securely, but avoid over-tightening, which can strip the holes.
Double-Check Stability
Gently tug on the mount to ensure it’s firmly attached. It should not wobble or shift. If it does, reinforce with additional anchors or relocate to a stud.
Step 6: Run Cables Safely
Running cables outdoors requires special care to protect against moisture, UV damage, and tripping hazards.
Use Waterproof Conduit
Run all cables (power, HDMI, Ethernet, etc.) through a waterproof electrical conduit. PVC or metal conduit rated for outdoor use is ideal. This protects wires from rain, pests, and physical damage.
Route Cables Through Walls (If Possible)
For a clean, professional look, run cables inside the wall. Use an in-wall rated HDMI cable and follow local electrical codes. If in-wall routing isn’t possible, use surface-mounted cable raceways or clips to secure wires along the wall.
Connect to a GFCI Outlet
All outdoor electrical outlets must be GFCI (Ground Fault Circuit Interrupter) protected. This shuts off power instantly if it detects a ground fault, preventing electric shock near water. If your existing outlet isn’t GFCI, install one or use a GFCI-protected power strip.
Use Surge Protectors
Outdoor electronics are vulnerable to power surges from lightning or grid fluctuations. Plug your TV and devices into a high-quality outdoor surge protector.
Step 7: Mount the TV
With the mount secure and cables in place, it’s time to attach the TV.
Attach Mounting Brackets to TV
Follow the TV’s manual to attach the mounting brackets to the back of the TV. Use the correct screws and ensure they’re tight.
Lift and Secure the TV
With a helper, lift the TV and hook it onto the wall mount. Double-check that it’s securely locked in place. Most mounts have safety screws or latches to prevent accidental detachment.
Connect Cables
Plug in the power cable, HDMI, and any other connections. Route cables neatly through the conduit or raceway. Avoid sharp bends or pinching.
Step 8: Test and Adjust
Before celebrating, test everything.
Power On and Check Picture
Turn on the TV and verify the picture is clear and bright. Adjust the tilt or swivel if needed to eliminate glare.
Test Audio and Connectivity
Play a video to check sound. Test Wi-Fi, streaming apps, and any connected devices like a soundbar or gaming console.
Secure Loose Cables
Use zip ties or clips to tidy up any loose wires. Ensure nothing is dangling or exposed.
Troubleshooting Common Issues
Even with careful planning, problems can arise. Here’s how to fix common issues:
TV Won’t Turn On
Check the power connection and GFCI outlet. Reset the GFCI if it tripped. Ensure the surge protector is on.
Poor Picture Quality
Adjust brightness and contrast settings. Clean the screen with a microfiber cloth. Check for loose HDMI connections.
Weak Wi-Fi Signal
Move the router closer or install a Wi-Fi extender. Use an Ethernet cable for a wired connection if possible.
Screen Glare
Reposition the TV or install a sun hood. Use curtains or shades to block direct sunlight.
Moisture Inside the TV
If you notice condensation, turn off the TV and let it dry completely. Check seals and ensure the TV is properly ventilated. Contact the manufacturer if damage occurs.
Enhance Your Setup
Once your TV is installed, consider adding extras to improve the experience.
Outdoor Speakers
Pair your TV with weatherproof speakers or a soundbar. In-wall or in-ceiling speakers provide clean sound without clutter.
Smart Home Integration
Connect your TV to a smart home system like Alexa or Google Home. Use voice commands to change channels or adjust volume.
Lighting and Ambiance
Add outdoor LED lights, string lights, or pathway lighting to create a cozy atmosphere for evening viewing.
Maintenance Tips
To keep your patio TV in top condition:
- Clean the screen monthly with a soft, dry cloth.
- Inspect seals and mounts for wear or rust.
- Check cables for damage or fraying.
- Cover the TV during storms or off-seasons if recommended by the manufacturer.
- Test GFCI outlets monthly by pressing the “test” button.
Conclusion
Installing a patio TV for your pool area is a rewarding project that enhances your outdoor lifestyle. With the right TV, careful planning, and attention to safety, you can enjoy high-quality entertainment in the comfort of your backyard. From choosing a weatherproof model to mounting it securely and running cables safely, every step matters.
Remember, safety comes first—especially near water. Always follow local electrical codes, use GFCI protection, and consult a licensed electrician if you’re unsure about wiring. With proper installation and maintenance, your outdoor TV will provide years of enjoyment for family and friends.
So grab your tools, pick the perfect spot, and get ready to transform your pool area into the ultimate outdoor entertainment zone. Your summer movie nights will never be the same!

