
Installing an outdoor TV on your balcony or patio lets you enjoy movies, sports, and shows under the sky. This guide walks you through choosing the right TV, mounting it safely, protecting it from weather, and setting up cables—all while ensuring a clean, secure setup.
Key Takeaways
- Choose an outdoor-rated TV: Regular indoor TVs aren’t built for humidity, rain, or temperature swings. Look for models labeled “weatherproof,” “all-weather,” or “outdoor.”
- Use a proper outdoor mount: Standard mounts can rust or fail in damp conditions. Invest in a corrosion-resistant, VESA-compatible outdoor TV mount.
- Plan your cable routing: Keep power and HDMI cables protected with conduit or outdoor-rated cable covers to prevent water damage and tripping hazards.
- Ensure proper ventilation: Even outdoor TVs need airflow. Don’t enclose them in tight spaces without ventilation to avoid overheating.
- Check local building codes: Some apartments or condos restrict balcony modifications. Always get approval before drilling or mounting.
- Use a surge protector: Outdoor electronics are more vulnerable to power surges. Plug your TV and devices into a weatherproof surge protector.
- Test before finalizing: Power on the TV and check picture, sound, and signal strength before securing all cables and covers.
How to Install Outside TV for Balcony Patio
Imagine sipping your morning coffee while catching up on the news, or hosting friends for a movie night under the stars—all from the comfort of your balcony or patio. With the right setup, an outdoor TV can transform your outdoor space into a true entertainment zone. But installing a TV outside isn’t as simple as mounting one indoors. You’re dealing with weather, safety, cables, and space limitations.
In this complete guide, you’ll learn exactly how to install an outside TV for your balcony or patio—safely, securely, and stylishly. We’ll cover everything from choosing the right TV and mount to routing cables, protecting against the elements, and troubleshooting common issues. Whether you’re a DIY beginner or a seasoned home improver, this step-by-step walkthrough will help you create a durable, high-quality outdoor viewing experience.
Let’s get started.
Step 1: Assess Your Space and Needs
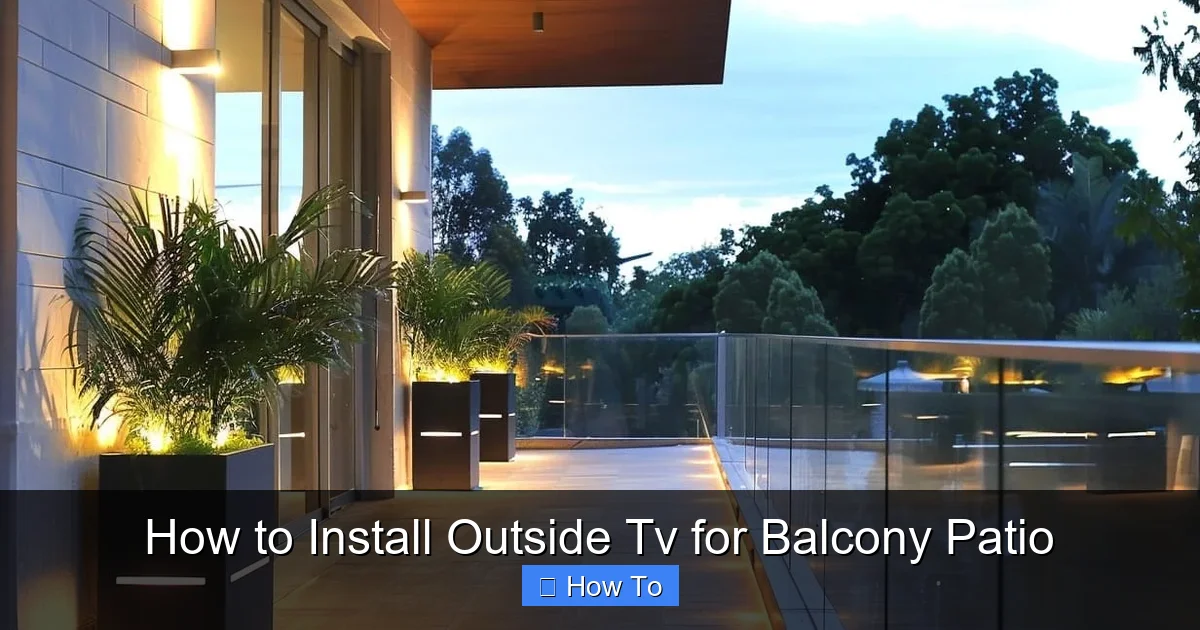
Visual guide about How to Install Outside Tv for Balcony Patio
Image source: garden.lighting
Before buying anything, take a good look at your balcony or patio. Ask yourself:
– How much space do I have?
– Where will people sit?
– Is the TV visible from all seating areas?
– Is there shade, or will the screen be in direct sunlight?
– Are there power outlets nearby?
– Is the area exposed to rain, wind, or snow?
These questions will help you determine the best TV size, placement, and type.
For example, a small balcony might only fit a 32- to 43-inch TV, while a large patio could handle a 55-inch or larger model. If your space gets a lot of sun, you’ll need a TV with high brightness (measured in nits) to combat glare. Most indoor TVs top out around 300–400 nits, but outdoor models often reach 700–2,000 nits for better visibility.
Also, consider how you’ll use the TV. Will it be for casual viewing, movie nights, or watching sports with friends? This affects whether you need built-in streaming apps, strong speakers, or compatibility with external sound systems.
Check for Structural Support
Your balcony railing or wall must be strong enough to hold the TV and mount. Most outdoor mounts require a solid wall or a reinforced railing. If you’re mounting to a concrete or brick wall, you’ll need masonry anchors. For wood or metal railings, ensure they’re securely attached to the building structure.
Avoid mounting on glass railings or flimsy materials. If in doubt, consult a contractor or building manager—especially in apartments or condos.
Get Permission if Needed
Many rental properties or homeowners’ associations (HOAs) have rules about modifications to balconies. Drilling holes or installing permanent mounts may require approval. Check your lease or HOA guidelines before starting. Some buildings allow temporary mounts or clamp-on brackets that don’t require drilling.
Step 2: Choose the Right Outdoor TV
Not all TVs are created equal—especially when it comes to outdoor use. Using an indoor TV outside is risky. It can overheat, get damaged by moisture, or fail prematurely.
Look for Outdoor-Rated Models
Outdoor TVs are specifically designed to handle temperature changes, humidity, and light rain. They come in three main types:
– **All-Weather TVs:** Fully sealed and built for year-round outdoor use. These are the best choice for uncovered patios or balconies exposed to the elements. Brands like SunBrite, Samsung Terrace, and Seura offer high-quality all-weather models.
– **Partial-Weather TVs:** Designed for covered areas like screened porches or under eaves. They resist humidity and light moisture but shouldn’t be exposed to direct rain.
– **Indoor TVs with Outdoor Enclosures:** Some people use indoor TVs inside weatherproof outdoor enclosures. This is a budget-friendly option, but enclosures can limit airflow and make repairs harder.
For most balconies and patios, an all-weather TV is the safest and most reliable choice.
Consider Screen Brightness and Anti-Glare
Outdoor lighting can wash out your picture. Look for a TV with:
– **High brightness (700+ nits):** Essential for sunny days.
– **Anti-reflective coating:** Reduces glare from sunlight.
– **Wide viewing angles:** So everyone can see the screen clearly, even from the side.
OLED TVs offer great contrast but can struggle in bright light. LED/LCD TVs with high brightness are usually better for outdoor use.
Check Connectivity and Smart Features
Most outdoor TVs come with built-in Wi-Fi, streaming apps (like Netflix, YouTube, and Amazon Prime), and multiple HDMI ports. Make sure yours supports the devices you want to connect—like a streaming stick, game console, or soundbar.
Some models also have built-in heaters or cooling systems to regulate internal temperature in extreme climates.
Step 3: Select the Right Mount and Accessories
A sturdy, weatherproof mount is just as important as the TV itself.
Choose an Outdoor TV Mount
Look for a mount labeled “outdoor,” “weatherproof,” or “corrosion-resistant.” These are typically made from powder-coated aluminum or stainless steel to resist rust.
There are three main types:
– **Fixed Mounts:** Hold the TV flat against the wall. Best for permanent setups with a clear viewing angle.
– **Tilting Mounts:** Allow you to angle the TV up or down. Useful if the screen is mounted high or low.
– **Full-Motion (Articulating) Mounts:** Let you swivel and extend the TV. Great for adjusting the angle based on seating or sun position.
For most balconies, a tilting or fixed mount works well. Full-motion mounts are ideal if you want flexibility but require more space and stronger support.
Ensure VESA Compatibility
VESA (Video Electronics Standards Association) refers to the screw pattern on the back of your TV. Common sizes include 100×100, 200×200, and 400×400 mm. Your mount must match your TV’s VESA pattern. Check the TV manual or manufacturer’s website for details.
Get the Right Hardware
Use stainless steel screws, bolts, and anchors designed for outdoor use. Regular hardware can rust and fail over time. If mounting to concrete or brick, use masonry anchors. For wood, use lag bolts.
Optional Accessories
– **Outdoor surge protector:** Protects your TV from power surges caused by lightning or grid fluctuations.
– **Cable management kit:** Keeps wires neat and protected.
– **Weatherproof outlet cover:** Shields outdoor electrical outlets from rain.
– **Remote extender:** Helps you control the TV from a distance if the signal is blocked.
Step 4: Plan Your Cable Routing
Cables are often the trickiest part of an outdoor TV install. You need to power the TV, connect devices, and keep everything safe from weather and tripping hazards.
Locate a Power Source
Find the nearest outdoor GFCI (Ground Fault Circuit Interrupter) outlet. These are required for outdoor use and protect against electrical shock. If you don’t have one, hire an electrician to install it.
Avoid using extension cords long-term. They can degrade in sunlight and pose a tripping risk. If you must use one, choose a heavy-duty, outdoor-rated cord and secure it with clips.
Run HDMI and Other Cables
If you’re connecting a streaming device, game console, or soundbar, you’ll need HDMI cables. Use outdoor-rated HDMI cables, which are shielded and weather-resistant.
Route cables along the wall or railing, keeping them as hidden as possible. Use:
– **Cable raceways:** Plastic or metal channels that attach to the wall and hide wires.
– **Conduit:** Flexible or rigid tubing that protects cables from moisture and physical damage.
– **Zip ties or clips:** To secure cables neatly.
Avoid running cables across walkways. If you must cross a path, use a cable cover or bury the cable slightly under outdoor carpet or decking (if allowed).
Use a Cable Entry Point
If running cables from inside your home to the balcony, drill a small hole through the wall or window frame. Seal it with silicone caulk to prevent water and pests from entering. Use a cable pass-through kit for a clean, professional look.
Step 5: Install the Mount
Now it’s time to mount the bracket. Safety is key—TVs can be heavy, and a fall could cause injury or damage.
Gather Your Tools
You’ll need:
– Drill
– Level
– Measuring tape
– Stud finder (if mounting to wall)
– Masonry drill bit (if drilling into concrete/brick)
– Screwdriver or impact driver
– Safety goggles and gloves
Mark the Mounting Location
Hold the mount against the wall or railing where you want the TV. Use a level to ensure it’s straight. Mark the screw holes with a pencil.
If mounting to a wall, use a stud finder to locate studs. Mounting into studs provides the strongest support. If no studs are available, use heavy-duty wall anchors rated for the TV’s weight.
For railings, ensure the mount’s clamps or brackets fit securely. Some mounts come with adjustable arms to fit different railing sizes.
Drill Pilot Holes
Drill pilot holes at the marked spots. For concrete or brick, use a hammer drill and masonry bit. For wood, a standard drill bit works.
Attach the Mount
Secure the mount with the provided screws and anchors. Tighten firmly, but don’t over-tighten, which can strip the holes.
Double-check that the mount is level and secure. Give it a gentle tug to test stability.
Step 6: Mount the TV
With the bracket in place, it’s time to attach the TV.
Attach the Mounting Brackets to the TV
Most mounts come with brackets that screw into the VESA holes on the back of the TV. Use the correct screws (usually included) and tighten securely.
Lift and Secure the TV
With a helper, lift the TV and hook it onto the wall mount. Follow the manufacturer’s instructions—some mounts use a locking mechanism or safety screws to prevent accidental detachment.
Once the TV is mounted, check that it’s level and secure. Adjust the tilt or angle if needed.
Connect the Cables
Plug in the power cable and any HDMI or audio cables. Route them through the cable management system you installed earlier.
Step 7: Power On and Test
Before finalizing the setup, test everything.
Turn on the TV
Plug the TV into the outdoor outlet and turn it on. Check the picture quality, brightness, and sound.
Test All Inputs
Connect your streaming device, game console, or other equipment. Make sure all HDMI ports work and the signal is strong.
Check Remote Control Range
Stand at various points on the balcony and test the remote. If the signal is weak, consider using a remote extender or placing the streaming device closer to the TV.
Adjust Settings
Go into the TV’s menu and adjust:
– Brightness and contrast for outdoor viewing
– Sound settings (or connect external speakers)
– Network settings to connect to Wi-Fi
Step 8: Secure and Weatherproof
Now that everything works, protect your investment.
Seal All Openings
Use outdoor silicone caulk to seal any holes, cable entry points, or gaps around the mount. This prevents water, insects, and debris from getting in.
Install a Surge Protector
Plug the TV and connected devices into a weatherproof surge protector. This protects against lightning strikes and power surges.
Use a Weatherproof Cover (Optional)
If your TV isn’t fully all-weather, or if you want extra protection during storms, use a fitted outdoor TV cover. Remove it before use to avoid overheating.
Regular Maintenance
Every few months, inspect the mount, cables, and seals for signs of wear, rust, or damage. Clean the screen with a microfiber cloth and mild cleaner. Check that screws are tight and the TV is secure.
Troubleshooting Common Issues
Even with careful planning, problems can arise. Here’s how to fix the most common ones.
TV Won’t Turn On
– Check the power outlet with another device.
– Ensure the surge protector is on and working.
– Verify all cables are securely connected.
Poor Picture Quality
– Adjust brightness and contrast settings.
– Clean the screen—dust and smudges reduce clarity.
– Check for signal interference from nearby devices.
Remote Not Working
– Replace the batteries.
– Make sure nothing is blocking the IR sensor.
– Use a remote extender if the TV is far from seating areas.
Overheating
– Ensure the TV has proper ventilation.
– Don’t cover it with a blanket or enclosure unless designed for it.
– Move it to a shadier spot if possible.
Water Damage
– If the TV gets wet, unplug it immediately.
– Let it dry completely before using.
– Consider upgrading to a fully sealed all-weather model.
Conclusion
Installing an outside TV for your balcony or patio is a fantastic way to enjoy entertainment in the fresh air. With the right TV, mount, and setup, you can create a durable, high-quality viewing experience that lasts for years.
Remember: safety and weather protection are key. Always use outdoor-rated equipment, secure your mount properly, and protect your cables from the elements. Take the time to plan your layout, test everything, and maintain your setup regularly.
Whether you’re watching the big game, streaming a movie, or just catching up on your favorite show, your outdoor TV will make your balcony or patio a go-to spot for relaxation and fun.
So grab your tools, pick out your TV, and start building your outdoor entertainment zone today.

