
Transform your backyard into a cozy outdoor cinema by installing an outside TV for movie night. This guide walks you through choosing the right TV, mounting it securely, protecting it from the elements, and setting up audio and streaming for a seamless experience.
Key Takeaways
- Choose an outdoor-rated TV: Regular indoor TVs aren’t built for weather exposure. Opt for a weatherproof, all-season outdoor TV designed for sun, rain, and temperature changes.
- Pick the right location: Install your TV under a covered area like a pergola or patio to protect it from direct rain and harsh sunlight. Ensure a clear view from seating areas.
- Use a sturdy, weatherproof mount: A full-motion or fixed outdoor mount rated for outdoor use ensures your TV stays secure and adjustable for the best viewing angle.
- Protect all connections and power sources: Use outdoor-rated extension cords, surge protectors, and weatherproof enclosures for cables and devices to prevent damage and hazards.
- Enhance audio with outdoor speakers: Built-in TV speakers often lack volume outdoors. Add weatherproof Bluetooth or wired speakers for rich, immersive sound.
- Test everything before movie night: Do a full system check a day before your event to troubleshoot any issues with picture, sound, or connectivity.
- Consider a backup power source: A portable power station or generator ensures your movie night isn’t interrupted by a power outage.
How to Install Outside TV for Backyard Movie Night
Imagine this: the sun sets, string lights twinkle above, cozy blankets are spread across outdoor seating, and your favorite film begins to play on a crisp, clear screen right in your backyard. No need to drive to the theater—your own outdoor cinema is just steps from your back door. Installing an outside TV for backyard movie night is easier than you think, and with the right setup, you can enjoy immersive entertainment under the stars all season long.
In this guide, we’ll walk you through every step of installing an outdoor TV, from choosing the perfect model to mounting it safely and setting up audio and streaming. Whether you’re hosting a family movie night, a romantic date under the stars, or a neighborhood block party, this guide ensures your setup is safe, functional, and fun. You’ll learn how to protect your investment from the elements, optimize viewing angles, and create a cinematic experience that rivals any indoor setup.
By the end of this guide, you’ll have a fully functional outdoor TV system ready for action. Let’s get started!
Step 1: Choose the Right Outdoor TV
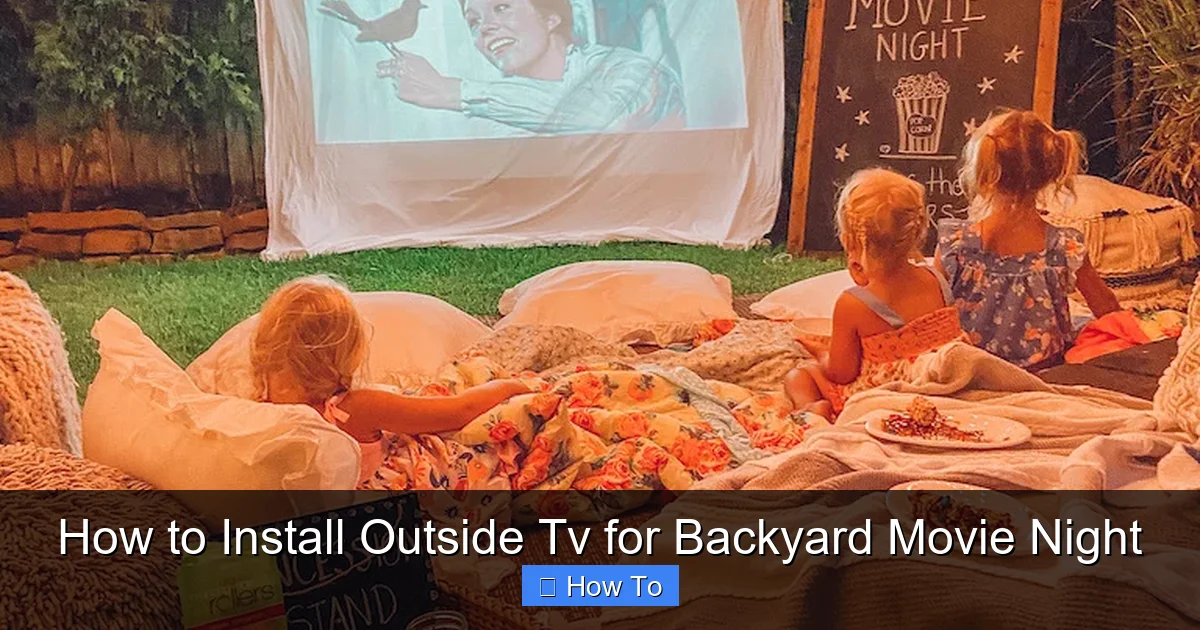
Visual guide about How to Install Outside Tv for Backyard Movie Night
Image source: lifebyleanna.com
Not all TVs are created equal—especially when it comes to outdoor use. A regular indoor TV might seem like a cost-effective option, but it’s not built to withstand humidity, rain, dust, or extreme temperatures. Installing an indoor TV outside can lead to overheating, screen damage, or even electrical hazards.
Instead, invest in an outdoor-rated TV. These models are specifically engineered for outdoor environments and come with features like:
– Weatherproof casings (IP54 or higher rating)
– Anti-glare screens for daylight viewing
– Wide operating temperature ranges (from -22°F to 122°F or more)
– Ventilation systems to prevent overheating
– UV-resistant materials to prevent sun damage
There are two main types of outdoor TVs:
All-Season Outdoor TVs
These are the gold standard for backyard entertainment. Designed for year-round use, they can handle rain, snow, heat, and cold. Brands like SunBrite, Samsung Terrace, and Seura offer high-quality all-season models with bright, vibrant displays. They’re ideal if you plan to use your TV frequently, even in winter or during light rain.
Partial-Cover Outdoor TVs
These are more affordable and suitable for covered areas like patios, pergolas, or screened-in porches. They’re not fully waterproof but are built to resist humidity and light moisture. If your TV will always be under a roof and shielded from direct weather, this option can save you money without sacrificing too much performance.
Tip: Look for a TV with at least 400 nits of brightness for daytime viewing. For evening use, 300 nits is usually sufficient.
Step 2: Pick the Perfect Location
Where you install your outdoor TV is just as important as the TV itself. The right location ensures optimal viewing, protects your equipment, and enhances the overall experience.
Choose a Covered Area
Install your TV under a covered structure such as:
– A pergola with a roof
– A screened-in porch
– A covered patio or gazebo
– A shaded deck with an overhang
This protects the TV from direct rain, snow, and intense sunlight. Even all-season TVs benefit from extra shelter, especially during heavy storms.
Consider Viewing Distance and Angle
The ideal viewing distance depends on your TV size. A general rule is to sit 1.5 to 2.5 times the diagonal screen size away. For example, a 55-inch TV should be viewed from 6.5 to 11 feet away.
Mount the TV at eye level when seated. For most outdoor seating, this means placing the screen between 42 and 60 inches from the ground. Use a full-motion mount to tilt or swivel the TV for the best angle, especially if seating is spread out.
Avoid Glare and Obstructions
Position the TV so it’s not directly facing the sun during peak hours. Morning or evening sun can cause glare, making the screen hard to see. Use curtains, outdoor blinds, or strategic landscaping (like tall plants or trellises) to reduce glare.
Also, ensure there are no trees, walls, or furniture blocking the view from your seating area.
Step 3: Select and Install a Weatherproof Mount
A sturdy, outdoor-rated mount is essential for safety and performance. Never use an indoor mount outside—it won’t withstand wind, moisture, or temperature changes.
Choose the Right Mount Type
– Fixed Mount: Keeps the TV flat against the wall. Best for permanent, straight-on viewing.
– Tilt Mount: Allows you to angle the TV up or down to reduce glare and improve viewing.
– Full-Motion (Articulating) Mount: Lets you pull the TV away from the wall, swivel it left or right, and tilt it. Ideal for flexible seating arrangements.
Make sure the mount is rated for outdoor use and can support your TV’s weight and size. Check the VESA pattern (the screw hole layout on the back of your TV) to ensure compatibility.
Install the Mount Securely
1. Use a stud finder to locate wall studs or secure into concrete/brick with appropriate anchors.
2. Mark the mounting holes and drill pilot holes.
3. Attach the mount bracket using stainless steel or galvanized screws (rust-resistant).
4. Double-check that the mount is level and tightly secured.
Safety Tip: If you’re mounting on a brick or concrete wall, use a hammer drill and masonry anchors. For wood siding, ensure the mount is anchored into solid framing—not just the siding.
Step 4: Run Power and Protect Electrical Connections
Powering your outdoor TV safely is critical. Outdoor electrical work must follow local codes and prioritize safety.
Use Outdoor-Rated Extension Cords and Outlets
– Only use extension cords labeled for outdoor use (look for “W” or “W-A” ratings).
– Choose cords with a gauge thick enough for your TV’s power needs (usually 14 or 12 AWG for longer runs).
– Plug the TV and all devices into a GFCI (Ground Fault Circuit Interrupter) outlet. These shut off power if they detect a fault, preventing shocks.
If you don’t have an outdoor GFCI outlet, hire a licensed electrician to install one. Never modify indoor outlets for outdoor use.
Protect Cables and Connections
Exposed cables are a tripping hazard and can get damaged by weather or pests. Use these solutions:
– Weatherproof cable conduits: Run cables through PVC or flexible outdoor conduit to protect them.
– Cable management clips: Secure cords along walls or under decking to keep them tidy and out of the way.
– Outdoor surge protector: Plug all devices into a weatherproof surge protector to guard against power spikes.
Use a Weatherproof Enclosure for Streaming Devices
Devices like Roku, Apple TV, or Amazon Fire Stick need protection too. Place them in a weatherproof outdoor media enclosure—a sealed box with ventilation and cable ports. Mount it near the TV, out of direct rain.
Step 5: Set Up Audio for Outdoor Enjoyment
Built-in TV speakers often sound tinny and weak outdoors, where sound dissipates quickly. To create a true cinematic experience, add external audio.
Choose Outdoor Speakers
– Wired Outdoor Speakers: Offer consistent sound quality and don’t rely on Bluetooth. Run speaker wire from your TV or audio receiver to weatherproof speakers mounted on posts, walls, or under eaves.
– Bluetooth Outdoor Speakers: Easy to set up and wireless, but range and battery life can be limiting. Great for small gatherings.
– Soundbar with Outdoor Enclosure: Some soundbars can be placed in weatherproof boxes for a sleek, powerful audio solution.
Position Speakers for Best Sound
Place speakers at ear level, slightly angled toward the seating area. For larger spaces, use multiple speakers for even coverage. Avoid placing them too close to walls or corners, which can cause bass distortion.
Connect Audio to Your TV
– Use an HDMI ARC port for wired soundbars or receivers.
– For Bluetooth speakers, pair them directly with your TV (if supported) or use a Bluetooth transmitter connected to the TV’s audio output.
Step 6: Connect Streaming Devices and Accessories
Most outdoor movie nights rely on streaming services like Netflix, Disney+, or YouTube. Here’s how to get your content playing smoothly.
Use a Reliable Streaming Device
Popular options include:
– Apple TV 4K
– Roku Ultra
– Amazon Fire TV Stick 4K
– Google Chromecast with Google TV
These devices support 4K, HDR, and voice control, and connect via HDMI.
Ensure Strong Wi-Fi Signal
Weak Wi-Fi is the #1 cause of buffering outdoors. To boost your signal:
– Install a Wi-Fi extender or mesh network near your outdoor area.
– Use a powerline adapter to extend your network through electrical wiring.
– Consider a dedicated outdoor Wi-Fi access point for large yards.
Test your connection speed before movie night. Aim for at least 25 Mbps for 4K streaming.
Add a Backup Power Source
Power outages can ruin your movie night. Keep a portable power station (like a Jackery or EcoFlow) charged and ready. These can power your TV, speakers, and streaming device for several hours.
Step 7: Test and Troubleshoot Before Movie Night
Don’t wait until guests arrive to test your setup. Do a full system check at least 24 hours in advance.
Check Picture and Sound Quality
– Play a high-definition movie trailer to test brightness, color, and clarity.
– Walk around the seating area to ensure the picture is visible from all angles.
– Test audio volume and balance—adjust speaker placement if needed.
Test All Connections
– Ensure HDMI, power, and audio cables are secure.
– Verify that your streaming device connects to Wi-Fi and loads apps quickly.
– Confirm that remote controls work from various distances.
Troubleshoot Common Issues
– Screen is too dark or washed out: Adjust brightness and contrast settings. Use a TV with higher nits if glare is a persistent issue.
– Audio is out of sync: Check audio delay settings on your TV or streaming device.
– Wi-Fi keeps dropping: Move the extender closer or switch to a wired Ethernet connection using a weatherproof cable.
– TV won’t turn on: Check the power source, GFCI outlet, and surge protector. Reset if necessary.
Step 8: Create the Perfect Backyard Movie Atmosphere
Your TV is installed—now make the experience unforgettable.
Set Up Comfortable Seating
Use outdoor sofas, lounge chairs, bean bags, or picnic blankets. Add cushions and throws for extra comfort. Arrange seating in a semi-circle facing the TV for the best view.
Add Ambient Lighting
String lights, lanterns, or LED candles create a cozy, magical vibe. Avoid bright lights that cause glare on the screen.
Provide Snacks and Drinks
Set up a snack station with popcorn, candy, and drinks. Use insulated coolers to keep beverages cold.
Control the Elements
Have blankets on hand for cooler evenings. Use outdoor heaters or fire pits for warmth. Provide bug spray or citronella candles to keep mosquitoes away.
Maintenance Tips to Keep Your Outdoor TV in Top Shape
To enjoy your outdoor TV for years, follow these maintenance tips:
– Clean the screen regularly: Use a microfiber cloth and screen-safe cleaner. Avoid paper towels or harsh chemicals.
– Inspect cables and connections: Check for fraying, corrosion, or loose connections every few months.
– Cover during extreme weather: Even all-season TVs benefit from a cover during hurricanes, heavy snow, or prolonged storms.
– Check mount stability: After strong winds or storms, ensure the mount is still secure.
Conclusion
Installing an outside TV for backyard movie night is a rewarding project that brings entertainment, comfort, and connection to your outdoor space. By choosing the right TV, mounting it safely, protecting it from the elements, and enhancing it with great audio and lighting, you create a cinematic experience that’s perfect for families, friends, and solo relaxation.
Remember: safety comes first. Use outdoor-rated equipment, protect all electrical connections, and test your system before each use. With a little planning and the right setup, your backyard can become the ultimate destination for movie magic under the stars.
So grab your popcorn, dim the lights, and press play—your outdoor cinema awaits.

