
Installing an outdoor TV on your pergola enhances your outdoor living space for movie nights, sports, and relaxation. This guide walks you through choosing the right TV, mounting it securely, running cables safely, and protecting it from weather—all while keeping your setup stylish and functional.
Key Takeaways
- Choose an outdoor-rated TV: Standard indoor TVs aren’t built for weather, humidity, or temperature changes—invest in a TV specifically designed for outdoor use.
- Use a weatherproof mount: A sturdy, rust-resistant mounting bracket ensures your TV stays secure and level, even in windy conditions.
- Plan cable management early: Conceal and protect power and signal cables with conduit or cable covers to prevent tripping hazards and water damage.
- Ensure proper ventilation: Avoid enclosing the TV in a tight space; allow airflow to prevent overheating, especially in direct sunlight.
- Test before finalizing: Power on the TV and check all connections before securing everything in place to avoid rework.
- Consider shade and glare: Position the TV under partial shade or use an anti-glare screen to improve visibility on sunny days.
- Hire a professional if unsure: If electrical work or structural mounting feels overwhelming, consult a licensed electrician or contractor.
How to Install Outdoor Television for Pergola
Imagine sipping your morning coffee or hosting a backyard barbecue while watching your favorite show under the dappled shade of your pergola. Installing an outdoor television transforms your outdoor space into a true entertainment zone. But unlike setting up a TV indoors, mounting one under a pergola comes with unique challenges—weather exposure, cable routing, structural support, and visibility in sunlight.
This comprehensive guide will walk you through every step of installing an outdoor television for your pergola. Whether you’re a DIY enthusiast or hiring help, you’ll learn how to choose the right TV, select the best mounting hardware, run cables safely, and protect your investment from the elements. By the end, you’ll have a weather-resistant, high-quality outdoor viewing experience that’s both functional and stylish.
Step 1: Choose the Right Outdoor Television
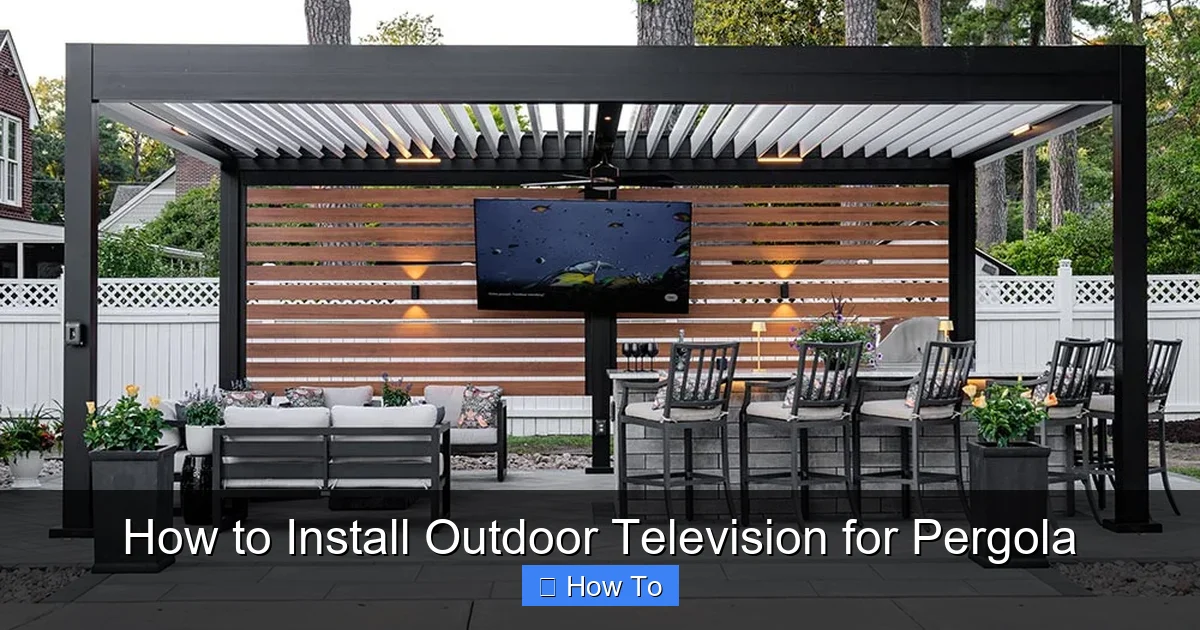
Visual guide about How to Install Outdoor Television for Pergola
Image source: pergola-north-carolina.azenco-outdoor.com
Not all TVs are created equal—especially when it comes to outdoor use. Standard indoor televisions are not built to withstand temperature swings, humidity, rain, or dust. That’s why your first step should be selecting a TV specifically designed for outdoor environments.
Look for Outdoor-Rated Models
Outdoor TVs are engineered with sealed casings, corrosion-resistant materials, and enhanced cooling systems. Brands like SunBrite, Samsung Terrace, and LG Outdoor offer models rated for all-weather use. These TVs often come with IP55 or higher ratings, meaning they’re protected against dust and water jets.
For example, the SunBrite Veranda series is built for covered outdoor areas like pergolas. It features a built-in heater and cooler to maintain optimal operating temperatures, even in extreme heat or cold.
Consider Screen Brightness and Anti-Glare
Outdoor lighting can wash out your screen. Look for a TV with high brightness—measured in nits—ideally 700 nits or higher. Many outdoor TVs also include anti-reflective coatings to reduce glare from the sun.
If your pergola gets direct sunlight for part of the day, consider a model with a matte finish or an optional sunshade. Some manufacturers sell compatible glare-reducing screens that attach directly to the TV.
Size and Viewing Distance
Choose a screen size based on how far you’ll be sitting. A general rule: for every 1.5 feet of viewing distance, use 1 inch of screen size. So, if your seating is 8 feet away, a 55-inch TV is ideal.
Also, consider the height of your pergola beams. You’ll want the screen centered at eye level when seated—typically 42 to 48 inches from the ground to the center of the screen.
Step 2: Select the Right Mounting Hardware
A strong, weatherproof mount is just as important as the TV itself. A flimsy or indoor-only mount can rust, loosen, or fail under wind stress.
Choose a Weatherproof Outdoor Mount
Look for mounts labeled “outdoor-rated” or “all-weather.” These are made from powder-coated aluminum or stainless steel to resist rust and corrosion. Brands like Peerless, Sanus, and Vogel’s offer outdoor-specific mounts with sealed pivot points and reinforced brackets.
Avoid using indoor mounts—even if they seem sturdy. They lack the protective coatings and structural support needed for long-term outdoor use.
Determine Mount Type: Fixed, Tilting, or Full-Motion
– Fixed mounts are the simplest and most secure. They hold the TV flat against the wall or beam. Great if your viewing angle is consistent.
– Tilting mounts allow you to angle the TV downward, which helps reduce glare and improve visibility from lower seating.
– Full-motion (articulating) mounts let you swivel and extend the TV. Useful if you want to watch from multiple areas, like a dining table and lounge chairs.
For pergolas, a tilting or full-motion mount is often best, as it allows adjustment for sun angle and seating positions.
Check Weight and VESA Compatibility
Make sure the mount supports your TV’s weight and VESA pattern (the screw hole layout on the back). Most outdoor TVs list compatible mounts on the manufacturer’s website.
For example, a 65-inch outdoor TV might weigh 50–70 pounds. Choose a mount rated for at least 20% more than your TV’s weight for safety.
Step 3: Plan the Installation Location
Where you mount the TV affects visibility, safety, and longevity. Take time to assess your pergola’s structure and layout.
Evaluate Structural Support
Pergolas are often made of wood, aluminum, or vinyl. Wooden beams are usually strong enough, but check for rot, cracks, or weak joints. Avoid mounting directly to lattice or thin slats—these can’t support the weight.
If your pergola has a solid beam or post, that’s your best mounting point. Use a stud finder (for wooden structures) or consult a contractor to confirm load-bearing capacity.
Consider Sun and Weather Exposure
Even though outdoor TVs are weather-resistant, prolonged exposure to direct sun can cause overheating. Ideally, mount the TV on the north or east side of the pergola to minimize afternoon sun.
If your pergola has a roof or shade cloth, position the TV under it for added protection. Avoid areas where rain might blow in during storms.
Think About Viewing Angle and Glare
Sit in your usual seating spot and look toward potential mounting locations. Is the screen visible without tilting your neck? Is there glare from windows, water features, or reflective surfaces?
Use a temporary stand or prop the TV up to test the view before drilling any holes.
Step 4: Gather Tools and Materials
Before you start, make sure you have everything you need. Rushing to the hardware store mid-project can delay your installation.
Essential Tools
– Drill with masonry and wood bits
– Level
– Tape measure
– Screwdriver or impact driver
– Stud finder (for wooden pergolas)
– Ladder or step stool
– Safety goggles and gloves
Materials Needed
– Outdoor-rated TV mount
– Stainless steel lag bolts or structural screws (check mount instructions)
– Weatherproof conduit or cable raceway
– Outdoor-rated extension cord or direct wiring kit
– Cable ties or clips
– Silicone sealant (for sealing screw holes)
– Optional: Surge protector or outdoor power outlet
If you’re running power from inside your house, you may need an electrician to install an outdoor GFCI outlet near the pergola.
Step 5: Install the Mounting Bracket
Now it’s time to secure the mount to your pergola. This step requires precision to ensure the TV is level and secure.
Mark the Mounting Points
Hold the mounting bracket against the beam or wall where you want the TV. Use a level to make sure it’s perfectly horizontal. Mark the screw holes with a pencil.
Double-check the height—remember, the center of the screen should be at eye level when seated.
Drill Pilot Holes
Use a drill bit slightly smaller than your lag bolts to create pilot holes. This prevents the wood from splitting and makes screwing easier.
For metal pergolas, use a metal drill bit and consider using self-tapping screws designed for outdoor use.
Secure the Bracket
Attach the bracket using stainless steel lag bolts or structural screws. Tighten firmly, but don’t over-torque—this can strip the wood or damage the mount.
Once secured, give the bracket a firm shake to test stability. It should not wobble or move.
Seal the Screw Holes
Apply a small amount of outdoor silicone sealant around each screw head. This prevents water from seeping into the wood and causing rot.
Let the sealant dry completely before proceeding.
Step 6: Run and Protect Cables
Exposed cables are not only unsightly—they’re a tripping hazard and vulnerable to weather damage. Proper cable management is essential.
Plan the Cable Route
Decide how power and signal cables (HDMI, antenna, etc.) will reach the TV. Options include:
– Running cables along the pergola beams
– Burying underground conduit (for longer distances)
– Using surface-mounted cable raceways
For short runs under a pergola, surface raceways are the easiest and most cost-effective.
Use Weatherproof Conduit or Raceways
Choose UV-resistant, waterproof conduit or plastic raceways designed for outdoor use. These protect cables from rain, sun, and pests.
Attach the raceway to the pergola beams using outdoor-rated clips or screws. Keep it as hidden as possible—run it along the underside of beams or behind decorative trim.
Connect and Secure Cables
Plug in the power cord, HDMI cables, and any other connections. Use cable ties to bundle and secure them inside the raceway.
Avoid sharp bends in HDMI cables, as this can damage the internal wires. Leave a little slack near the TV for adjustments.
Seal Cable Entry Points
If cables pass through a wall or beam, seal the hole with silicone or a rubber grommet to prevent water intrusion.
For direct burial, use waterproof junction boxes and direct-burial-rated cables.
Step 7: Attach the Television
With the mount secure and cables in place, it’s time to hang the TV.
Connect Cables Before Mounting
Plug in all cables to the TV before attaching it to the mount. This is much easier than trying to reach behind the screen once it’s mounted.
Use the manufacturer’s instructions to identify ports and avoid forcing connectors.
Mount the TV on the Bracket
With a helper, lift the TV and align the mounting holes on the back with the bracket. Most outdoor mounts use a hook-and-lock system—slide the TV onto the bracket and secure with locking screws or pins.
Double-check that the TV is level and firmly attached.
Test the Setup
Turn on the TV and check that all inputs work. Adjust the tilt or swivel if needed. Make sure the screen is visible from all seating areas.
If something isn’t working, don’t panic—power off and recheck connections.
Step 8: Final Touches and Safety Checks
Your installation is almost complete. A few final steps ensure long-term performance and safety.
Secure Loose Cables
Use additional cable clips or ties to keep wires tidy and prevent sagging. Avoid draping cables over sharp edges.
Install a Surge Protector
Outdoor electronics are vulnerable to power surges from lightning or grid fluctuations. Plug the TV and any connected devices into a high-quality outdoor surge protector.
For maximum protection, consider a whole-house surge suppressor installed by an electrician.
Check Local Codes and Permits
In some areas, outdoor electrical work requires permits or inspections—especially if you’re adding a new outlet or running underground wiring. Check with your local building department to stay compliant.
Troubleshooting Common Issues
Even with careful planning, problems can arise. Here’s how to handle common issues:
TV Won’t Turn On
– Check the power source: Is the outlet working? Test with another device.
– Inspect the power cord: Look for damage or loose connections.
– Verify the surge protector: Reset it if it has tripped.
Screen is Too Dark or Glared
– Adjust the TV’s brightness and contrast settings.
– Reposition the TV to avoid direct sunlight.
– Consider adding a shade canopy or anti-glare screen.
Mount Feels Loose
– Tighten all bolts and screws.
– Check for wood rot or structural damage.
– Reinforce with additional support if needed.
Cables Are Exposed or Damaged
– Re-route cables through conduit or raceways.
– Replace damaged cables with outdoor-rated ones.
– Seal any entry points with silicone.
Conclusion
Installing an outdoor television for your pergola is a rewarding project that enhances your outdoor living space. By choosing an outdoor-rated TV, using a weatherproof mount, planning cable routes, and following safety guidelines, you can create a durable and enjoyable entertainment setup.
Remember, the key to success is preparation. Take your time, double-check measurements, and don’t hesitate to consult a professional for electrical or structural work. With the right tools and attention to detail, your pergola will become the ultimate spot for movie nights, game days, and relaxing evenings under the stars.
Now grab your remote, sit back, and enjoy your favorite shows—outdoors.

