
This guide walks you through how to install Garden TV for a screened porch, from choosing the right model to mounting and wiring it safely. You’ll learn essential tips for weatherproofing, cable management, and optimizing your outdoor viewing experience.
Key Takeaways
- Choose a weatherproof outdoor TV: Garden TVs are designed to withstand humidity, temperature changes, and light rain—perfect for screened porches.
- Plan your layout first: Measure your space, consider seating angles, and ensure the TV is visible from all desired spots.
- Use proper mounting hardware: A sturdy, weather-resistant wall or ceiling mount is essential for safety and stability.
- Protect cables from the elements: Run wires through conduit or use outdoor-rated cable covers to prevent damage and tripping hazards.
- Ensure safe power connections: Use GFCI outlets and avoid overloading circuits to protect against electrical hazards.
- Optimize picture and sound: Adjust brightness and use outdoor speakers for the best audio-visual experience in open spaces.
- Test everything before finalizing: Power on the system, check connections, and make adjustments to ensure everything works perfectly.
How to Install Garden TV for Screened Porch
So, you’ve decided to bring the magic of movie nights and game days to your screened porch. Installing a Garden TV—specifically designed for outdoor use—is a fantastic way to enjoy your favorite shows and sports in the fresh air, without worrying about weather damage. Whether you’re sipping coffee on a breezy morning or hosting friends for a backyard barbecue, an outdoor TV adds comfort and entertainment value to your space.
But unlike indoor TVs, installing a Garden TV on a screened porch requires extra planning. You’ll need to consider weather resistance, proper mounting, safe wiring, and optimal viewing angles. Don’t worry—this guide will walk you through every step, from choosing the right TV to final testing. By the end, you’ll have a fully functional, safe, and stylish outdoor entertainment setup.
Let’s get started!
Step 1: Choose the Right Garden TV
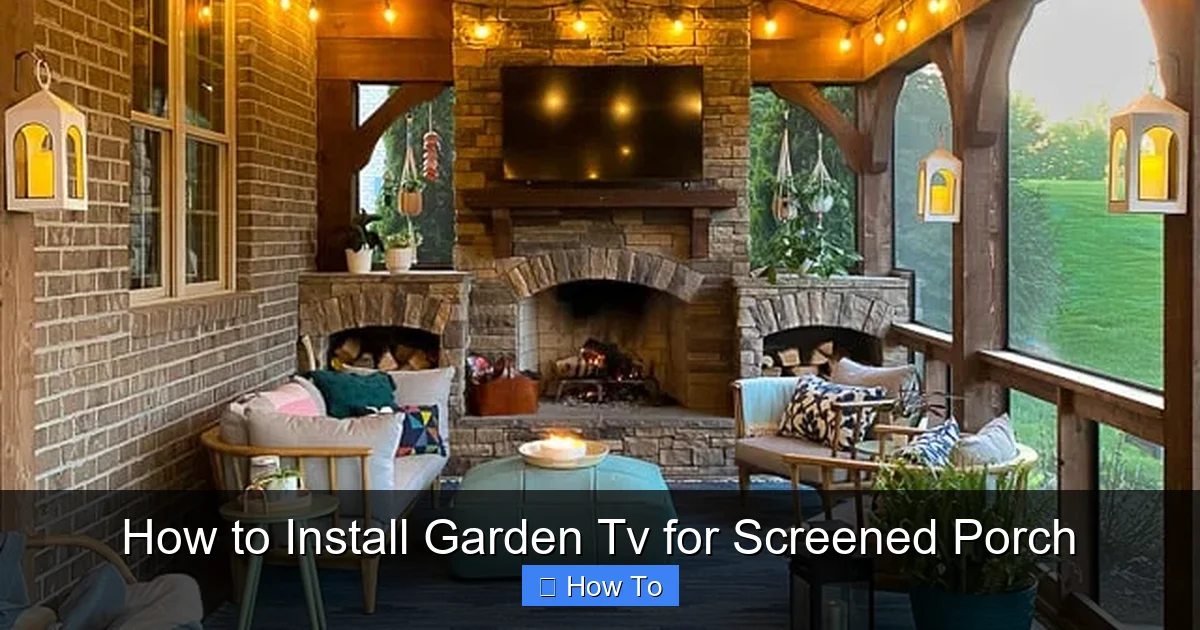
Visual guide about How to Install Garden Tv for Screened Porch
Image source: designertrapped.com
Not all TVs are created equal—especially when it comes to outdoor use. A standard indoor TV might seem like a budget-friendly option, but it won’t last long in a screened porch environment. Humidity, temperature swings, and even indirect sunlight can damage internal components over time. That’s why investing in a true Garden TV—or outdoor-rated television—is essential.
What Makes a Garden TV Different?
Garden TVs are built with weatherproof enclosures, anti-glare screens, and internal cooling or heating systems to handle outdoor conditions. They’re rated for partial exposure, meaning they can handle light rain, humidity, and temperature changes—perfect for a screened porch that’s protected from direct weather but still open to the elements.
Look for models with an IP55 or higher rating, which indicates protection against dust and water jets. Brands like Samsung Terrace, SunBriteTV, and Seura offer excellent options designed specifically for outdoor use.
Consider Screen Size and Resolution
Choose a screen size based on your viewing distance. For most screened porches, a 55-inch to 65-inch TV works well. If your seating is 8–10 feet away, a 55-inch screen is ideal. For longer distances, go bigger.
Resolution matters too. A 4K Ultra HD Garden TV delivers crisp, vibrant images—even in daylight. Many models also come with high brightness levels (measured in nits), which help combat glare from windows or ambient light.
Smart Features and Connectivity
Most Garden TVs come with built-in smart platforms like Roku, Android TV, or webOS, giving you access to streaming services like Netflix, Hulu, and YouTube. Make sure your model has Wi-Fi and enough HDMI ports for devices like a soundbar, gaming console, or cable box.
Step 2: Plan Your Installation Layout
Before you drill a single hole, take time to plan where your Garden TV will go. A well-thought-out layout ensures great viewing angles, easy access to controls, and safe cable routing.
Measure Your Space
Use a tape measure to determine the height and width of your wall or ceiling area. Note the location of windows, doors, and existing furniture. You’ll want the TV centered and at eye level when seated—typically 42 to 48 inches from the floor to the center of the screen.
Consider Viewing Angles
Think about where people will sit. Avoid placing the TV directly opposite a window, as glare can wash out the picture. Instead, position it on a wall that gets indirect light. If your porch has multiple seating areas, choose a spot that offers a clear view from all angles.
Check for Obstructions
Make sure there are no beams, vents, or electrical panels in the way. Also, avoid areas near grills or fire pits, where smoke or heat could damage the TV over time.
Plan for Accessories
Will you use a soundbar? A streaming device? A gaming console? Map out where these will go and how you’ll connect them. You may need to install additional outlets or run extra cables.
Step 3: Gather Your Tools and Materials
Having the right tools on hand makes the installation process smoother and safer. Here’s what you’ll need:
- Garden TV (outdoor-rated)
- Weatherproof wall or ceiling mount (check weight capacity)
- Drill and drill bits (masonry bits if mounting into brick or concrete)
- Level
- Measuring tape
- Screwdrivers (Phillips and flathead)
- Stud finder
- Electrical tape
- Outdoor-rated extension cord or conduit
- GFCI outlet (if not already installed)
- Cable management clips or raceways
- Optional: Outdoor speakers, soundbar, or streaming device
If you’re not comfortable working with electricity, consider hiring a licensed electrician for the wiring portion. Safety first!
Step 4: Install the Mounting Bracket
The mount is the foundation of your entire setup, so it must be secure and level. A loose or crooked mount can damage your TV or create a safety hazard.
Locate Studs or Use Anchors
Use a stud finder to locate wall studs. For the best support, anchor the mount directly into studs. If studs aren’t available (e.g., on drywall or brick), use heavy-duty toggle bolts or masonry anchors rated for the TV’s weight.
Mark and Drill Holes
Hold the mounting bracket against the wall at your desired height. Use a level to ensure it’s straight, then mark the screw holes with a pencil. Drill pilot holes carefully—especially if you’re working with brick or concrete.
Secure the Bracket
Attach the bracket using the provided screws and a drill or screwdriver. Double-check that it’s level and tightly secured. Give it a gentle tug to test stability.
Ceiling Mount Option
If wall mounting isn’t possible, a ceiling mount can be a great alternative. Ensure the ceiling is strong enough (wood or metal joists) and that the TV won’t block walkways. Use a swivel mount for adjustable viewing angles.
Step 5: Run and Protect Your Cables
Exposed wires are not only unsightly—they’re a tripping hazard and vulnerable to weather damage. Proper cable management is crucial for both safety and aesthetics.
Use Outdoor-Rated Conduit
Run all power and HDMI cables through PVC or metal conduit. This protects them from moisture, UV rays, and pests. Conduit also makes future upgrades or repairs easier.
Route Cables Neatly
Plan the shortest, most direct path from the TV to the power source and other devices. Avoid sharp bends in cables, which can damage internal wires. Use cable clips or raceways to secure wires along the wall or ceiling.
Connect to a GFCI Outlet
Outdoor electrical outlets should be GFCI (Ground Fault Circuit Interrupter) protected. These outlets shut off power automatically if they detect a fault, reducing the risk of shock. If your porch doesn’t have a GFCI outlet, have one installed by a qualified electrician.
Label Your Cables
Use colored tape or labels to mark each cable (e.g., “HDMI 1,” “Power,” “Soundbar”). This makes troubleshooting and future changes much easier.
Step 6: Mount the Garden TV
Now it’s time to attach your TV to the bracket. This step requires at least two people—TVs can be heavy and awkward to handle.
Attach the Mounting Arms
Most Garden TVs come with VESA-compatible mounting holes on the back. Secure the mounting arms to the TV using the provided screws. Tighten them firmly, but don’t over-tighten and risk cracking the screen.
Lift and Hook the TV
With a helper, carefully lift the TV and hook the arms onto the wall bracket. Listen for a click or feel for a secure fit. Double-check that the TV is level and seated properly.
Secure with Safety Bolts
Many mounts include safety bolts or locking mechanisms to prevent the TV from being accidentally knocked off. Install these according to the manufacturer’s instructions.
Test the Mount
Gently push on the TV to ensure it’s stable. If it wobbles or feels loose, recheck the bracket and mounting hardware.
Step 7: Connect Your Devices and Power
With the TV mounted, it’s time to hook up your devices and power source.
Connect HDMI and Other Cables
Plug in your streaming device, cable box, or gaming console using HDMI cables. If you’re using a soundbar, connect it via HDMI ARC or optical audio for the best sound quality.
Power On and Test
Plug the TV and accessories into the GFCI outlet. Turn everything on and check that the picture and sound work. Use the remote to navigate the menu and test different inputs.
Adjust Picture Settings
Outdoor viewing often requires brighter images. Go into the TV’s settings and increase brightness, contrast, and backlight. Enable “Outdoor Mode” if your model has it—this optimizes the display for daylight viewing.
Set Up Wi-Fi and Streaming Apps
Connect the TV to your home Wi-Fi network. Download and log into your favorite streaming apps. Consider using a streaming stick (like Roku or Fire Stick) if your Garden TV doesn’t have built-in smart features.
Step 8: Optimize Sound and Viewing Experience
Even the best picture won’t matter if the sound is weak or muffled. Outdoor spaces can be noisy, so good audio is key.
Use Outdoor Speakers or a Soundbar
Built-in TV speakers often struggle in open areas. Add weatherproof outdoor speakers or a soundbar for richer, louder sound. Mount speakers on the wall or place them on sturdy stands.
Reduce Glare and Reflections
If sunlight hits the screen, consider installing outdoor curtains or shades. You can also use an anti-glare screen protector designed for outdoor TVs.
Control the Environment
Use ceiling fans or portable heaters to keep the space comfortable. Avoid placing the TV near heat sources like grills or space heaters, which can damage internal components.
Troubleshooting Common Issues
Even with careful planning, problems can arise. Here’s how to fix the most common issues:
TV Won’t Turn On
Check the power outlet with another device. Ensure the GFCI hasn’t tripped—press the “Reset” button if needed. Verify all cables are securely connected.
Poor Picture Quality
Adjust brightness and contrast settings. Make sure the HDMI cable is high-speed and properly seated. If using Wi-Fi, check your signal strength—consider a Wi-Fi extender if needed.
Sound Issues
Ensure the audio output is set correctly in the TV menu. If using external speakers, check volume levels and connections. Test with different audio sources to isolate the problem.
Remote Not Working
Replace the batteries. Make sure there’s a clear line of sight between the remote and the TV’s sensor. Avoid using the TV in direct sunlight, which can interfere with infrared signals.
Overheating or Condensation
Garden TVs have built-in climate control, but extreme temperatures can still cause issues. Ensure the TV has proper ventilation. If you see condensation, turn it off and let it dry completely before use.
Maintenance Tips for Long-Term Use
To keep your Garden TV in top condition, follow these simple maintenance steps:
- Clean the screen regularly: Use a microfiber cloth and mild cleaner designed for electronics. Avoid harsh chemicals or paper towels.
- Inspect cables and connections: Check for fraying, corrosion, or loose plugs every few months.
- Protect during storms: If severe weather is expected, consider covering the TV with a weatherproof cover or unplugging it.
- Update software: Keep your TV’s firmware and apps updated for optimal performance and security.
- Check the mount: Periodically tighten screws and ensure the bracket remains secure.
Conclusion
Installing a Garden TV for your screened porch is a rewarding project that enhances your outdoor living space. With the right TV, proper mounting, safe wiring, and a little planning, you can enjoy high-quality entertainment in the fresh air—rain or shine.
Remember to choose a weatherproof model, secure the mount properly, protect your cables, and optimize your setup for the best viewing and listening experience. Whether you’re watching the big game, streaming a movie, or catching up on your favorite series, your Garden TV will bring comfort and joy to your porch for years to come.
So grab your tools, follow this guide, and get ready to transform your screened porch into the ultimate outdoor entertainment zone. Happy viewing!

