
This guide walks you through how to install backyard TV for pergola with clear, step-by-step instructions. You’ll learn about choosing the right TV, mounting options, power and signal setup, and weather protection to create a durable outdoor viewing space.
Key Takeaways
- Choose an outdoor-rated TV: Standard indoor TVs aren’t built for weather, temperature swings, or glare. Opt for a weatherproof outdoor TV designed for pergola use.
- Plan your layout first: Measure your pergola, seating area, and power sources. A well-thought-out plan prevents costly mistakes and ensures optimal viewing angles.
- Use a sturdy, weather-resistant mount: A full-motion or tilt mount allows adjustment for sun and seating. Make sure it’s rated for outdoor use and your TV’s weight.
- Protect all wiring and connections: Run cables through conduit, use outdoor-rated extensions, and seal connections with waterproof covers to prevent damage.
- Ensure proper ventilation and shade: Even outdoor TVs can overheat. Install in a shaded area and avoid enclosed spaces without airflow.
- Test everything before finalizing: Power on the TV, check signal strength, and test remote control range before securing all components.
- Maintain regularly: Clean the screen, inspect seals, and check mounts seasonally to keep your setup safe and functional year-round.
How to Install Backyard TV for Pergola
Imagine relaxing under your pergola on a warm summer evening, watching your favorite show or the big game with friends and family. With the right setup, your backyard can become the ultimate outdoor entertainment zone. Installing a backyard TV for your pergola isn’t just about mounting a screen—it’s about creating a safe, functional, and enjoyable space that stands up to the elements.
In this comprehensive guide, you’ll learn exactly how to install backyard TV for pergola, from choosing the right television and mounting hardware to running power and protecting your investment from rain, sun, and dust. Whether you’re a DIY enthusiast or hiring a pro, these steps will help you build a reliable outdoor viewing experience that lasts for years.
We’ll cover everything: TV selection, mounting options, electrical safety, cable management, weatherproofing, and maintenance. By the end, you’ll have a clear roadmap to transform your pergola into a cozy, high-tech retreat.
Step 1: Choose the Right Outdoor TV
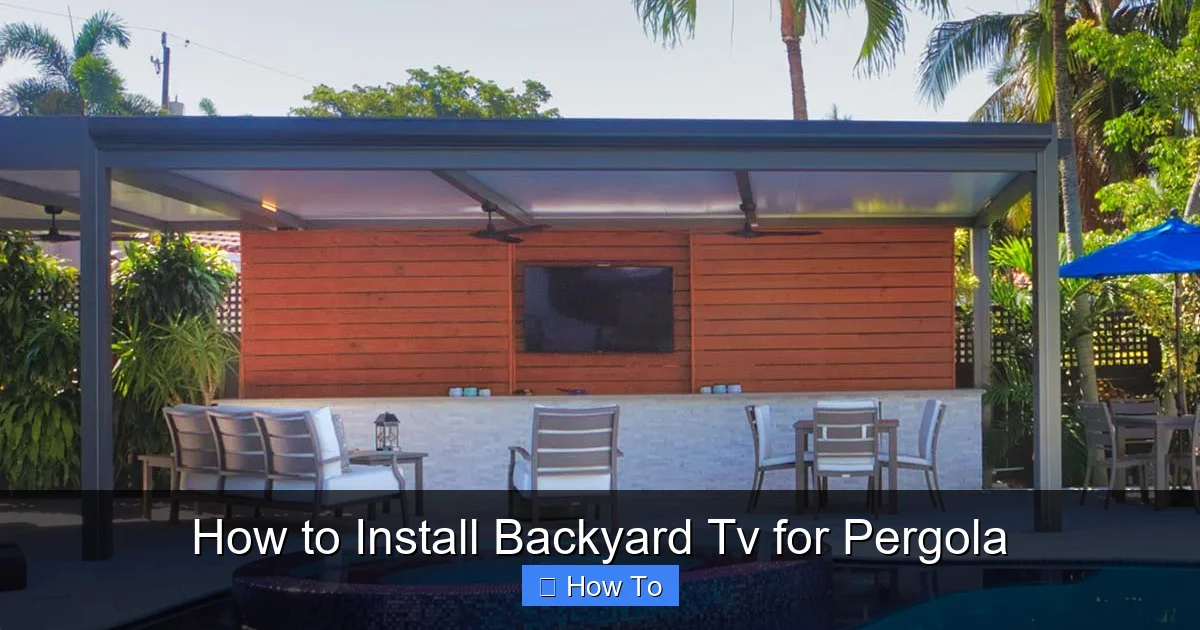
Visual guide about How to Install Backyard Tv for Pergola
Image source: pergola-palm-beach.azenco-outdoor.com
The first and most important step in how to install backyard TV for pergola is selecting the right television. Not all TVs are created equal—especially when it comes to outdoor use.
Why Indoor TVs Don’t Work Outdoors
Standard indoor TVs are designed for controlled environments. They’re not built to handle moisture, extreme temperatures, or direct sunlight. Even under a pergola, your TV will face humidity, rain splash, dust, and temperature fluctuations. Using an indoor TV outdoors can lead to overheating, screen damage, or electrical hazards.
Outdoor-Rated TVs: Your Best Bet
Outdoor TVs are specifically engineered for exterior use. They come with sealed casings, anti-glare screens, and internal climate control to manage heat and cold. Look for models labeled “all-weather,” “outdoor,” or “weatherproof.”
Popular brands like SunBriteTV, Samsung Terrace, and LG OLED Outdoor offer excellent options. These TVs often include:
– IP55 or higher waterproof ratings
– Wide operating temperature ranges (e.g., -22°F to 122°F)
– Anti-reflective coatings to reduce glare
– Built-in heaters and fans for climate control
Screen Size and Viewing Distance
Choose a screen size based on your seating distance. A general rule: for every 1 inch of screen size, sit about 1.5 feet away. So, a 55-inch TV is ideal for 7–8 feet away. If your pergola is small, a 43-inch or 50-inch model may be perfect. For larger spaces, go up to 65 inches or more.
Smart Features and Connectivity
Most outdoor TVs come with smart platforms (like Android TV or webOS), built-in Wi-Fi, and multiple HDMI ports. This lets you stream Netflix, connect a soundbar, or plug in a gaming console. Make sure your chosen model supports the apps and devices you plan to use.
Budget Considerations
Outdoor TVs are more expensive than indoor ones—expect to pay $1,500 to $4,000 depending on size and features. While it’s a bigger investment, it’s worth it for durability and performance. Skimping on quality can lead to early failure and safety risks.
Step 2: Assess Your Pergola and Plan the Layout
Before drilling any holes or buying equipment, take time to evaluate your pergola and plan your setup.
Measure the Space
Use a tape measure to determine:
– The height and width of your pergola’s support beams or walls
– The distance from seating to the intended TV location
– The height of your seating (sofa, chairs, etc.)
This helps you choose the right TV size and mounting position.
Check for Shade and Sun Exposure
Even with an anti-glare screen, direct sunlight can wash out the picture. Ideally, install the TV on the north or east side of the pergola to minimize afternoon sun. If that’s not possible, consider adding shade sails, retractable awnings, or pergola roof panels.
Evaluate Structural Strength
Your pergola must support the weight of the TV and mount. Most outdoor TVs weigh 30–60 pounds, and mounts add another 10–20 pounds. Check that your beams are sturdy and securely anchored. If your pergola is made of lightweight wood or aluminum, you may need to reinforce it with additional supports or consult a contractor.
Plan for Power and Signal Sources
You’ll need access to:
– A GFCI-protected outdoor electrical outlet (within 10–15 feet)
– Wi-Fi signal strength (test with your phone or tablet)
– Optional: cable, satellite, or streaming device connections
If your outlet is far away, you may need to run an outdoor-rated extension cord or hire an electrician to install a new outlet.
Sketch a Layout
Draw a simple diagram showing:
– TV location and height
– Seating arrangement
– Power and cable paths
– Mount type (fixed, tilt, or full motion)
This visual plan helps you spot potential issues before installation begins.
Step 3: Select the Right Mounting Hardware
A secure, weather-resistant mount is essential for safety and performance.
Types of Outdoor TV Mounts
- Fixed Mount: Holds the TV flat against the wall or beam. Best for permanent, low-profile setups. Least adjustable.
- Tilt Mount: Allows you to angle the TV up or down. Great for reducing glare when mounted high.
- Full-Motion (Articulating) Mount: Lets you swivel, tilt, and extend the TV. Ideal for flexible viewing from multiple seating areas.
For pergolas, a tilt or full-motion mount is often best, especially if the TV is mounted high or you want to adjust for sun position.
Weatherproof and Durable Materials
Choose a mount made from powder-coated aluminum or stainless steel. Avoid plastic or thin metal that can rust or bend. Look for mounts labeled “outdoor use” or “all-weather.”
Weight and VESA Compatibility
Check your TV’s weight and VESA pattern (the screw hole layout on the back). The mount must support both. Most outdoor mounts list compatibility for TVs up to 80–100 pounds and VESA sizes from 200×200 to 600×400.
Installation Location
Mount the TV at eye level when seated—typically 42 to 54 inches from the ground to the center of the screen. If mounting on a beam, ensure it’s vertical and strong enough. For horizontal beams, use a mount designed for angled surfaces or add a backing plate.
Step 4: Prepare for Power and Signal Connections
Safe and reliable power and signal delivery are critical for your backyard TV.
Electrical Safety First
Always use a Ground Fault Circuit Interrupter (GFCI) outlet for outdoor electronics. These outlets shut off power if they detect a fault, preventing shocks. If your existing outlet isn’t GFCI-protected, have a licensed electrician install one.
Use Outdoor-Rated Cables and Extensions
Indoor extension cords and cables can degrade quickly outdoors. Use:
– Outdoor-rated power cords (look for “SJTW” or “SJTOW” ratings)
– Weatherproof extension cords with built-in covers
– In-line GFCI protectors for extra safety
Run Cables Through Conduit
To protect wires from weather, pests, and UV damage, run them through PVC or metal conduit. Bury the conduit underground if running from the house, or attach it neatly to beams. Use waterproof cable glands where wires enter the TV or outlet.
Wi-Fi and Signal Boosting
Outdoor areas often have weak Wi-Fi. Test signal strength with your phone. If it’s weak:
– Use a Wi-Fi extender or mesh network
– Install an outdoor-rated access point
– Consider a wired Ethernet connection via buried Cat6 cable (with conduit)
For cable or satellite TV, use weatherproof coaxial cables and seal all connections with coaxial sealant tape.
Streaming Devices and Sound Systems
If using a streaming stick (like Roku or Fire Stick), mount it behind the TV or in a weatherproof enclosure. For better sound, add outdoor speakers or a soundbar. Run speaker wires through conduit and use outdoor-rated speakers with UV-resistant grilles.
Step 5: Install the TV Mount
Now it’s time to mount the hardware securely.
Gather Your Tools
You’ll need:
– Drill and drill bits
– Level
– Measuring tape
– Screwdriver or impact driver
– Stud finder (if mounting to a wall)
– Safety goggles and gloves
Mark the Mounting Points
Hold the mount in place and use a level to ensure it’s straight. Mark the screw holes with a pencil. Double-check height and alignment with your layout plan.
Drill Pilot Holes
Drill pilot holes slightly smaller than your screws to prevent splitting wood. If mounting to a beam, ensure screws go deep enough for a secure hold (at least 2–3 inches).
Secure the Mount
Attach the mount using stainless steel lag bolts or structural screws. Tighten firmly but don’t over-tighten, which can strip the wood. For extra strength, use a backing plate or metal bracket on the opposite side of the beam.
Test the Mount
Gently tug on the mount to ensure it’s secure. If it wobbles, reinforce it or reposition.
Step 6: Connect and Mount the TV
With the mount in place, it’s time to attach your TV.
Connect Cables Before Mounting
Plug in power, HDMI, and any other cables to the TV before attaching it to the mount. This is much easier than trying to reach ports once the TV is up.
Attach the TV to the Mount
Most mounts use a bracket system. Secure the bracket to the back of the TV using the provided screws. Then, hook or slide the TV onto the wall plate. Lock it in place with safety screws or pins.
Adjust the Angle
If using a tilt or full-motion mount, adjust the TV for the best viewing angle. Tighten all adjustment knobs to prevent sagging.
Secure Loose Cables
Use zip ties or cable clips to bundle and secure wires along the mount or beam. Avoid dangling cords that can snag or collect water.
Step 7: Weatherproof and Protect Your Setup
Even with an outdoor TV, extra protection extends its life.
Seal All Connections
Use silicone sealant or waterproof tape on cable entry points, especially where wires pass through wood or conduit.
Install a Weatherproof Cover (Optional)
Some homeowners add a custom cover or cabinet to protect the TV when not in use. Make sure it allows ventilation and doesn’t trap heat.
Use a Surge Protector
Outdoor electronics are vulnerable to power surges from lightning or grid fluctuations. Plug your TV and devices into a high-quality outdoor surge protector.
Regular Maintenance
Every few months:
– Wipe the screen with a microfiber cloth
– Check mount tightness
– Inspect seals and cables for damage
– Clean vents to prevent overheating
Troubleshooting Common Issues
Even with careful planning, problems can arise. Here’s how to fix common issues:
TV Won’t Turn On
– Check the GFCI outlet—press the reset button.
– Ensure the power cord is fully plugged in.
– Test the outlet with another device.
Poor Picture or Signal
– Check Wi-Fi signal strength; move the router or add an extender.
– Ensure HDMI cables are securely connected.
– Re-scan for channels if using an antenna.
Screen Glare or Washing Out
– Adjust the TV angle to avoid direct sunlight.
– Use a shade sail or awning.
– Clean the screen—smudges increase glare.
Mount Feels Loose
– Tighten all bolts and screws.
– Add a backing plate for extra support.
– Consult a professional if the beam is damaged.
Overheating
– Ensure the TV has proper ventilation.
– Avoid enclosing it in a cabinet without airflow.
– Check that internal fans are working.
Conclusion
Installing a backyard TV for your pergola is a rewarding project that enhances your outdoor living space. By choosing an outdoor-rated TV, planning your layout, using the right mount, and protecting your setup from the elements, you can enjoy movies, sports, and shows under the stars for years to come.
Remember: safety and preparation are key. Take your time, follow the steps, and don’t hesitate to consult a professional for electrical or structural work. With the right approach, your pergola will become the heart of your backyard entertainment.
Now grab your tools, pick out your favorite show, and get ready to enjoy your new outdoor theater.

