
This guide walks you through how to hide cables for a weatherproof TV in an outdoor kitchen using practical, weather-resistant methods. You’ll learn about cable routing, protective conduits, and smart design tips to keep your space tidy and safe.
Key Takeaways
- Plan your cable route before installation: Map out the shortest, safest path from your TV to power and AV sources to minimize exposure and clutter.
- Use weatherproof conduit and raceways: Protect cables from rain, UV rays, and temperature swings with outdoor-rated PVC or metal conduit.
- Choose the right cable types: Opt for outdoor-rated, UV-resistant HDMI, power, and coaxial cables designed for exterior use.
- Secure cables properly: Use stainless steel clips, zip ties, or adhesive mounts rated for outdoor conditions to prevent sagging or damage.
- Integrate cable management into cabinetry: Hide wires inside outdoor cabinets or behind panels for a clean, professional look.
- Test all connections before finalizing: Ensure signal quality and power delivery work reliably after installation.
- Maintain access for future repairs: Use removable panels or access points so you can troubleshoot or upgrade without tearing everything apart.
How to Hide Cables for a Weatherproof TV in an Outdoor Kitchen
So, you’ve installed a sleek weatherproof TV in your outdoor kitchen—great choice! Now you can enjoy your favorite shows while grilling, dining, or entertaining guests under the open sky. But there’s one problem: those dangling cables. Power cords, HDMI wires, and antenna lines can quickly turn your beautiful setup into an eyesore. Worse, exposed cables are vulnerable to weather damage, tripping hazards, and signal interference.
The good news? Hiding cables for your outdoor TV is totally doable—and doesn’t require a professional electrician. With the right tools, materials, and a bit of planning, you can create a clean, safe, and stylish outdoor entertainment space.
In this guide, we’ll walk you through how to hide cables for a weatherproof TV in an outdoor kitchen step by step. Whether you’re mounting your TV on a wall, under a cabinet, or near a grill station, these tips will help you keep your cables out of sight and out of harm’s way.
We’ll cover everything from planning your cable route to choosing the best weatherproof materials, installing protective conduits, and integrating cable management into your outdoor kitchen design. By the end, you’ll have a tidy, professional-looking setup that’s built to last.
Let’s get started!
Step 1: Plan Your Cable Route
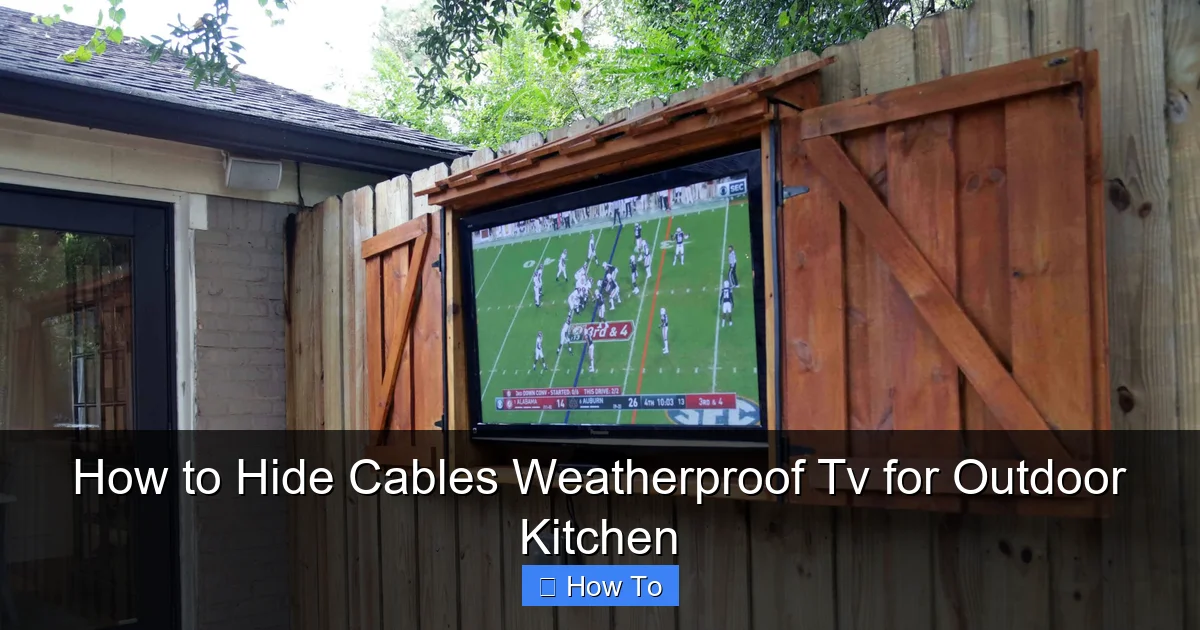
Visual guide about How to Hide Cables Weatherproof Tv for Outdoor Kitchen
Image source: backyard.exmark.com
Before you run a single wire, take time to plan your cable path. A well-thought-out route saves time, reduces material waste, and ensures your cables stay protected.
Identify Power and Signal Sources
Start by locating where your TV will connect to power, audio/video sources, and internet (if applicable). Common sources include:
– Outdoor electrical outlets (GFCI-protected)
– AV receivers or streaming devices (like Roku, Apple TV, or soundbars)
– Cable or satellite boxes
– Wi-Fi extenders or Ethernet ports
If your outdoor kitchen doesn’t have built-in power, you may need to install a weatherproof outlet. Always hire a licensed electrician for any electrical work to ensure safety and code compliance.
Map the Shortest, Safest Path
Trace the shortest route from your TV to each source. Avoid high-traffic areas, sharp edges, and places where cables could get pinched or damaged. Ideal paths include:
– Along the back of cabinets
– Inside wall cavities (if accessible)
– Under countertops
– Behind outdoor panels or soffits
Use a tape measure to estimate cable lengths. Add 10–15% extra length for slack and future adjustments.
Consider Future Access
Think ahead: Will you need to replace a cable or upgrade your system later? Design your route with removable panels or access points so you can easily reach wires without dismantling your entire setup.
Step 2: Choose the Right Weatherproof Cables
Not all cables are created equal—especially when it comes to outdoor use. Standard indoor cables can degrade quickly when exposed to sun, rain, and temperature changes.
Use Outdoor-Rated Cables
Look for cables labeled “outdoor,” “direct burial,” or “UV-resistant.” These are designed to withstand harsh conditions. Key types include:
– **Outdoor HDMI cables:** Shielded to prevent signal loss and rated for moisture and UV exposure.
– **Outdoor power cords:** Heavy-duty, weatherproof extension cords or permanent wiring with proper grounding.
– **Outdoor coaxial cables:** For satellite or antenna connections, choose ones with waterproof connectors.
– **Ethernet cables (if needed):** Use Cat6 or Cat6a with UV-resistant jackets for wired internet.
Avoid cheap, unrated cables—they may fail within months and cause signal issues or safety hazards.
Match Cable Length to Your Route
Buy cables that are just long enough for your planned route. Excess length creates clutter and increases the risk of tangling or damage. If you need longer runs, use weatherproof couplers or splices rated for outdoor use.
Step 3: Select Weatherproof Cable Management Solutions
Now that you have the right cables, it’s time to protect and hide them. Outdoor cable management requires durable, weather-resistant materials.
PVC Conduit (Best for Exposed Runs)
PVC conduit is a popular choice for outdoor cable protection. It’s affordable, easy to install, and comes in white or gray to blend with most outdoor kitchens.
– Use ½-inch or ¾-inch conduit for most TV setups.
– Choose schedule 40 PVC for above-ground use.
– Secure with outdoor-rated conduit straps every 3–4 feet.
Metal Conduit (For High-Traffic or Harsh Areas)
For extra durability, especially near grills or high-heat zones, consider metal conduit (like EMT or flexible metal conduit). It’s more expensive but offers superior protection against crushing and heat.
Outdoor Cable Raceways
Raceways are plastic channels that snap onto walls or cabinets. They’re great for hiding cables along flat surfaces. Look for models with:
– UV-resistant covers
– Waterproof seals
– Easy-open lids for access
Adhesive Cable Clips and Mounts
For minor cable management, use outdoor-rated adhesive clips or mounts. These stick to cabinets, walls, or under countertops. Choose ones with strong 3M backing and weatherproof adhesive.
Step 4: Install Conduit or Raceways
Once you’ve chosen your cable management system, it’s time to install it. Follow these steps for a clean, secure setup.
Measure and Cut Conduit
Measure your cable route and cut the conduit to size using a hacksaw or PVC cutter. Sand the edges smooth to prevent cable damage.
Drill Holes for Entry and Exit Points
Drill holes in cabinets, walls, or soffits where cables will enter and exit. Use a drill bit slightly larger than the conduit diameter. Seal holes with silicone caulk to prevent water intrusion.
Thread Cables Through Conduit
Before securing the conduit, thread your cables through it. Use a fish tape or string to pull cables through long runs. Apply a small amount of cable lubricant if needed—but avoid petroleum-based products, which can degrade cables.
Secure the Conduit
Mount the conduit using outdoor-rated straps or clips. Space them every 3–4 feet to prevent sagging. For vertical runs, use additional support at the top and bottom.
Seal All Connections
Apply silicone sealant around entry points and joints to keep moisture out. This is especially important in rainy or humid climates.
Step 5: Integrate Cables into Outdoor Cabinetry
One of the cleanest ways to hide cables is by routing them through or behind your outdoor kitchen cabinets.
Use Existing Cabinet Gaps
Many outdoor cabinets have small gaps or vents at the back or bottom. Use these to route cables from the TV to power or AV sources.
Install Grommets or Cable Pass-Throughs
If your cabinets don’t have openings, drill small holes and install rubber grommets. These protect cables from sharp edges and reduce wear.
Create a Dedicated AV Cabinet
Designate one cabinet for your streaming device, soundbar, or cable box. Run all cables into this cabinet and use a power strip with surge protection. Label each cable for easy identification.
Use Cable Ties Inside Cabinets
Once inside, use reusable zip ties or Velcro straps to organize cables. Keep power and signal cables separated to avoid interference.
Step 6: Secure and Organize Exposed Cables
Even with conduit and cabinet routing, some cables may remain visible. Here’s how to keep them tidy and safe.
Use Outdoor Zip Ties
Choose UV-resistant, stainless steel or nylon zip ties. Avoid regular plastic ties—they become brittle and break in sunlight.
Mount Cables Along Edges
Route cables along the edges of countertops, walls, or support beams. Use adhesive clips or screw-mounted holders to keep them flush and out of the way.
Bundle Cables Together
Group related cables (e.g., power and HDMI) using spiral wrap or braided sleeves. This reduces clutter and makes future troubleshooting easier.
Step 7: Test All Connections
Before you call the job done, test everything to ensure your setup works perfectly.
Check Power Delivery
Plug in your TV and all devices. Make sure they power on and receive electricity without flickering or interruptions.
Test Signal Quality
Play a high-definition video to check for lag, pixelation, or audio sync issues. If you notice problems, double-check cable connections and ensure HDMI cables are fully seated.
Verify Weather Resistance
After installation, simulate rain or hose down the area (carefully). Check for water intrusion in conduit, cabinets, or connection points.
Troubleshooting Common Issues
Even with careful planning, you might run into problems. Here’s how to fix the most common ones.
Cables Are Too Short
If your cables don’t reach, use outdoor-rated extension cords or couplers. Never splice cables with tape—this creates fire and signal risks.
Signal Loss or Interference
This often happens when power and signal cables run parallel. Separate them by at least 6 inches, or use shielded cables. Avoid running cables near motors, pumps, or high-voltage lines.
Water in Conduit
If moisture builds up, check seals and ensure conduit slopes slightly downward to allow drainage. Add a small weep hole at the lowest point.
Cables Are Hard to Access
If you can’t reach a cable for repairs, install a pull string inside the conduit during installation. This lets you fish new cables later.
Design Tips for a Clean Look
Cable management isn’t just functional—it’s also about aesthetics. Here’s how to make your outdoor kitchen look sleek and professional.
Match Conduit to Your Kitchen Color
Paint PVC conduit to match your cabinets or wall color. Use outdoor-grade spray paint for durability.
Hide Cables Behind Panels
Install removable back panels on cabinets or soffits. Route cables behind them for a seamless look.
Use Decorative Trims
Add wood or metal trim along cable runs to blend them into the design. This works especially well under countertops or along walls.
Keep It Minimal
Only run the cables you need. Unplug devices when not in use, and consider wireless alternatives (like Bluetooth speakers) to reduce wire clutter.
Maintenance Tips
To keep your cable setup in top shape, perform regular maintenance.
Inspect Every Season
Check cables, conduit, and seals twice a year—especially after winter or heavy storms. Look for cracks, fraying, or loose mounts.
Clean Conduit and Raceways
Wipe down exterior surfaces with a damp cloth to remove dirt and debris. Avoid harsh chemicals that could degrade materials.
Replace Damaged Cables Promptly
If a cable shows signs of wear, replace it immediately. Don’t wait for a failure—outdoor conditions can accelerate damage.
Conclusion
Hiding cables for your weatherproof TV in an outdoor kitchen doesn’t have to be complicated. With proper planning, the right materials, and a few smart techniques, you can create a clean, safe, and stylish setup that enhances your outdoor living space.
Remember:
– Plan your cable route carefully
– Use outdoor-rated cables and conduit
– Integrate cables into cabinetry for a hidden look
– Test everything before finalizing
– Maintain your system regularly
By following this guide, you’ll enjoy a clutter-free outdoor kitchen where your TV shines—without the distraction of messy wires. Whether you’re watching the big game or your favorite cooking show, your setup will look as good as it performs.
Now go enjoy your outdoor oasis—cable-free and weather-ready!

