
Hiding cables for a weatherproof TV on your outdoor bar doesn’t have to be complicated. This guide walks you through practical, weather-safe methods to conceal wires while ensuring safety and durability. Enjoy a clean, professional look without compromising performance.
Key Takeaways
- Use weatherproof cable management solutions: Always choose outdoor-rated conduits, raceways, and clips designed to withstand rain, sun, and temperature changes.
- Plan your cable route before installation: Map out the shortest, safest path from the TV to power and signal sources to minimize exposure and clutter.
- Secure cables with UV-resistant materials: Regular plastic clips can degrade in sunlight—opt for UV-stabilized options to prevent cracking and failure.
- Protect power and signal cables separately: Keep power cords away from HDMI and audio cables to avoid interference and ensure clear picture and sound.
- Test all connections before finalizing: Ensure your TV, sound system, and streaming devices work properly after routing cables to avoid rework.
- Consider wireless alternatives where possible: Use wireless HDMI kits or streaming devices to reduce the number of cables needing concealment.
- Maintain accessibility for future repairs: Design your setup so cables can be accessed easily without dismantling your entire bar structure.
How to Hide Cables for a Weatherproof TV on Your Outdoor Bar
So you’ve installed a sleek weatherproof TV on your outdoor bar—great choice! Now you’re staring at a tangled mess of power cords, HDMI cables, and maybe even speaker wires snaking across your deck or patio. Not only does it look messy, but exposed cables can be a tripping hazard, get damaged by the elements, or even cause electrical issues. The good news? Hiding those cables is easier than you think—and totally doable with the right tools and planning.
In this complete guide, we’ll walk you through every step of hiding cables for your weatherproof TV on an outdoor bar. Whether you’re building a new setup or upgrading an existing one, you’ll learn how to route, conceal, and protect your cables so your outdoor entertainment space looks clean, professional, and safe. We’ll cover everything from choosing the right materials to troubleshooting common issues—all while keeping your setup weather-resistant and functional.
By the end of this guide, you’ll have a clutter-free outdoor bar where your TV shines—literally and figuratively—without a single visible wire in sight.
Why Hiding Cables Matters for Outdoor TVs
Before we dive into the how-to, let’s talk about why cable management is so important for outdoor TV setups.
Outdoor environments are tough on electronics. Rain, snow, UV rays, temperature swings, and even pests can damage exposed cables. A frayed power cord or waterlogged HDMI cable can lead to short circuits, signal loss, or even fire hazards. Plus, let’s be honest—no one wants to look at a jumble of wires while sipping a cocktail under the stars.
Hiding cables does more than just improve aesthetics. It:
- Protects your investment: Weatherproof TVs aren’t cheap. Proper cable management extends the life of your TV and connected devices.
- Enhances safety: Tripping over a loose cable can ruin your night—or worse, cause injury. Concealed cables reduce this risk.
- Improves performance: Shielded, properly routed cables deliver better picture and sound quality by reducing interference.
- Boosts curb appeal: A clean, wire-free setup makes your outdoor bar look more inviting and professionally designed.
Think of cable management as the unsung hero of your outdoor entertainment system. It’s not flashy, but it’s essential.
Step 1: Plan Your Cable Route
The first—and most important—step in hiding cables is planning. Rushing into installation without a map is a recipe for frustration and rework.
Assess Your Setup
Start by identifying all the devices that need to be connected to your TV. Common ones include:
- Streaming devices (Roku, Apple TV, Fire Stick)
- Soundbar or outdoor speakers
- Game consoles
- Cable or satellite boxes
- Power sources
Make a list and note where each device will be located. Most will sit near the TV, but some—like a cable box—might be indoors or in a weatherproof enclosure.
Map the Shortest, Safest Path
Next, trace the route each cable will take from the device to the TV. Look for:
- Walls, beams, or railings you can run cables along
- Gaps under decking or behind bar panels
- Existing conduit or raceways
- Areas protected from direct rain and sun
Avoid running cables across high-traffic areas or where they could be stepped on. If you must cross a walkway, use a cable ramp or bury the cable in a protective channel.
Measure Cable Lengths
Buy cables that are long enough to reach—but not so long they create excess slack. Extra cable can tangle, trap moisture, or get caught on something. Use a tape measure to determine exact distances, then add 6–12 inches for flexibility.
Pro tip: Label each cable with a tag or colored tape so you know which is which during installation and future troubleshooting.
Step 2: Choose the Right Cable Management Tools
Not all cable organizers are created equal—especially for outdoor use. You need products that can handle moisture, UV exposure, and temperature changes.
Weatherproof Conduit
Conduit is a protective tube that houses multiple cables. For outdoor bars, choose:
- PVC conduit: Affordable, easy to cut, and resistant to moisture. Look for UV-stabilized PVC to prevent yellowing and cracking.
- Metal conduit: More durable but heavier and prone to rust unless galvanized. Best for high-traffic or commercial areas.
Use conduit when running cables through walls, under decks, or along exposed beams.
Cable Raceway
Raceways are surface-mounted channels that hide cables along walls or under bar counters. Choose outdoor-rated raceways made from:
- UV-resistant plastic
- Aluminum (for a sleek, modern look)
Look for models with adhesive backing or screw mounts. Some come with snap-on covers for easy access.
Cable Clips and Ties
Use these to secure loose cables along railings, posts, or under the bar.
- Stainless steel or nylon clips: Resist rust and UV damage.
- Reusable zip ties: Avoid single-use plastic ties that degrade in sunlight. Opt for UV-resistant, releasable ties.
Never use regular office-style clips or ties outdoors—they’ll crack and fail within months.
Weatherproof Enclosures
If you’re housing devices like a streaming box or power strip, use a weatherproof enclosure (also called a junction box). Look for:
- IP65 or higher rating (dust-tight and protected against water jets)
- Ventilation to prevent overheating
- Clear cover to see indicator lights
Mount the enclosure under the bar or behind a panel for easy access.
Step 3: Run and Conceal the Cables
Now it’s time to put your plan into action. Follow these steps to route and hide your cables safely.
Start with Power Cables
Power cords are the most critical—and potentially dangerous—cables. Always:
- Use outdoor-rated extension cords or direct wiring.
- Keep power cables separate from signal cables (HDMI, audio) to avoid interference.
- Plug into a GFCI (Ground Fault Circuit Interrupter) outlet for safety.
If running power from indoors, drill a small hole through the wall or under the deck. Seal the hole with silicone caulk to prevent water intrusion.
Route HDMI and Signal Cables
HDMI cables are sensitive to bending and interference. Follow these tips:
- Avoid sharp bends—keep the radius gentle.
- Don’t run HDMI cables parallel to power lines. Cross them at 90 degrees if necessary.
- Use HDMI cables rated for outdoor use (look for “direct burial” or “outdoor” labels).
If your TV is more than 25 feet from the source, consider an HDMI extender over Cat6 cable or a wireless HDMI kit.
Use Conduit for Long Runs
For cables running under the deck or through walls, feed them through conduit. Here’s how:
- Measure and cut the conduit to length.
- Drill entry and exit holes.
- Use a fish tape or string to pull cables through.
- Seal both ends with silicone or rubber grommets to keep water out.
Pro tip: Leave a pull string inside the conduit for future upgrades.
Install Raceways Along Walls or Under the Bar
For surface runs, attach raceways using screws or outdoor adhesive. Run cables inside, then snap the cover shut. Paint the raceway to match your bar or wall for a seamless look.
Secure Cables with Clips
Use clips to bundle and guide cables along railings or posts. Space them every 12–18 inches to prevent sagging. Don’t overtighten—cables need room to expand and contract with temperature changes.
Step 4: Protect Connections and Devices
Even hidden cables need protection at connection points.
Use Weatherproof Covers
Cover all outdoor outlets and power strips with weatherproof outlet covers. These flip-up shields keep rain out while allowing access.
Seal Cable Entry Points
Where cables enter the TV, wall, or enclosure, seal the gaps with:
- Silicone caulk
- Rubber grommets
- Self-amalgamating tape
This prevents water, insects, and rodents from getting in.
Elevate Devices Off the Ground
Never place power strips or streaming devices directly on wet surfaces. Use a small shelf, bracket, or waterproof box raised at least 6 inches off the ground.
Step 5: Test and Troubleshoot
Before you call it done, test everything.
Power On and Check Signals
Turn on the TV and all connected devices. Verify:
- Picture quality (no flickering or signal drop)
- Sound output
- Streaming functionality
- Remote control responsiveness
If something isn’t working, check connections first. Loose HDMI cables are a common culprit.
Look for Interference
If the picture is fuzzy or the sound cuts out, you might have electromagnetic interference (EMI). This happens when power and signal cables run too close together.
Fix it by:
- Rerouting cables to increase separation
- Using shielded HDMI cables
- Adding ferrite cores to cables
Check for Water Intrusion
After a rainstorm, inspect your setup. Look for:
- Water inside enclosures or raceways
- Moisture around seals
- Corrosion on connectors
If you find water, dry everything thoroughly and improve sealing.
Step 6: Maintain Your Setup
Cable management isn’t a one-and-done task. Outdoor setups need regular maintenance.
Inspect Every Season
Check cables, clips, and seals at least twice a year—spring and fall are ideal. Look for:
- Cracked or faded raceways
- Loose clips
- Frayed cables
- Pest damage (mice love chewing wires)
Replace damaged parts immediately.
Clean Gently
Use a soft cloth and mild soap to clean raceways and enclosures. Avoid harsh chemicals that can degrade plastic.
Upgrade as Needed
Technology evolves. If you add a new device, reroute cables neatly instead of creating a new tangle.
Troubleshooting Common Issues
Even with the best planning, problems can arise. Here’s how to fix the most common ones.
Problem: Cables Are Still Visible
Solution: Reassess your route. Can you run cables behind a beam or under a counter? Use paintable raceways or cable sleeves that blend with your decor. Consider wireless options to reduce cable count.
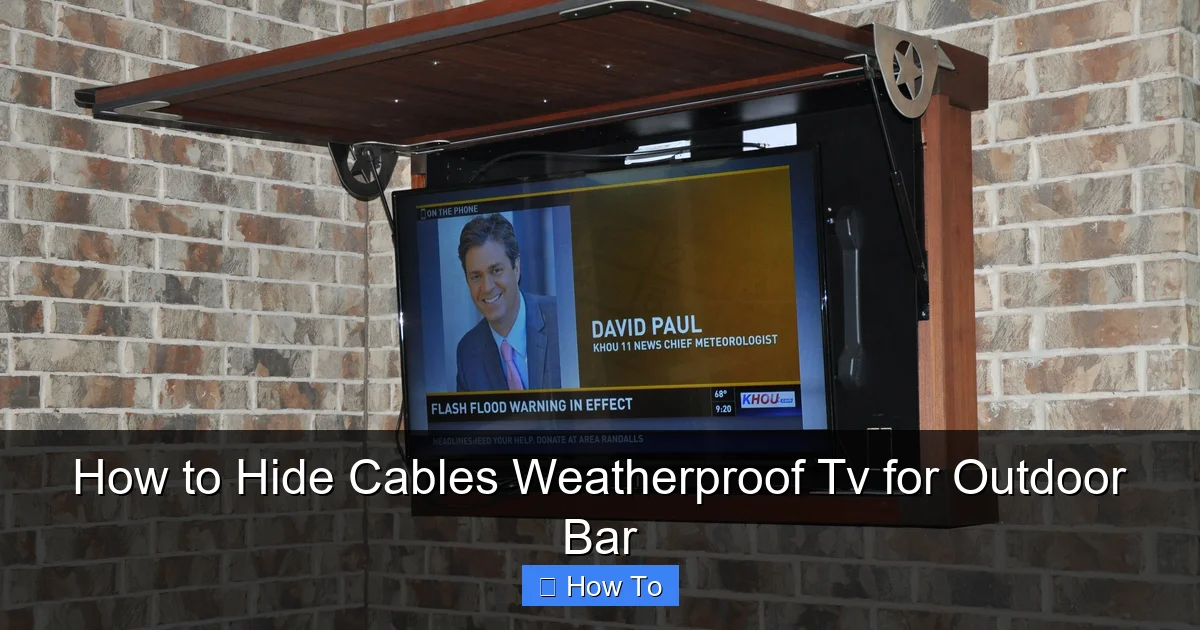
Visual guide about How to Hide Cables Weatherproof Tv for Outdoor Bar
Image source: i.pinimg.com
Problem: Signal Loss Over Long Distances
Solution: Use an HDMI extender or switch to a wireless HDMI system. Alternatively, relocate your streaming device closer to the TV.
Problem: Water in the Enclosure
Solution: Check the seal and drainage. Add a small vent with a mesh filter to allow airflow without letting water in. Elevate the enclosure further off the ground.
Problem: Cables Keep Coming Loose
Solution: Use more clips or switch to a more secure raceway. Make sure clips are rated for outdoor use and tightened properly—but not too tight.
Problem: Overheating Devices
Solution: Ensure enclosures have ventilation. Avoid covering devices with towels or blankets. Use fans or heat-resistant boxes if needed.
Bonus Tips for a Pro-Looking Setup
Want to take your outdoor bar to the next level? Try these expert tips:
- Use cable sleeves: Fabric sleeves bundle multiple cables into one clean line. Choose outdoor-safe, breathable materials.
- Paint raceways: Match the color to your wall or bar for a hidden effect.
- Install LED strip lighting: Add ambient lighting under the bar to highlight your TV and hide cable routes in shadow.
- Go wireless where possible: Use Bluetooth speakers or wireless HDMI to cut down on cables.
- Label everything: Use a label maker or colored tape so you know which cable is which during future upgrades.
Conclusion
Hiding cables for your weatherproof TV on an outdoor bar might seem like a small detail, but it makes a big difference in safety, performance, and style. With the right planning, tools, and techniques, you can create a clean, professional setup that stands up to the elements and looks great year after year.
Remember: always use outdoor-rated materials, keep power and signal cables separate, and test everything before finalizing. A little effort now saves you headaches—and expenses—down the road.
Your outdoor bar is more than just a place to watch the game. It’s a retreat, a gathering spot, a sanctuary. Keep it looking sharp, safe, and smart with proper cable management. Now go enjoy that sunset—wire-free.

