
Transform your outdoor space into a sleek, cable-free entertainment zone. This guide walks you through practical, weather-resistant methods to hide TV cables on your patio or deck—keeping them safe, organized, and out of sight.
Key Takeaways
- Plan your cable route first: Map out the shortest, safest path from your TV to power and signal sources to minimize exposure and clutter.
- Use weatherproof cable covers: Choose outdoor-rated raceways, conduits, or channels designed to protect wires from rain, UV rays, and temperature changes.
- Anchor cables securely: Prevent tripping hazards and damage by fastening cables tightly along railings, walls, or under deck boards.
- Label and organize all connections: Keep track of HDMI, power, and audio cables with tags or color-coding for easy maintenance.
- Test everything before finalizing: Ensure your TV, speakers, and streaming devices work properly after installation to avoid rework.
- Consider wireless alternatives: Reduce cable clutter with wireless HDMI kits or Bluetooth audio systems where possible.
- Maintain access for future upgrades: Install removable panels or access points so you can easily add or replace cables later.
How to Hide Cables TV for Patio for Deck Entertainment
Imagine sipping your morning coffee or hosting a backyard movie night with your favorite show playing on a crisp outdoor TV—no messy wires snaking across your deck or patio. Sounds perfect, right? But the reality often includes tangled cables, tripping hazards, and weather-damaged electronics. The good news? You can enjoy a clean, safe, and stylish outdoor entertainment setup by learning how to hide cables for TV on your patio or deck.
This complete guide will walk you through every step—from planning your layout to installing durable, weatherproof cable management solutions. Whether you’re mounting a TV under a pergola, setting up a projector on the deck, or just want a neater look, we’ve got you covered. By the end, you’ll have a sleek, functional outdoor space that’s ready for any season.
Why Hiding Outdoor TV Cables Matters
Outdoor cable management isn’t just about aesthetics—it’s about safety, durability, and performance. Exposed wires can become tripping hazards, especially in high-traffic areas like decks and patios. They’re also vulnerable to weather damage. Rain, snow, UV rays, and temperature swings can degrade standard cables over time, leading to signal loss or electrical issues.
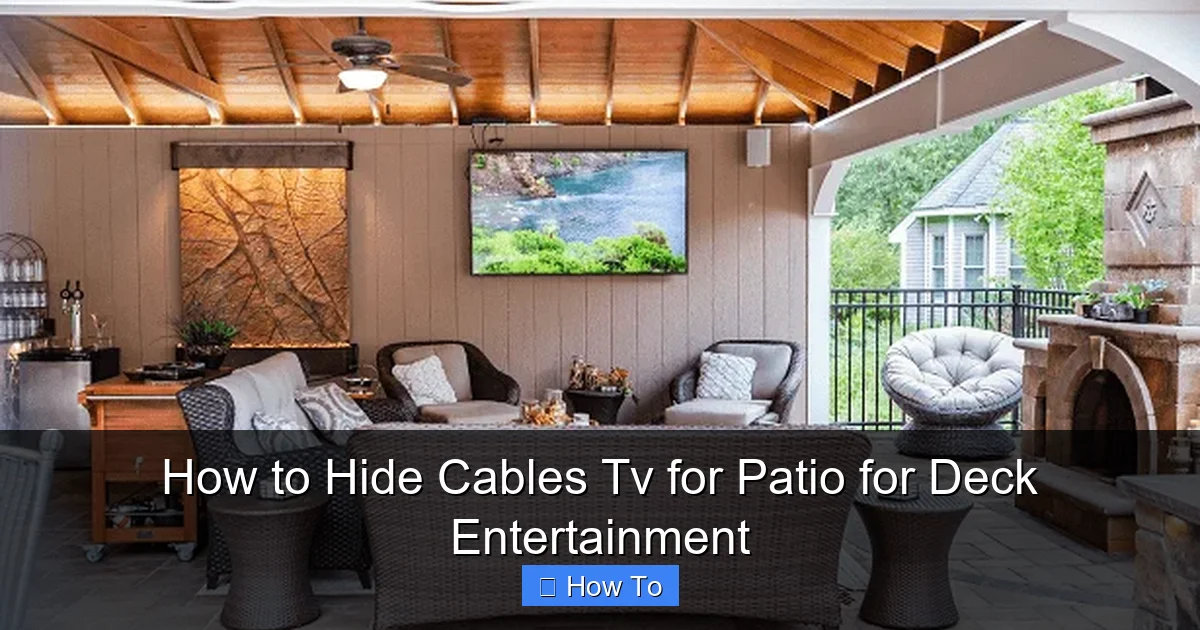
Visual guide about How to Hide Cables Tv for Patio for Deck Entertainment
Image source: thepatiocompanyma.com
Plus, a clean setup enhances your outdoor living experience. No one wants to stare at a bundle of cords while trying to relax. Hiding cables creates a more inviting atmosphere and protects your investment in outdoor electronics. Whether you’re using a smart TV, soundbar, or streaming device, proper cable management ensures everything works reliably and looks great.
Step 1: Plan Your TV and Cable Layout
Before you run a single wire, take time to plan your setup. A little foresight saves time, money, and frustration later.
Choose the Right TV Location
Pick a spot that’s sheltered from direct sunlight and rain. Under a covered patio, pergola, or awning is ideal. Avoid areas where water pools or where the TV might be exposed to sprinklers. Make sure the viewing angle is comfortable from your seating area.
Map Out Power and Signal Sources
Identify where your power outlet, cable/satellite box, streaming device, and audio equipment will be located. Ideally, these should be indoors or in a weatherproof enclosure nearby. Measure the distance from your TV to each source to determine how much cable you’ll need.
Decide on Cable Paths
Look for the shortest, least visible route. Common options include:
- Running cables along the wall or railing
- Tucking them under deck boards
- Routing them through conduit buried slightly below ground (for longer runs)
- Using existing structures like posts or beams
Avoid sharp bends or tight corners, which can damage cables over time.
Check Local Codes and Permits
If you’re running electrical wires or drilling into structures, check local building codes. Some areas require permits for outdoor electrical work. When in doubt, consult a licensed electrician.
Step 2: Gather the Right Tools and Materials
Having the right supplies makes the job easier and ensures long-term results. Here’s what you’ll need:
Essential Tools
- Measuring tape
- Drill and drill bits (for mounting)
- Cable staples or clips
- Wire strippers (if splicing cables)
- Level (to keep everything straight)
- Utility knife or scissors
Recommended Materials
- Outdoor-rated cable raceways: Plastic or metal channels that snap over wires (e.g., Legrand Wiremold Outdoor Raceways)
- Flexible conduit: UV-resistant tubing for burying or running under decks (e.g., Carlon or Southwire)
- Cable ties and mounts: Weatherproof zip ties and adhesive-backed clips
- Weatherproof outlet covers: For protecting power connections
- Extension cords and power strips: Outdoor-rated, GFCI-protected models
- HDMI and power cables: High-quality, outdoor-rated versions (look for “direct burial” or “UV-resistant” labels)
Tip: Buy a little extra cable and materials. It’s better to have surplus than to run short mid-project.
Step 3: Run and Protect Your Cables
Now it’s time to install your cables safely and neatly. Follow these steps based on your chosen route.
Option A: Use Cable Raceways Along Walls or Railings
Raceways are one of the easiest and most effective ways to hide cables on patios and decks.
- Clean the surface where you’ll mount the raceway.
- Measure and cut the raceway to fit your cable length.
- Use a level to mark a straight line.
- Drill pilot holes and secure the base with screws or outdoor adhesive.
- Place your cables inside, then snap on the cover.
- Use corner pieces for turns and end caps for a finished look.
Pro Tip: Choose a raceway color that matches your wall or railing to make it nearly invisible.
Option B: Run Cables Under Deck Boards
If your deck has gaps between boards, you can tuck cables underneath.
- Lift a few boards using a pry bar (be gentle to avoid damage).
- Feed the cables through the space beneath.
- Use cable clips or zip ties to secure wires to the joists.
- Replace the boards carefully.
Warning: Don’t staple cables directly to wood—this can crush insulation and cause shorts. Use protective clips instead.
Option C: Bury Flexible Conduit (For Long Runs)
For runs from your house to a distant deck or patio, burying conduit is a durable solution.
- Dig a shallow trench (6–8 inches deep) along your planned route.
- Lay the conduit in the trench, ensuring it’s smooth and free of kinks.
- Feed your cables through the conduit using a fish tape or string.
- Cover the conduit with soil and tamp it down.
- Mark the location with landscape stakes or flags for future reference.
Safety Note: Call 811 before digging to check for underground utilities.
Option D: Use Existing Structures
Get creative with your deck’s design. Run cables:
- Inside hollow railings or posts
- Along beams or support columns
- Behind outdoor curtains or screens
Use adhesive clips or Velcro straps to keep wires tidy and removable.
Step 4: Secure and Organize Connections
Once your cables are in place, it’s time to manage the connections neatly.
Use a Weatherproof Enclosure
If your cable box, streaming device, or power strip is outdoors, protect it with a weatherproof junction box or outdoor media cabinet. These are designed to keep moisture and dust out while allowing airflow.
- Mount the enclosure near your TV or on a nearby wall.
- Run all cables into the box through grommets or sealed ports.
- Use cable glands to prevent water ingress.
- Label each cable with tape or tags (e.g., “HDMI,” “Power,” “Audio”).
Bundle and Label Cables
Group similar cables together using Velcro straps or reusable zip ties. This prevents tangling and makes troubleshooting easier. Label both ends of each cable so you know what’s what—especially helpful if you ever need to unplug or upgrade.
Install a GFCI Outlet
Outdoor electrical outlets should always be GFCI (Ground Fault Circuit Interrupter) protected. This shuts off power if it detects a fault, preventing shocks. If your outlet isn’t GFCI, have one installed by an electrician.
Step 5: Test and Finalize Your Setup
Before you call it done, test everything to ensure it works properly.
Power On and Check Signals
- Turn on your TV and all connected devices.
- Verify that video, audio, and internet connections are strong.
- Test remote controls and voice assistants (like Alexa or Google Assistant).
Inspect for Safety Hazards
- Make sure no cables are pinched, frayed, or exposed.
- Check that all covers and enclosures are sealed.
- Ensure there are no tripping risks—especially near steps or seating.
Make Final Adjustments
- Trim excess zip ties or tape.
- Touch up paint on raceways if needed.
- Add decorative elements like outdoor rugs or plants to further conceal cable areas.
Troubleshooting Common Issues
Even with careful planning, problems can arise. Here’s how to fix the most common ones.
Problem: Weak or No Signal
Cause: Long cable runs can degrade HDMI or coaxial signals.
Solution: Use signal boosters or active HDMI cables for runs over 25 feet. Alternatively, switch to a wireless HDMI transmitter.
Problem: Cables Get Wet or Corroded
Cause: Poor sealing or low-quality materials.
Solution: Replace indoor cables with outdoor-rated ones. Reapply silicone sealant around entry points and upgrade to better enclosures.
Problem: Tripping or Snagging
Cause: Loose or poorly secured cables.
Solution: Re-secure with more clips or switch to a raceway. Consider raising cables off the ground with hooks or overhead runs.
Problem: Overheating Devices
Cause: Enclosures without ventilation.
Solution: Use ventilated outdoor media cabinets or leave space around devices for airflow. Avoid covering them with tarps or fabric.
Bonus Tips for a Pro-Looking Finish
Want your setup to look like it was done by a professional? Try these extra touches:
- Paint raceways to match your deck or wall. Use outdoor spray paint for a seamless blend.
- Use wireless alternatives where possible. Wireless HDMI kits (like Nyrius or J-Tech Digital) eliminate the need for long video cables.
- Add LED strip lighting under the TV or along railings. This enhances ambiance and draws attention away from cables.
- Install a retractable cable reel. Great for temporary setups or seasonal use.
- Keep a maintenance kit handy. Include spare cables, clips, and sealant for quick fixes.
Conclusion
Hiding cables for your patio or deck TV doesn’t have to be complicated or expensive. With the right planning, tools, and weatherproof materials, you can create a clean, safe, and stylish outdoor entertainment space that lasts for years. From using cable raceways to burying conduit, there’s a solution for every setup and skill level.
Remember: the key is to protect your cables from the elements, keep them organized, and ensure easy access for future upgrades. Whether you’re watching the big game, streaming a movie, or just enjoying music outdoors, a tidy cable setup lets you focus on what matters—relaxing and having fun.
So grab your tools, follow this guide, and say goodbye to messy wires. Your perfect outdoor oasis is just a few cable clips away.

