
Hiding TV cables on your patio or balcony doesn’t have to be complicated. This guide walks you through simple, effective methods to conceal wires while keeping them safe from weather and tripping hazards.
Key Takeaways
- Use weatherproof cable covers: Protect wires from rain, sun, and foot traffic with outdoor-rated raceways or conduits.
- Route cables along walls or railings: Secure cords vertically or horizontally using clips, ties, or adhesive mounts designed for outdoor use.
- Choose the right tools for your surface: Concrete, wood, or metal require different fasteners—pick ones that won’t damage your space.
- Plan your cable path before drilling: Map out the shortest, safest route from your TV to the power source and signal box.
- Test all connections before finalizing: Ensure your TV, soundbar, and streaming devices work properly after installation.
- Maintain access for future repairs: Use removable covers or modular systems so you can easily check or replace cables later.
- Prioritize safety and aesthetics: Keep cords out of walkways and blend them into your decor for a clean, professional look.
Introduction: Why Hiding TV Cables on Your Patio or Balcony Matters
So, you’ve set up your outdoor TV on the patio or balcony—great choice! Nothing beats watching your favorite show under the stars or catching the big game while grilling. But now you’re staring at a tangled mess of cables snaking across the floor: power cords, HDMI cables, maybe even speaker wires. Not only does it look messy, but it’s also a tripping hazard and a risk for water damage or electrical issues.
That’s where this guide comes in. We’ll show you how to hide TV cables on your patio or balcony safely, neatly, and affordably. Whether you’re working with a small balcony or a spacious patio, these step-by-step solutions will help you create a clean, organized outdoor entertainment area. You’ll learn about weatherproof materials, smart routing techniques, and tools that make installation a breeze.
By the end of this guide, you’ll have a cable-free zone that’s both functional and stylish—perfect for relaxing or entertaining guests. Let’s get started!
Step 1: Assess Your Space and Plan the Cable Route
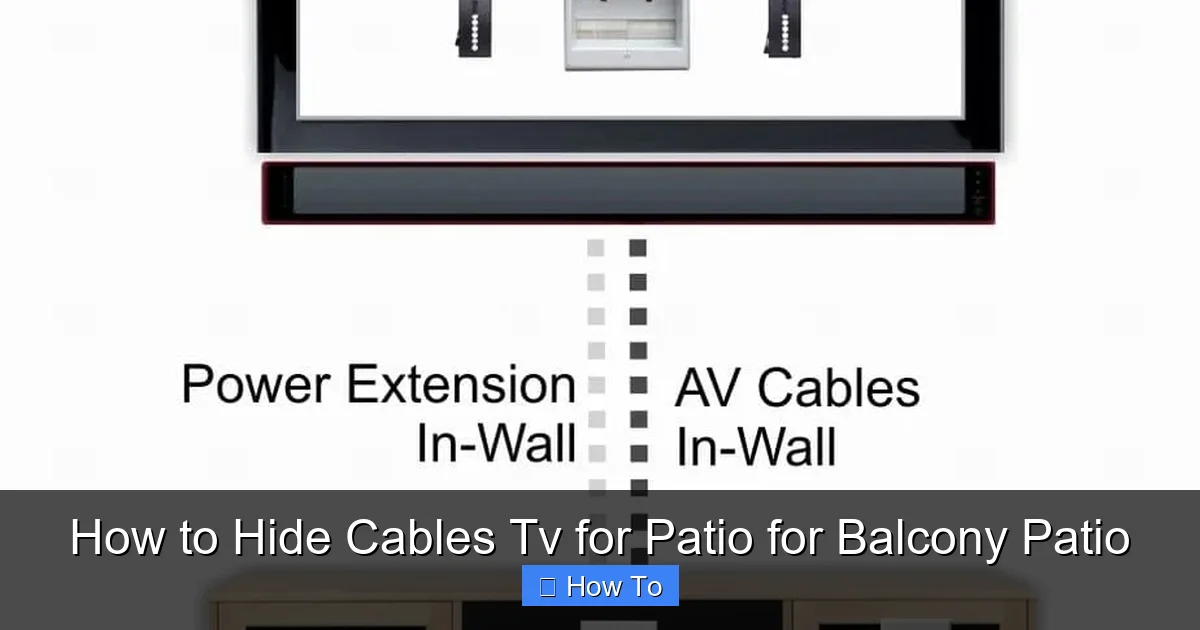
Visual guide about How to Hide Cables Tv for Patio for Balcony Patio
Image source: hellotech.com
Before you buy anything or start drilling, take a good look at your patio or balcony. Every space is different, so planning is key.
Identify Your TV Location and Power Source
Start by deciding exactly where your TV will go. Is it mounted on the wall? Placed on a stand? Make sure it’s positioned where you can comfortably view it from your seating area. Then, locate the nearest outdoor power outlet. If you don’t have one, you may need to install one (we’ll cover that later).
Next, trace the path your cables will take. For example:
– From the TV to the power outlet (for the TV and any devices like a streaming box or soundbar).
– From the TV to a cable box, satellite receiver, or internet router (if applicable).
– From external speakers to their power source or amplifier.
Measure the Distance
Use a tape measure to determine how long your cables need to be. Add a little extra length (about 6–12 inches) to allow for slack and future adjustments. This prevents tension on the cords, which can damage ports over time.
Note Obstacles and Surface Types
Look for things that might block your path:
– Railings
– Furniture
– Plants or planters
– Thresholds or steps
Also, identify the surface you’ll be working with:
– Concrete or brick walls
– Wooden railings or fences
– Metal posts or frames
– Tile or stone floors
Each surface requires different mounting methods. For example, you can’t use adhesive clips on rough concrete—you’ll need screws or anchors instead.
Sketch a Simple Diagram
Grab a piece of paper or use a notes app and sketch a rough layout. Mark:
– TV location
– Power outlet
– Cable path (dotted line)
– Any devices (soundbar, streaming box, etc.)
This visual plan will save you time and prevent mistakes during installation.
Step 2: Gather the Right Tools and Materials
Now that you’ve planned your route, it’s time to gather supplies. Using the right materials ensures your setup lasts through rain, sun, and temperature changes.
Essential Tools
- Measuring tape
- Pencil or marker
- Drill (cordless recommended)
- Screwdriver
- Level (to keep things straight)
- Cable tester (optional, but helpful)
Weatherproof Cable Management Products
Here are the best options for hiding and protecting your cables:
1. Outdoor Cable Raceways (Conduits)
These are plastic or metal channels that snap or screw onto walls. They’re perfect for running multiple cables neatly and safely. Look for UV-resistant, waterproof models rated for outdoor use.
2. Adhesive Cable Clips and Ties
Great for lightweight cables on smooth surfaces like glass railings or painted wood. Choose ones with strong outdoor adhesive (3M VHB tape works well).
3. Zip Ties and Mounting Bases
Use UV-resistant zip ties to bundle cables together. Pair them with screw-in mounting bases for extra security on railings or posts.
4. In-Wall Conduit (for Permanent Installs)
If you’re comfortable with more advanced DIY, you can run cables inside the wall using flexible conduit. This is the cleanest look but requires drilling and possibly professional help.
5. Cable Hiders and Sleeves
Flexible sleeves (like braided mesh or spiral wrap) bundle cables together and can be routed along edges or under furniture. They’re less protective than raceways but offer a quick fix.
Fasteners for Different Surfaces
– Concrete/Brick: Use masonry anchors and screws. A hammer drill may be needed.
– Wood: Standard wood screws or outdoor-rated adhesive.
– Metal: Self-tapping screws or magnetic clips (for temporary setups).
– Glass: Suction cup clips or clear adhesive mounts.
Optional but Helpful Extras
– GFCI outlet (for safety near water)
– Surge protector with outdoor rating
– Cable labels (to identify each wire)
– Silicone sealant (to waterproof entry points)
Step 3: Choose the Best Cable Hiding Method for Your Setup
Not all cable hiding solutions work for every space. Here are the top methods, ranked by effectiveness and ease of use.
Method 1: Surface-Mounted Raceways (Best for Most Balconies and Patios)
Raceways are the gold standard for outdoor cable management. They’re durable, easy to install, and look clean.
How to Install:
1. Clean the surface where you’ll mount the raceway.
2. Measure and cut the raceway to length (use a hacksaw or utility knife).
3. Mark screw holes with a pencil.
4. Drill pilot holes (if needed) and secure with screws.
5. Open the raceway, lay in your cables, and snap the cover shut.
Pro Tip: Paint the raceway to match your wall or railing for a seamless look. Use outdoor spray paint for best results.
Method 2: Under-Railing or Behind-Furniture Routing
If your balcony has a railing, run cables underneath it using clips or adhesive mounts. This keeps them out of sight and off the floor.
For patios with outdoor sofas or benches, tuck cables behind or underneath furniture. Use furniture grommets or small hooks to guide them neatly.
Method 3: In-Wall or In-Floor Conduit (For Permanent Setups)
If you’re renovating or building a new space, consider running cables inside the wall or under the floor. This requires:
– Drilling through walls or decking
– Installing flexible conduit
– Fishing cables through (may need a fish tape)
This method is more complex but offers the cleanest finish. Always check local building codes and consider hiring an electrician for power lines.
Method 4: Cable Sleeves and Wraps (Quick and Temporary)
For renters or temporary setups, use braided sleeves or spiral wrap to bundle cables. Route them along edges or under outdoor rugs.
Note: Sleeves don’t protect against water or crushing, so only use them in low-traffic, covered areas.
Step 4: Install the Cable Management System
Now it’s time to put your plan into action. Follow these steps for a smooth installation.
Step 4.1: Prepare the Cables
– Unplug all devices.
– Bundle cables together using zip ties or Velcro straps (leave slack at both ends).
– Label each cable with tape or tags (e.g., “HDMI,” “Power,” “Speaker”).
Step 4.2: Mount the Raceways or Clips
– Start at the TV and work toward the power source.
– Use a level to ensure raceways are straight.
– Space screws every 12–18 inches for support.
– For adhesive clips, press firmly for 30 seconds to ensure a strong bond.
Step 4.3: Route the Cables
– Gently guide cables into the raceway or under clips.
– Avoid sharp bends—HDMI and power cables can be damaged if kinked.
– Leave a little slack near connection points for flexibility.
Step 4.4: Secure Entry and Exit Points
– Use silicone sealant around where cables enter the raceway or wall to prevent water ingress.
– If cables go through a wall, install a waterproof grommet or conduit boot.
Step 4.5: Test Everything
– Plug in all devices.
– Turn on the TV and check for picture, sound, and internet connection.
– Make sure no cables are pinched or strained.
Step 5: Maintain and Upgrade Your Setup
Once your cables are hidden, a little maintenance goes a long way.
Regular Checks
– Inspect raceways and clips every few months for loosening or wear.
– Look for signs of water damage or UV degradation.
– Re-tighten screws or replace adhesive mounts as needed.
Seasonal Adjustments
– In winter, ensure cables aren’t exposed to freezing temperatures (can affect performance).
– In summer, check for overheating—avoid covering cables with dark materials that absorb heat.
Future-Proofing
– Leave extra space in raceways for new cables (e.g., for a future sound system).
– Use modular systems that allow easy access.
Troubleshooting Common Issues
Even with the best planning, problems can happen. Here’s how to fix them.
Problem: Cables Keep Falling Out of Clips
Solution: Use stronger adhesive or switch to screw-in clips. Make sure the surface is clean and dry before applying.
Problem: Water Is Getting Into the Raceways
Solution: Seal all seams and entry points with outdoor silicone. Use raceways with gaskets or waterproof ratings.
Problem: Signal Loss or Interference
Solution: Keep power cables separate from HDMI and audio cables to reduce interference. Use shielded cables if needed.
Problem: Raceways Look Too Noticeable
Solution: Paint them to match your wall or use camouflage tape. Or, choose raceways in neutral colors like white, gray, or black.
Problem: Drilling Damages the Surface
Solution: Use wall anchors for concrete or brick. For wood, pre-drill to prevent splitting. If you’re renting, opt for adhesive-only solutions.
Conclusion: Enjoy a Clean, Safe Outdoor Entertainment Space
Hiding TV cables on your patio or balcony isn’t just about looks—it’s about safety, durability, and peace of mind. With the right tools and a little planning, you can transform a messy wire jungle into a sleek, organized setup that enhances your outdoor experience.
Remember:
– Always use weatherproof materials.
– Plan your route before installing.
– Test everything before finalizing.
– Maintain your system regularly.
Whether you’re hosting a movie night or just unwinding after work, a clean cable setup lets you focus on what matters: enjoying your outdoor space. So grab your tools, follow this guide, and say goodbye to tangled wires for good!

