
Hiding cables for your patio TV doesn’t have to be complicated. This guide walks you through simple, effective methods to keep your outdoor kitchen neat, safe, and stylish. From planning to final installation, you’ll achieve a clean look with minimal effort.
Key Takeaways
- Plan your cable route before drilling or installing anything. Mapping out where cables will run helps avoid mistakes and ensures a clean finish.
- Use weatherproof cable management products designed for outdoor use. Regular indoor clips or raceways won’t withstand sun, rain, or humidity.
- Conceal cables behind walls, under countertops, or through outdoor cabinets. These hidden pathways keep wires out of sight and protected.
- Label all cables during installation to simplify future troubleshooting or upgrades. This small step saves time and frustration later.
- Secure cables properly to prevent tripping hazards and damage. Loose wires can be dangerous and degrade over time.
- Consider wireless alternatives like streaming devices to reduce cable clutter. Fewer wires mean easier management and a cleaner setup.
- Test all connections after installation to ensure everything works before finalizing the setup. This avoids having to redo work due to overlooked issues.
How to Hide Cables for Your Patio TV in an Outdoor Kitchen
Setting up a patio TV in your outdoor kitchen is a fantastic way to enjoy your favorite shows, sports, or movies while grilling, dining, or relaxing outside. But let’s be honest—nothing ruins the sleek look of your outdoor space faster than a tangled mess of cables snaking across the floor or dangling from the wall. Whether it’s HDMI, power, audio, or antenna wires, exposed cables are not only unsightly but also pose safety and durability risks in an outdoor environment.
The good news? Hiding those cables is easier than you think—and totally doable with the right tools, planning, and a little DIY know-how. In this comprehensive guide, we’ll walk you through every step of the process, from planning your cable route to choosing the best outdoor-rated concealment solutions. By the end, your patio TV setup will look clean, professional, and ready for year-round enjoyment—rain or shine.
Why Cable Management Matters for Outdoor TVs
Before diving into the how-to, let’s talk about why proper cable management is so important for outdoor TV setups. Unlike indoor entertainment systems, outdoor environments expose your equipment and wiring to harsh conditions like UV rays, moisture, temperature swings, and physical wear. Exposed cables are prone to:
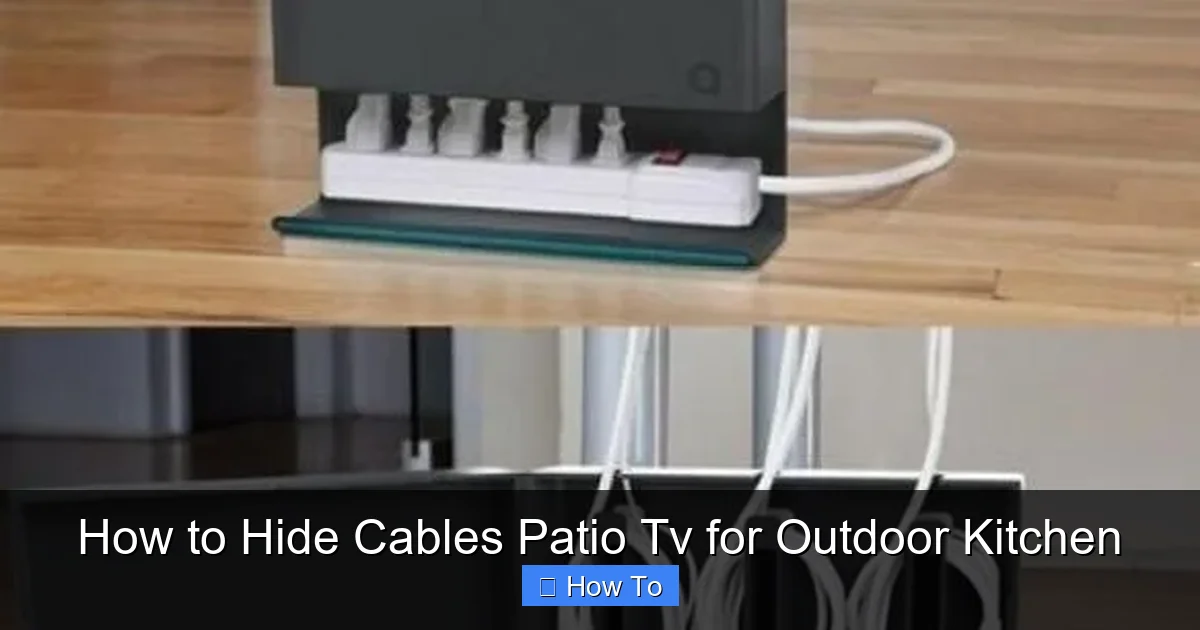
Visual guide about How to Hide Cables Patio Tv for Outdoor Kitchen
Image source: lushome.com
- Weather damage: Sunlight can degrade plastic insulation, while rain and humidity can cause corrosion or short circuits.
- Tripping hazards: Loose wires on the ground or across walkways can be dangerous, especially in dim lighting.
- Pest interference: Rodents and insects may chew through unprotected cables.
- Aesthetic clutter: A messy cable setup distracts from the beauty of your outdoor kitchen and patio design.
- Reduced lifespan: Poorly managed cables are more likely to get pinched, bent, or damaged during cleaning or furniture movement.
By investing a little time upfront to hide and protect your cables, you’ll extend the life of your equipment, improve safety, and maintain a polished, inviting outdoor space.
Step 1: Plan Your Cable Route
The first—and most important—step in hiding patio TV cables is planning. Rushing into installation without a clear path can lead to unnecessary drilling, damaged walls, or cables that are too short or too long. Take time to map out the best route from your TV to the source devices (like a streaming box, soundbar, or antenna) and power outlets.
Assess Your Setup
Start by identifying all the components that need to be connected:
- The TV itself (mounted on the wall or on a stand)
- Streaming devices (e.g., Roku, Apple TV, Fire Stick)
- Sound system (soundbar, outdoor speakers, or AV receiver)
- Antenna or satellite receiver
- Power sources (outlets, surge protectors, or outdoor-rated extension cords)
Next, determine where each device will be located. For example, will your streaming box sit on a shelf under the TV, or will it be tucked inside a weatherproof cabinet? Knowing the final placement helps you calculate cable lengths and choose the right routing method.
Choose the Best Path
Look for the shortest, most discreet route that keeps cables out of sight and protected from the elements. Ideal paths include:
- Behind the TV wall: If your TV is mounted on an exterior wall, you may be able to run cables inside the wall cavity (more on this below).
- Under countertops or cabinets: If your outdoor kitchen has a counter or storage unit near the TV, you can route cables beneath it.
- Through outdoor cabinets: Many outdoor kitchens include weatherproof cabinets—perfect for hiding devices and managing cables.
- Along structural beams or posts: If your patio has support beams, you can attach cables neatly along them using outdoor-rated clips.
Avoid running cables across open floors, over thresholds, or in high-traffic areas. Also, keep power and signal cables (like HDMI) separated when possible to reduce interference.
Measure and Label
Once you’ve mapped your route, measure the distance from the TV to each device and power source. Add a few extra inches to each cable for flexibility—this helps prevent tension and makes future adjustments easier. Label each cable with a tag or tape so you know which one is which during installation and troubleshooting.
Step 2: Choose the Right Cable Management Products
Not all cable organizers are created equal—especially when it comes to outdoor use. Indoor cable raceways, zip ties, or plastic clips may crack, fade, or fail under sun and rain exposure. For a durable, long-lasting solution, choose products specifically designed for outdoor environments.
Weatherproof Cable Raceways
Cable raceways (also called conduit channels or wire ducts) are one of the most effective ways to hide and protect multiple cables. These are plastic or metal channels that snap open to hold wires and then close securely. Look for raceways labeled “UV-resistant,” “weatherproof,” or “outdoor-rated.”
Popular options include:
- PVC raceways: Affordable and easy to install, but ensure they’re rated for outdoor use.
- Metal conduit: More durable and fire-resistant, ideal for permanent installations.
- Flexible conduit: Great for tight spaces or curved surfaces.
Install raceways along walls, under countertops, or behind cabinets. Use outdoor-rated adhesive or screws to secure them. For a seamless look, paint the raceway to match your wall or cabinet color.
Outdoor Cable Clips and Ties
For simpler setups or single cables, use heavy-duty outdoor cable clips or UV-resistant zip ties. These are ideal for attaching cables to beams, posts, or the underside of counters. Avoid standard plastic zip ties—they become brittle in sunlight.
Look for clips made from stainless steel or UV-stabilized nylon. Some clips come with adhesive backing, while others require drilling. Choose based on your surface and preference.
Weatherproof Junction Boxes
If you’re running cables through walls or under cabinets, consider using a weatherproof junction box to house connections. These sealed boxes protect splices, adapters, and power strips from moisture and debris. They’re especially useful if you’re combining multiple cables into one raceway.
Cable Sleeves and Wraps
For a clean, bundled look, use expandable braided cable sleeves or spiral wraps. These flexible covers group multiple cables together and protect them from abrasion. Choose sleeves made from PET (polyethylene terephthalate) or nylon, which resist UV and moisture.
Step 3: Run Cables Through Walls (If Possible)
If your patio TV is mounted on an exterior wall, running cables inside the wall is the most professional and hidden method. This approach keeps wires completely out of sight and fully protected. However, it requires some DIY skill and the right tools.
Check Local Codes and Permits
Before drilling into exterior walls, check your local building codes. Some areas require permits for electrical work or modifications to exterior structures. Also, ensure you’re not drilling into load-bearing walls or near plumbing or electrical lines.
Use a Fish Tape or Flexible Drill Bit
To run cables through walls, you’ll need a fish tape (a long, flexible metal wire) or a flexible drill bit. These tools help guide cables through wall cavities without damaging insulation or drywall.
Start by drilling a small hole behind the TV mount and another near the power source or device location. Insert the fish tape and gently pull the cables through. Be patient—rushing can damage the wires.
Seal the Holes
Once cables are in place, seal the entry and exit points with outdoor-rated caulk or silicone sealant. This prevents water, insects, and drafts from entering the wall. Use a color-matched sealant for a cleaner look.
Install an In-Wall Power Kit (Optional)
For a truly clean setup, consider an in-wall power kit designed for outdoor TVs. These kits include a recessed power outlet and HDMI port that mount inside the wall, allowing you to plug in your TV and devices without visible cords. They’re more expensive but offer a premium, built-in appearance.
Step 4: Use Outdoor Cabinets and Enclosures
If running cables through walls isn’t feasible, outdoor cabinets and enclosures offer a great alternative. Many outdoor kitchens include weatherproof storage units—perfect for hiding streaming devices, routers, and power strips.
Choose a Weatherproof Cabinet
Select a cabinet made from materials like marine-grade polymer, stainless steel, or treated wood. Ensure it has ventilation to prevent overheating and a secure latch to keep out moisture and pests.
Install a Power Strip Inside
Mount a surge-protected outdoor power strip inside the cabinet. This centralizes all your power needs and reduces the number of cables running to external outlets. Use a power strip with a built-in circuit breaker for added safety.
Route Cables Through Grommets
Drill small holes in the back or bottom of the cabinet and insert rubber grommets. These protect cables from sharp edges and help seal out moisture. Run HDMI, power, and antenna cables through the grommets to the TV or other devices.
Keep Devices Cool and Dry
Avoid overloading the cabinet with too many devices, which can generate heat. Leave space for airflow, and consider adding a small, weatherproof fan if needed. Also, use silica gel packs to absorb moisture inside the cabinet.
Step 5: Conceal Cables Under Countertops or Along Structures
For open-concept outdoor kitchens, you can hide cables under countertops, along support beams, or beneath patio furniture. These methods are less invasive and work well for temporary or semi-permanent setups.
Under-Counter Cable Trays
Install a cable tray or raceway under the edge of your outdoor counter. These trays hold multiple cables and can be painted to blend in. Use outdoor adhesive or screws to secure them.
Attach Cables to Beams or Posts
If your patio has exposed beams or support posts, use outdoor cable clips to attach wires neatly along the surface. Run cables vertically or horizontally, depending on the layout. This method keeps wires off the ground and out of sight.
Use Furniture to Hide Cables
Strategically place outdoor furniture—like a console table or storage bench—near the TV to conceal cables running along the floor. Just ensure the furniture is stable and won’t shift and damage the wires.
Step 6: Secure and Protect All Connections
Even the best cable management plan fails if connections are loose or exposed. Take time to secure every cable and protect junctions from the elements.
Use Cable Ties and Clips
Bundle loose cables together with UV-resistant zip ties or Velcro straps. Avoid over-tightening, which can damage insulation. Use clips to anchor cables to walls, cabinets, or beams.
Protect Outdoor Outlets
Ensure all outdoor power outlets are GFCI-protected and covered with weatherproof outlet covers. These covers stay closed when not in use and flip open when plugs are inserted.
Seal Outdoor Connections
For added protection, use dielectric grease on electrical connections to prevent corrosion. Wrap outdoor splices with electrical tape and cover with a waterproof junction box.
Step 7: Test and Finalize Your Setup
Before declaring your project complete, test every component to ensure everything works properly.
Power On and Check Signals
Turn on the TV and all connected devices. Verify that video, audio, and internet connections are strong and stable. Watch for flickering, lag, or dropouts, which may indicate a loose or damaged cable.
Adjust and Re-Secure
If any cables are loose or visible, make final adjustments. Tighten clips, reposition raceways, or add extra support as needed.
Document Your Setup
Take photos or make a simple diagram of your cable layout. This helps with future troubleshooting, upgrades, or if you need to move the TV.
Troubleshooting Common Cable Issues
Even with careful planning, problems can arise. Here’s how to handle common issues:
Signal Loss or Interference
If your picture or sound cuts out, check for loose HDMI connections or damaged cables. Keep power and signal cables separated, and avoid running them parallel to high-voltage lines.
Cables Overheating
If devices feel hot or shut down, ensure your cabinet or enclosure has proper ventilation. Avoid stacking too many devices in a small space.
Water Damage
If you notice corrosion or moisture inside connections, immediately disconnect power and dry the area. Replace damaged cables and improve sealing with better grommets or sealant.
Tripping Hazards
If cables are still visible on the floor, consider using a cable ramp or cover. These rubber or plastic covers lay flat over wires and protect them from foot traffic.
Conclusion
Hiding cables for your patio TV doesn’t require a professional installer or a huge budget—just a little planning, the right tools, and attention to detail. By following the steps in this guide, you’ll create a clean, safe, and stylish outdoor entertainment setup that enhances your outdoor kitchen instead of cluttering it.
Remember: the key to success is preparation. Map your cable route, choose weatherproof products, and secure every connection. Whether you run wires through walls, tuck them into cabinets, or use raceways along beams, the result will be a seamless, professional-looking patio TV experience.
Now, kick back, fire up your favorite show, and enjoy your beautifully organized outdoor space—cable-free and stress-free.

