
Hiding cables for your patio TV doesn’t have to be complicated. This guide walks you through practical, weather-resistant methods to keep your outdoor bar looking sleek and safe. From cable raceways to conduit systems, you’ll find the perfect solution for your setup.
Key Takeaways
- Plan your cable route first: Map out the path from your TV to power and signal sources before installing anything.
- Use weatherproof materials: All cable management tools must be rated for outdoor use to prevent damage from rain, sun, and humidity.
- Choose the right concealment method: Options include raceways, conduits, in-ground channels, and decorative covers—pick based on your setup and style.
- Secure cables properly: Loose wires can sag, snag, or get damaged—use clips, ties, and anchors to keep everything tight and tidy.
- Test before finalizing: Always check signal strength and power after routing cables to avoid frustrating issues later.
- Prioritize safety: Keep cables away from foot traffic, water sources, and heat to prevent tripping or electrical hazards.
- Maintain access for future repairs: Use removable covers or accessible conduits so you can troubleshoot or upgrade without tearing everything apart.
How to Hide Cables Patio TV for Outdoor Bar
So you’ve got your outdoor bar all set up—string lights, comfy seating, a killer sound system, and of course, a sleek patio TV mounted for game day or movie nights under the stars. But now there’s one eyesore ruining the vibe: a tangled mess of cables snaking across the floor, dangling behind the TV, or exposed along the wall. Not only does it look messy, but it’s also a tripping hazard and can get damaged by weather or foot traffic.
The good news? Hiding cables for your patio TV is totally doable—and doesn’t require a contractor or a huge budget. With the right tools and a bit of planning, you can create a clean, professional-looking setup that’s safe, weather-resistant, and easy to maintain.
In this guide, we’ll walk you through step-by-step methods to hide your TV cables at your outdoor bar. Whether you’re dealing with power cords, HDMI cables, speaker wires, or Ethernet, we’ve got solutions that work for every setup. You’ll learn how to choose the right materials, plan your cable route, install concealment systems, and keep everything running smoothly—rain or shine.
Let’s get started!
Why Hiding Cables Matters for Your Outdoor Bar
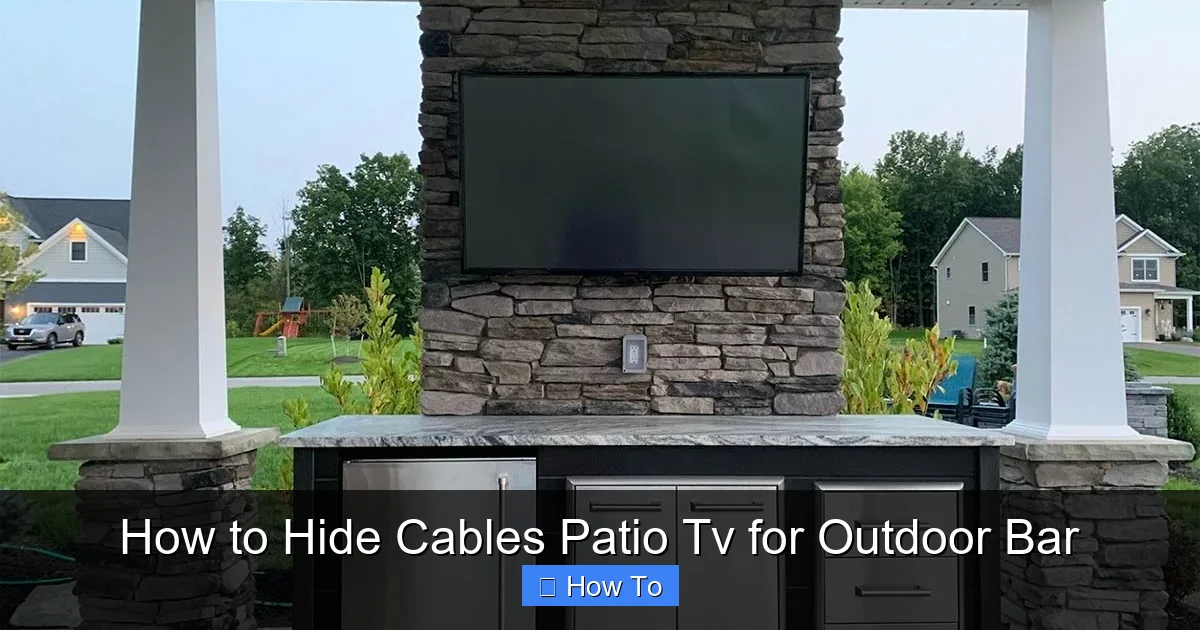
Visual guide about How to Hide Cables Patio Tv for Outdoor Bar
Image source: rtaoutdoorliving.com
Before diving into the how-to, let’s talk about why this matters. An outdoor bar is meant to be a relaxing, stylish space where you can entertain guests or unwind after a long day. Exposed cables can ruin that atmosphere in several ways:
- Safety hazard: Loose wires are a tripping risk, especially in low light or when guests are mingling.
- Weather damage: Rain, snow, UV rays, and humidity can degrade standard indoor cables and connectors over time.
- Aesthetic clutter: Cables dangling behind the TV or snaking across the deck distract from your decor and make the space look unfinished.
- Rodent and pest attraction: Exposed wires can attract chewing pests, leading to damaged cables and potential electrical issues.
- Reduced lifespan: Poorly protected cables wear out faster, leading to signal loss, power issues, or the need for frequent replacements.
By hiding your cables properly, you’re not just improving the look of your space—you’re also protecting your investment and ensuring your outdoor entertainment system lasts for years.
Step 1: Assess Your Setup and Plan the Cable Route
The first step in hiding your patio TV cables is understanding your current setup. Take a few minutes to map out where everything is and where it needs to go.
Identify All Cables Needed
Start by listing every cable connected to your TV and outdoor bar setup. Common ones include:
- Power cable (from TV to outlet)
- HDMI cable (from streaming device, cable box, or game console)
- Ethernet cable (for wired internet, if using)
- Speaker or audio cables (if using external sound)
- USB cables (for streaming sticks or external drives)
- Antenna or satellite cable (if applicable)
Make a quick sketch or take a photo of your current setup. Note where each cable starts and ends. This will help you plan the most efficient and hidden route.
Determine the Best Path
Look for the shortest, most discreet path from your TV to the power source and other devices. Common routes include:
- Along the wall behind the TV
- Down the side of a support post or beam
- Under decking or along the edge of a patio
- Through a nearby wall or under a bar counter
Avoid running cables across walkways or high-traffic areas. If you must cross a path, consider in-ground solutions (we’ll cover those later).
Check for Obstacles
Look for things that could interfere with your cable run:
- Doors or windows that swing open
- Outdoor furniture or planters
- Water features or sprinkler systems
- Electrical panels or outdoor outlets
Also, note where your power source is. Is it nearby? Do you need an extension cord or outdoor-rated power strip? Make sure your plan accounts for all these factors.
Measure and Plan for Extra Length
Always buy cables a little longer than you think you’ll need. This gives you flexibility during installation and prevents tension on connectors. A good rule of thumb: add 6–12 inches to your measured distance.
Step 2: Choose the Right Cable Management Solution
Now that you’ve planned your route, it’s time to pick the best way to hide your cables. There are several options, each with pros and cons. The right choice depends on your setup, budget, and how permanent you want the solution to be.
Option 1: Outdoor Cable Raceways
Cable raceways are plastic or metal channels that snap or screw onto walls, posts, or under eaves. They’re one of the most popular and affordable ways to hide cables outdoors.
Pros:
- Easy to install—no drilling into walls
- Weather-resistant and UV-protected options available
- Removable covers let you add or remove cables later
- Come in various colors to match your decor
Cons:
- Visible on the surface—may not look seamless
- Can collect dirt or debris over time
Best for: Wall-mounted TVs, short cable runs, renters, or DIYers who want a quick fix.
Tip: Choose raceways labeled “outdoor-rated” or “UV-resistant.” Look for ones with adhesive backing or screw mounts, depending on your surface.
Option 2: Flexible Conduit (PVC or Metal)
Conduit is a hollow tube that protects cables and can be bent around corners. It’s more durable than raceways and offers better protection.
Pros:
- Highly durable and weatherproof
- Can be painted to blend in
- Protects against rodents and physical damage
- Can be buried or surface-mounted
Cons:
- More complex to install—requires cutting and bending
- May need tools like a conduit bender
- Less flexible for future changes
Best for: Permanent setups, long cable runs, or areas with heavy foot traffic.
Tip: Use liquid-tight flexible conduit (LFMC) for outdoor use. It’s waterproof and resists corrosion.
Option 3: In-Ground Cable Channels
If you’re running cables across a patio or deck, in-ground channels let you bury them just below the surface. These are great for crossing walkways.
Pros:
- Completely hidden from view
- Protects cables from weather and wear
- Safe for foot traffic
Cons:
- Requires digging—can be labor-intensive
- Not ideal for existing hardscapes
- Harder to access for repairs
Best for: New builds, patios with removable pavers, or decks with access underneath.
Tip: Use a flat, low-profile channel designed for outdoor use. Always check local codes—some areas require burial depth of at least 6 inches for electrical cables.
Option 4: Decorative Cable Covers
These are stylish covers that look like trim, molding, or even rope. They’re designed to blend in with your outdoor decor.
Pros:
- Aesthetically pleasing—looks intentional
- Easy to install with adhesive or clips
- Available in wood, stone, or metallic finishes
Cons:
- May not be as durable as raceways or conduit
- Limited cable capacity
Best for: Short runs, modern or rustic-themed bars, or when appearance is a top priority.
Tip: Pair decorative covers with cable clips to keep wires secure inside.
Option 5: Run Cables Through Walls or Under Structures
For a truly hidden look, you can route cables through walls, under decking, or inside bar cabinets.
Pros:
- Completely invisible
- Maximum protection from elements
Cons:
- Requires drilling and possibly professional help
- Harder to modify later
- May void warranties or violate building codes
Best for: Permanent installations, custom-built bars, or when you’re already doing renovations.
Tip: Use a fish tape to pull cables through walls. Always check for electrical wires or plumbing before drilling.
Step 3: Gather Your Tools and Materials
Before you start installing, make sure you have everything you need. Here’s a checklist:
- Outdoor-rated cables (HDMI, power, Ethernet, etc.)
- Cable management system (raceway, conduit, etc.)
- Measuring tape
- Level
- Drill and drill bits (if mounting)
- Screws and wall anchors (if needed)
- Cable ties or clips
- Utility knife or conduit cutter
- Weatherproof sealant (for conduit joints)
- Gloves and safety glasses
Pro tip: Buy a few extra cable ties and clips—you’ll always need more than you think!
Step 4: Install Your Chosen Cable Management System
Now it’s time to put your plan into action. Follow these steps based on your chosen method.
Installing Cable Raceways
- Clean the surface: Wipe down the wall or post with a damp cloth and let it dry.
- Mark the route: Use a pencil and level to mark where the raceway will go.
- Cut to size: Use a utility knife or saw to trim the raceway to the correct length.
- Attach the base: If using adhesive, peel and stick. If using screws, drill pilot holes and secure with screws.
- Insert cables: Open the cover and lay your cables inside. Avoid overfilling—leave some space for airflow.
- Snap on the cover: Close the raceway and press firmly to seal.
- Secure loose ends: Use cable clips to anchor the raceway at corners or ends.
Installing Flexible Conduit
- Measure and cut: Use a conduit cutter to trim the tube to length.
- Bend as needed: Use a conduit bender for smooth curves—avoid kinking.
- Mount the conduit: Use conduit straps every 3–4 feet to secure it to the wall or post.
- Pull the cables: Attach a fish tape to the cables and pull them through the conduit.
- Seal the ends: Use weatherproof conduit caps or sealant to prevent moisture entry.
Installing In-Ground Channels
- Mark the path: Use spray paint or chalk to outline where you’ll dig.
- Dig a shallow trench: About 2–3 inches deep—just enough to bury the channel.
- Lay the channel: Place the flat cable channel in the trench.
- Run the cables: Feed your cables through the channel.
- Cover with soil or gravel: Fill the trench and tamp down gently.
- Optional: Add a decorative stone or paver on top for a finished look.
Installing Decorative Covers
- Clean the area: Ensure the surface is dry and free of dust.
- Apply adhesive or clips: Follow the manufacturer’s instructions.
- Insert cables: Slide them into the cover.
- Press into place: Hold for 30 seconds to ensure a strong bond.
Step 5: Secure and Organize Your Cables
Even the best concealment system won’t work if your cables are loose or tangled. Take time to organize and secure them properly.
Use Cable Ties and Clips
Bundle cables together with outdoor-rated zip ties. Don’t overtighten—this can damage the insulation. Use adhesive-backed clips to anchor cables to walls or under surfaces.
Label Your Cables
Use waterproof labels or colored tape to mark each cable (e.g., “HDMI,” “Power,” “Ethernet”). This makes troubleshooting much easier later.
Avoid Sharp Bends
HDMI and Ethernet cables can lose signal if bent too tightly. Keep bends gentle—no tighter than a 2-inch radius.
Keep Power and Signal Cables Separate
Running power cables next to HDMI or audio cables can cause interference (called “crosstalk”). If possible, keep them at least 6 inches apart, or cross them at 90-degree angles.
Step 6: Test Everything Before Finalizing
Before you call it done, test your setup:
- Turn on the TV and check the picture and sound.
- Test the internet connection (if using Ethernet).
- Make sure all devices power on correctly.
- Walk around the area to check for tripping hazards.
If something isn’t working, double-check connections and cable integrity. It’s much easier to fix issues now than after everything is hidden.
Troubleshooting Common Issues
Even with careful planning, problems can arise. Here’s how to handle the most common ones.
Problem: Cables Are Too Short
Solution: Use outdoor-rated extension cables or couplers. Avoid daisy-chaining multiple extensions—this can cause voltage drop or overheating.
Problem: Signal Loss or Interference
Solution: Check for sharp bends, damaged cables, or proximity to power lines. Use shielded HDMI cables for longer runs.
Problem: Water Getting Into Conduit or Raceways
Solution: Seal all joints with silicone or outdoor-rated sealant. Use drip loops (a downward curve in the cable) before it enters a wall or conduit.
Problem: Cables Sagging or Coming Loose
Solution: Add more clips or straps. Use adhesive-backed hooks for extra support.
Problem: Pests Chewing on Cables
Solution: Use metal conduit or rodent-proof raceways. Apply peppermint oil (a natural deterrent) around entry points.
Maintenance Tips to Keep Your Setup Looking Great
Once your cables are hidden, a little maintenance goes a long way:
- Inspect cables every 3–6 months for wear, cracks, or loose connections.
- Clean raceways and covers with a damp cloth to remove dirt and debris.
- Check seals and adhesives—reapply if needed.
- Trim overgrown plants that might damage cables.
- After storms, check for water intrusion or displaced covers.
Final Thoughts
Hiding cables for your patio TV doesn’t have to be a headache. With the right approach, you can create a clean, safe, and stylish outdoor bar that’s ready for any gathering. Whether you go with simple raceways, durable conduit, or a hidden in-ground channel, the key is planning, using weatherproof materials, and securing everything properly.
Remember: A little effort now saves you time, money, and frustration down the road. Your outdoor space should be a place of relaxation and enjoyment—not a tangle of wires. So grab your tools, follow this guide, and enjoy your sleek, cable-free patio TV setup.
You’ve got this!

