
Transform your deck into a year-round entertainment hub with a professionally installed outdoor TV. This guide walks you through choosing the right TV, mounting it safely, managing cables, and protecting it from the elements—all while keeping your setup stylish and functional.
Key Takeaways
- Choose a true outdoor TV: Indoor TVs aren’t built for weather, temperature swings, or glare—opt for a certified outdoor model designed for deck use.
- Pick the right mount: Use a weatherproof, full-motion outdoor TV mount that allows tilt and swivel for optimal viewing from different deck areas.
- Plan cable management early: Run power and HDMI cables through waterproof conduits or under decking to prevent tripping hazards and water damage.
- Protect against the elements: Install your TV under a covered area or use a weatherproof enclosure to shield it from rain, snow, and direct sun.
- Test before finalizing: Power on the TV and check signal strength, audio, and remote functionality before securing all components.
- Consider sound upgrades: Built-in TV speakers often lack outdoor punch—add weather-resistant speakers or a soundbar for better audio.
- Schedule regular maintenance: Clean the screen and check seals seasonally to extend your TV’s lifespan and performance.
How to Install Outdoor TV for Deck Entertainment
Imagine sipping your morning coffee while catching up on the news, hosting a backyard movie night under the stars, or watching the big game with friends—all from the comfort of your deck. With the right setup, your outdoor space can become a premium entertainment zone. Installing an outdoor TV for deck entertainment isn’t just about mounting a screen; it’s about creating a durable, safe, and enjoyable experience that stands up to the elements.
In this comprehensive guide, you’ll learn everything you need to know to install an outdoor TV on your deck. We’ll cover how to choose the perfect TV, select the right mounting hardware, run cables safely, protect your investment from weather, and enhance your audio experience. Whether you’re a DIY enthusiast or working with a contractor, these step-by-step instructions will help you create a seamless, professional-looking setup.
By the end of this guide, you’ll have a weather-resistant, high-performance outdoor entertainment system that turns your deck into the ultimate social and relaxation spot—rain or shine.
Step 1: Choose the Right Outdoor TV
Visual guide about How to Install Outdoor Tv for Deck Entertainment
Image source: sylvoxtv.uk
Not all TVs are created equal—especially when it comes to outdoor use. Indoor TVs may look tempting due to their lower price tags, but they’re not built to handle the challenges of outdoor environments. Heat, cold, humidity, dust, and glare can quickly damage or degrade an indoor TV, leading to poor performance or complete failure.
Look for True Outdoor Certification
When shopping for an outdoor TV, prioritize models specifically designed for outdoor use. These TVs are built with weather-resistant materials, sealed components, and enhanced cooling systems. Look for certifications like IP55 or IP65, which indicate protection against dust and water jets. Brands like SunBrite, Samsung Terrace, and LG Outdoor are known for their reliable outdoor models.
Consider Screen Brightness and Anti-Glare
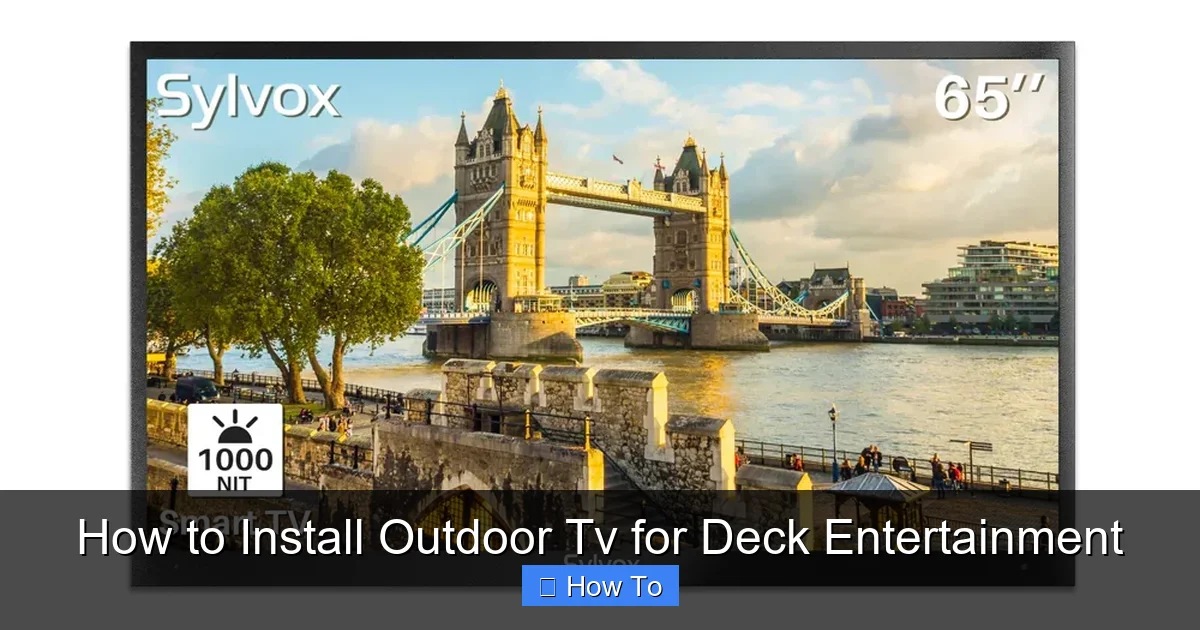
Outdoor spaces are naturally brighter than indoor rooms, especially during the day. A standard TV with 300–400 nits of brightness will struggle in direct sunlight. Opt for an outdoor TV with at least 700 nits—preferably 1000+ nits—for clear, vibrant images even on sunny afternoons. Many outdoor TVs also feature anti-glare coatings or matte finishes to reduce reflections.
Decide on Size and Placement
Think about where you’ll be sitting on your deck. A 55-inch TV is a great starting point for most decks, but if you have a larger space or plan to view from a distance, consider 65 or 75 inches. Measure your viewing distance: a general rule is to sit 1.5 to 2.5 times the screen’s diagonal size away. For example, a 65-inch TV is best viewed from 8 to 13 feet away.
Smart Features and Connectivity
Most outdoor TVs come with smart platforms like Android TV, Roku, or webOS, allowing you to stream Netflix, YouTube, and more without extra devices. Ensure your model has Wi-Fi and enough HDMI ports for cable boxes, gaming consoles, or streaming sticks. Some models even include built-in apps optimized for outdoor use.
Step 2: Select the Best Mounting Location
Where you mount your TV is just as important as the TV itself. The ideal location balances visibility, safety, and protection from the elements.
Choose a Covered or Shaded Area
Even with a weatherproof TV, it’s best to install it under a covered area like a pergola, awning, or roof overhang. This protects the screen from direct rain, snow, and UV exposure, which can degrade the display over time. If your deck isn’t covered, consider adding a shade structure or using a weatherproof TV enclosure.
Avoid Direct Sunlight and Heat Sources
Mounting your TV in direct sunlight can cause overheating and screen damage. Similarly, avoid placing it near grills, fire pits, or heaters, as excessive heat can warp components or trigger safety shutoffs. Aim for a shaded wall or post that still offers a clear view from your seating area.
Ensure Structural Support
Your deck’s railing, wall, or post must be strong enough to support the TV and mount. Wooden railings may not be sturdy enough—consider reinforcing with a backing plate or mounting to a solid wall or post. Use a stud finder to locate wall studs if attaching to a house wall. For freestanding decks, a heavy-duty post mount anchored into concrete may be necessary.
Check Viewing Angle and Height
Mount the TV at eye level when seated. A good rule is to place the center of the screen 42 to 48 inches from the ground. If your deck has multiple seating areas, choose a spot that offers the best compromise for all viewers. Avoid mounting too high, as it can cause neck strain.
Step 3: Pick the Right Outdoor TV Mount
A high-quality outdoor mount is essential for safety, adjustability, and longevity.
Choose a Weatherproof Mount
Standard indoor mounts aren’t designed for outdoor conditions. Look for mounts labeled “outdoor-rated” or “weatherproof” with rust-resistant coatings like powder-coated steel or aluminum. These materials resist corrosion from rain, snow, and humidity.
Decide on Mount Type
There are three main types of outdoor mounts:
- Fixed mounts: Hold the TV flat against the wall. Best for permanent viewing angles and minimal wind exposure.
- Tilt mounts: Allow you to angle the TV up or down for better viewing from different heights.
- Full-motion (articulating) mounts: Let you swivel, tilt, and extend the TV for flexible positioning. Ideal for decks with multiple seating zones.
For most deck setups, a full-motion mount offers the best versatility. Just ensure it’s rated for outdoor use and can support your TV’s weight and size.
Check Weight and Size Compatibility
Always verify that the mount supports your TV’s VESA pattern (the screw hole layout on the back) and weight. Most outdoor mounts list compatibility ranges—double-check before purchasing.
Step 4: Plan and Run Cables Safely
Exposed cables are not only unsightly—they’re a tripping hazard and vulnerable to weather damage. Proper cable management is crucial for safety and aesthetics.
Use Outdoor-Rated Cables
Standard indoor HDMI and power cables aren’t built for outdoor use. Invest in outdoor-rated, UV-resistant cables with waterproof connectors. These are thicker, more durable, and designed to withstand temperature changes and moisture.
Route Cables Through Conduit or Under Decking
The safest way to run cables is through a waterproof electrical conduit buried underground or attached to the deck frame. Alternatively, you can run cables under the deck boards using cable trays or raceways. Avoid draping cables over railings or across walkways.
Install a Weatherproof Electrical Outlet
Your TV needs power, and outdoor outlets must be GFCI-protected (Ground Fault Circuit Interrupter) for safety. Hire a licensed electrician to install a weatherproof outlet near the mounting location. If running power from inside, use an outdoor-rated extension cord only as a temporary solution—permanent wiring is safer and more reliable.
Label and Organize Cables
Use zip ties or cable clips to bundle and secure cables. Label each cable (e.g., “HDMI 1,” “Power”) to make future troubleshooting easier. Keep extra length coiled neatly out of sight.
Step 5: Install the Mount and TV
Now it’s time to put everything together. Take your time—rushing can lead to mistakes or unsafe installations.
Assemble the Mount
Follow the manufacturer’s instructions to assemble the mount. Most come with pre-drilled holes and hardware. Use a level to ensure the mounting plate is straight before drilling.
Attach the Mount to the Wall or Post
Drill pilot holes into the mounting surface, then secure the mount with lag bolts or concrete anchors (for posts). Double-check that it’s level and tightly fastened. Have a helper hold the mount in place while you drill.
Attach the TV to the Mount
Most outdoor TVs have VESA mounting holes on the back. Secure the mounting arms to the TV using the provided screws. Then, carefully lift the TV and hook it onto the wall plate. Lock it in place with safety screws or pins.
Test the Setup
Before finalizing, power on the TV and test all functions: picture, sound, remote control, and input sources. Adjust the tilt or swivel to find the best viewing angle. Make sure the TV doesn’t wobble or sag.
Step 6: Enhance Audio with Outdoor Speakers
Built-in TV speakers often lack the volume and clarity needed for outdoor spaces. Wind, ambient noise, and distance can make dialogue hard to hear.
Add Weather-Resistant Speakers
Install outdoor speakers around your deck for immersive sound. Look for models with IPX5 or higher ratings. You can mount them on posts, under eaves, or on railings. Pair them with a Bluetooth receiver or connect via audio cables.
Consider a Soundbar
Some outdoor TVs support soundbars, which offer better bass and clarity than built-in speakers. Choose a weatherproof model designed for outdoor use. Mount it below or above the TV for a clean look.
Use a Wireless Audio System
For a cable-free setup, use a wireless speaker system like Sonos Move or Bose SoundLink. These connect via Bluetooth or Wi-Fi and can be moved around the deck as needed.
Step 7: Protect Your TV from the Elements
Even with a weatherproof TV, extra protection extends its life and performance.
Use a TV Cover or Enclosure
When not in use, cover your TV with a breathable, UV-resistant cover. For uncovered decks, consider a full outdoor TV enclosure with a protective front panel. These allow you to watch TV in light rain while shielding the screen.
Install a Shade or Awning
If your deck isn’t covered, add a retractable awning, pergola with shade cloth, or outdoor umbrella to reduce sun exposure. This also improves comfort for viewers.
Clean Regularly
Dust, pollen, and bird droppings can accumulate on the screen. Wipe it gently with a microfiber cloth and mild cleaner designed for electronics. Avoid harsh chemicals or abrasive materials.
Troubleshooting Common Issues
Even the best setups can run into problems. Here’s how to fix common issues:
TV Won’t Turn On
Check the power outlet and ensure the GFCI hasn’t tripped. Test the outlet with another device. If the TV still won’t power on, inspect the power cable for damage.
Poor Picture Quality
Ensure the HDMI cable is securely connected and rated for outdoor use. If using a streaming device, check your Wi-Fi signal strength. Move the router closer or use a Wi-Fi extender.
Remote Control Not Working
Outdoor TVs can suffer from signal interference. Replace the remote batteries and ensure there’s a clear line of sight between the remote and the TV’s sensor. Some models support app-based remotes via smartphone.
Overheating or Shutting Down
This usually means poor ventilation or direct sun exposure. Ensure the TV has airflow around it and isn’t mounted in a confined space. Relocate it to a shadier spot if needed.
Audio Issues
If sound is muffled or absent, check audio settings and cable connections. Test with headphones or external speakers to isolate the problem.
Conclusion
Installing an outdoor TV for deck entertainment is a rewarding project that enhances your outdoor living space. By choosing a true outdoor TV, mounting it securely, managing cables safely, and protecting it from the elements, you’ll create a durable and enjoyable setup that lasts for years.
Remember, safety and weather resistance are paramount. Don’t cut corners on mounts, cables, or electrical work. When in doubt, consult a professional. With the right planning and execution, your deck will become the go-to spot for relaxation, entertainment, and unforgettable moments with family and friends.
So grab your tools, pick out your favorite show, and get ready to enjoy your new outdoor entertainment hub—rain or shine.

