
Transform your screened porch into an outdoor entertainment hub by installing a backyard TV safely and effectively. This guide walks you through choosing the right TV, mounting it securely, managing cables, and protecting it from the elements—all while keeping your space stylish and functional.
Key Takeaways
- Choose an outdoor-rated or weather-resistant TV: Regular indoor TVs aren’t built for humidity, temperature swings, or dust—opt for models specifically designed for outdoor or semi-outdoor use.
- Mount the TV securely to a sturdy wall or ceiling: Use a full-motion or tilting mount rated for outdoor conditions and ensure it’s anchored into wall studs or concrete.
- Protect all electrical connections and cables: Use weatherproof conduit, outdoor-rated extension cords, and surge protectors to prevent water damage and electrical hazards.
- Plan your viewing angle and distance: Position the screen at eye level when seated and within 6–10 feet for optimal picture quality and comfort.
- Consider sound and streaming options: Built-in TV speakers may not be enough—add outdoor speakers or a soundbar, and ensure strong Wi-Fi or use a wired Ethernet connection.
- Perform regular maintenance checks: Inspect seals, clean the screen, and check cables seasonally to extend your TV’s lifespan.
- Follow local building codes and safety standards: Consult an electrician if running new wiring and avoid overloading circuits.
How to Install Backyard TV for Screened Porch
Imagine sipping your morning coffee or hosting a summer BBQ while enjoying your favorite show—right from your screened porch. Installing a backyard TV on your screened porch is a fantastic way to extend your living space and enjoy entertainment outdoors. But it’s not as simple as mounting a regular TV and calling it a day. Screened porches are semi-outdoor environments, which means your setup needs to withstand humidity, temperature changes, dust, and occasional moisture.
In this comprehensive guide, we’ll walk you through every step of installing a backyard TV for your screened porch—from choosing the right television to mounting it safely, managing cables, enhancing sound, and maintaining your setup year-round. Whether you’re a DIY enthusiast or working with a professional, this guide will help you create a comfortable, safe, and enjoyable outdoor viewing experience.
Step 1: Assess Your Screened Porch Environment
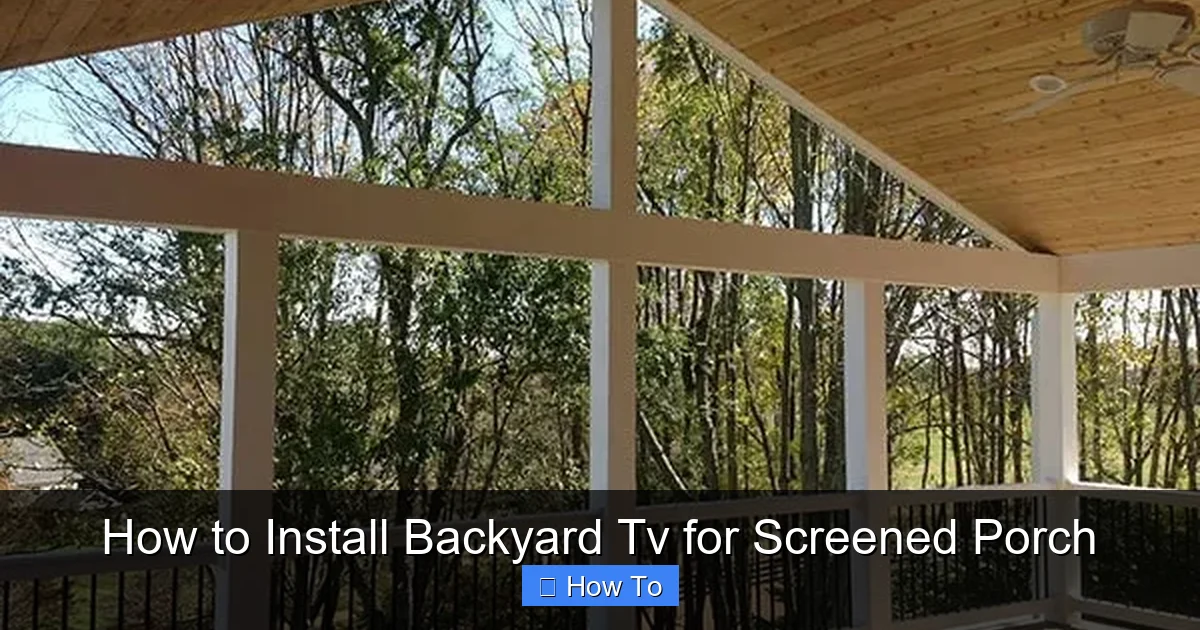
Visual guide about How to Install Backyard Tv for Screened Porch
Image source: freedomfenceandhome.com
Before you buy a TV or drill a single hole, take time to evaluate your screened porch. Not all screened spaces are created equal, and understanding your environment is crucial for a successful installation.
Check for Exposure to the Elements
Even though your porch is screened, it’s still exposed to outdoor conditions. Ask yourself:
- Does rain ever blow in during storms?
- Is the area prone to high humidity or condensation?
- Are there direct sunlight issues that could cause glare?
- Is there protection from wind, pollen, or insects?
If your porch is fully enclosed with screens and a roof, it’s considered a “semi-outdoor” space. This means you can use certain outdoor-rated electronics, but not everything designed for open patios will work here.
Evaluate Electrical Access
You’ll need a reliable power source near the TV location. Check:
- Is there an outdoor-rated GFCI (Ground Fault Circuit Interrupter) outlet nearby?
- Can you safely run an extension cord or install a new outlet?
- Is the circuit capable of handling the TV and any additional devices (like a soundbar or streaming box)?
If you don’t have an outlet within 6–8 feet of your desired TV location, consult a licensed electrician. Running new wiring may be necessary, and it must comply with local electrical codes.
Consider Viewing Conditions
Think about how and when you’ll use the TV:
- Will you watch during the day? If so, glare from sunlight could be an issue.
- Is the seating area fixed, or do you move around? This affects where you mount the TV.
- How many people will typically watch at once? This helps determine screen size and placement.
For example, if your porch gets afternoon sun, consider mounting the TV on a shaded wall or using an anti-glare screen protector.
Step 2: Choose the Right TV for Your Screened Porch
Not all TVs are built for outdoor use. Using a standard indoor TV on a screened porch can lead to overheating, moisture damage, or premature failure. Here’s what to look for:
Outdoor-Rated or Weather-Resistant TVs
These TVs are specifically designed for outdoor or semi-outdoor environments. They feature:
- Weatherproof casings that resist moisture, dust, and temperature extremes.
- Enhanced cooling systems to prevent overheating.
- Bright displays (400+ nits) to combat ambient light.
- Vandal-resistant screens in some models.
Popular brands include SunBriteTV, Samsung Terrace, and LG Outdoor. These models are more expensive than indoor TVs but are built to last in challenging conditions.
Indoor TVs with Outdoor Enclosures
If you prefer a more budget-friendly option, you can use a high-quality indoor TV inside a weatherproof outdoor TV enclosure. These enclosures protect the TV from rain, humidity, and dust while allowing ventilation.
- Look for enclosures with built-in fans or heating elements for temperature control.
- Ensure the enclosure is rated for your climate (e.g., IP55 or higher for water and dust resistance).
- Choose a model with a UV-protected front panel to prevent screen damage from sunlight.
This option gives you more flexibility in TV choice but requires careful installation and maintenance.
Screen Size and Resolution
For a typical screened porch (10×12 feet), a 43- to 55-inch TV is ideal. Larger screens may overwhelm the space, while smaller ones may be hard to see from a distance.
- 4K resolution is recommended for clarity, especially if you plan to stream high-definition content.
- OLED screens offer better contrast but can be more sensitive to humidity—consider QLED or LED for durability.
Smart Features and Connectivity
Choose a TV with built-in Wi-Fi and streaming apps (like Netflix, YouTube, or Disney+) to minimize the need for external devices. Also, ensure it has multiple HDMI ports for connecting a soundbar, gaming console, or streaming stick.
Step 3: Select the Right Mounting Hardware
A secure mount is essential for safety and optimal viewing. The wrong mount can lead to a wobbly screen, poor angle, or even a fallen TV.
Types of TV Mounts
- Fixed Mount: Keeps the TV flush against the wall. Best for permanent viewing angles and saving space.
- Tilting Mount: Allows you to angle the TV up or down. Great if the screen is mounted high or if you want to reduce glare.
- Full-Motion (Articulating) Mount: Lets you swivel, tilt, and extend the TV. Ideal if you want to watch from different areas of the porch.
For most screened porches, a tilting or full-motion mount offers the best flexibility.
Outdoor-Rated Mounts
Standard indoor mounts aren’t built to withstand moisture or temperature changes. Choose a mount labeled for outdoor or all-weather use. Look for:
- Corrosion-resistant materials (e.g., powder-coated steel or aluminum).
- Weatherproof seals around bolts and joints.
- A weight capacity that exceeds your TV’s weight by at least 25%.
Popular brands include Sanus, Peerless, and Vogel’s.
Mounting Surface Considerations
You’ll need a solid surface to mount the TV. Options include:
- Wooden Wall Studs: Ideal for most framed porches. Use a stud finder to locate studs and anchor the mount securely.
- Concrete or Brick Walls: Use masonry anchors or concrete screws. A drill with a masonry bit is required.
- Ceiling Mount: If wall space is limited, consider a ceiling-mounted arm. Ensure the ceiling structure can support the weight.
Avoid mounting on drywall alone, thin panels, or decorative surfaces—these won’t support the TV’s weight.
Step 4: Plan the Installation Layout
Before drilling, map out the entire setup to avoid mistakes and ensure a clean, functional installation.
Determine Optimal Viewing Height and Angle
The center of the TV screen should be at or slightly below eye level when seated. For most people, this is about 42–48 inches from the floor.
- If your seating is on a couch or chairs, measure eye level when seated.
- If you’re standing or using bar stools, adjust accordingly.
- Use a tape measure and painter’s tape to mark the desired position on the wall.
Avoid mounting too high—this forces viewers to look up, causing neck strain.
Check for Obstructions
Make sure the TV won’t be blocked by:
- Ceiling fans or light fixtures
- Plants, decorations, or furniture
- Screen doors or windows when opened
Also, ensure the TV doesn’t protrude into walkways, creating a safety hazard.
Plan Cable Management
Visible wires look messy and can be damaged by moisture or pests. Plan to:
- Run cables through the wall (if permitted and safe).
- Use outdoor-rated cable raceways or conduit along the wall.
- Bundle and secure loose cords with zip ties or clips.
If running cables through the wall, check local building codes—some areas require professional installation for in-wall wiring.
Step 5: Install the TV Mount
Now it’s time to mount the hardware. Take your time—this step is critical for safety.
Gather Your Tools
You’ll need:
- Stud finder or masonry detector
- Power drill and appropriate bits
- Level
- Tape measure
- Screwdriver
- Socket wrench (if needed)
- Safety goggles and gloves
Mark and Drill Pilot Holes
- Hold the mount bracket against the wall at the desired height.
- Use a level to ensure it’s straight.
- Mark the screw hole locations with a pencil.
- Drill pilot holes into the studs or masonry.
For wood studs, drill slightly smaller than the screw diameter. For concrete, use a hammer drill and masonry bits.
Secure the Mount
- Align the mount with the pilot holes.
- Insert and tighten the screws or bolts.
- Double-check that the mount is level and firmly attached.
Have a friend help hold the mount during installation—especially for larger TVs.
Step 6: Connect and Protect Cables
Proper cable management protects your equipment and keeps your porch looking tidy.
Use Outdoor-Rated Cables
Standard indoor cables can degrade when exposed to moisture and UV light. Use:
- Outdoor-rated HDMI cables (look for “direct burial” or “UV-resistant” labels).
- Weatherproof extension cords with GFCI protection.
- Surge protectors rated for outdoor use.
Avoid daisy-chaining multiple extension cords—this can overload circuits.
Route Cables Safely
- If running through the wall, use an in-wall rated HDMI cable and install an access panel for future repairs.
- If running along the wall, use a cable raceway or flexible conduit. Secure it with outdoor-rated adhesive or screws.
- Bend cables gently—sharp bends can damage internal wires.
Protect Connection Points
Use waterproof cable connectors or silicone sealant around ports to prevent moisture ingress. For extra protection, consider a weatherproof junction box for power and signal connections.
Step 7: Mount the TV and Test the Setup
With the mount secure and cables in place, it’s time to attach the TV.
Attach the TV to the Mount
- Have a helper hold the TV while you connect it to the mount.
- Follow the manufacturer’s instructions for attaching the mounting arms to the TV.
- Secure all screws and locking mechanisms.
Never lift a TV by the screen—always support it from the bottom and sides.
Connect Power and Devices
- Plug in the TV and any streaming devices (like a Roku or Apple TV).
- Connect HDMI cables and ensure all devices are powered.
- Test the TV to confirm it turns on and receives a signal.
Adjust the Viewing Angle
If using a tilting or full-motion mount, adjust the TV for the best viewing angle. Tighten all knobs and locks to prevent sagging.
Step 8: Enhance Audio and Streaming
Built-in TV speakers often lack volume and clarity, especially in open spaces.
Add Outdoor Speakers or a Soundbar
- Wireless outdoor speakers can be placed on tables or mounted on walls.
- A weatherproof soundbar mounted below the TV improves dialogue clarity.
- Bluetooth speakers offer flexibility but may have latency issues with video.
Ensure speakers are rated for outdoor use and protected from direct rain.
Improve Wi-Fi Signal
Weak Wi-Fi can cause buffering. Solutions include:
- Moving your router closer to the porch.
- Using a Wi-Fi extender or mesh network system.
- Running an Ethernet cable from your router to the TV for a wired connection.
A wired connection offers the most reliable streaming performance.
Step 9: Perform Regular Maintenance
To keep your backyard TV in top condition, perform routine checks.
Monthly Checks
- Wipe the screen with a microfiber cloth and mild cleaner.
- Inspect cables for fraying or damage.
- Check mount screws for tightness.
Seasonal Maintenance
- Clean the TV and enclosure thoroughly.
- Reapply silicone sealant if needed.
- Test all connections and power sources.
Winter Preparation
If you live in a cold climate:
- Cover the TV with a breathable, waterproof cover when not in use.
- Consider removing the TV and storing it indoors during extreme weather.
Troubleshooting Common Issues
TV Won’t Turn On
- Check the power outlet with another device.
- Ensure the surge protector is on and functioning.
- Inspect cables for damage.
Poor Picture Quality
- Adjust brightness and contrast settings.
- Check for loose HDMI connections.
- Ensure the source device is outputting the correct resolution.
Overheating or Shutting Down
- Ensure the TV has proper ventilation.
- Clean dust from vents and fans.
- Move the TV to a cooler, shaded area if possible.
Audio Issues
- Check volume settings on the TV and external speakers.
- Ensure audio output is set correctly (e.g., HDMI ARC or optical).
- Test with different content to rule out source issues.
Conclusion
Installing a backyard TV on your screened porch is a rewarding project that enhances your outdoor living experience. By choosing the right TV, mounting it securely, protecting your cables, and maintaining the setup, you can enjoy movies, sports, and shows in the fresh air—rain or shine.
Remember, safety and durability are key. Invest in weather-resistant equipment, follow electrical codes, and don’t rush the installation. With proper planning and care, your backyard TV will provide years of entertainment and comfort.
So grab your tools, gather your family, and get ready to transform your screened porch into the ultimate outdoor entertainment zone.

