
Transform your backyard into the ultimate sports-watching zone by installing a patio TV. This guide walks you through choosing the right TV, mounting it safely, protecting it from weather, and optimizing your setup for an immersive outdoor viewing experience—no matter the season.
Key Takeaways
- Choose an outdoor-rated TV: Standard indoor TVs aren’t built for sun, rain, or temperature swings. Look for models specifically designed for outdoor use with weatherproof casings and anti-glare screens.
- Pick the right location: Install your TV under a covered patio, pergola, or awning to protect it from direct sunlight and rain while ensuring a clear view from seating areas.
- Use a proper outdoor mount: Standard wall mounts won’t cut it. Invest in a weather-resistant, tiltable outdoor TV mount that can handle wind and moisture.
- Protect your cables and connections: Use waterproof conduit, cable raceways, and outdoor-rated extension cords to prevent damage and electrical hazards.
- Optimize for sound and streaming: Pair your TV with weatherproof outdoor speakers and a strong Wi-Fi extender to ensure crisp audio and smooth streaming during live games.
- Plan for power and safety: Hire a licensed electrician to install a dedicated outdoor GFCI outlet near your TV to meet safety codes and prevent shocks.
- Test before game day: Run a full system check—picture, sound, internet, and remote access—before your first outdoor sports event to avoid last-minute surprises.
How to Install Patio TV for Outdoor Sports Watching
Imagine this: It’s game day. The sun is shining, the grill is fired up, and your friends are gathered around a crystal-clear TV mounted under your covered patio. The crowd roars as your favorite team scores—right there in your own backyard. Sounds like a dream? It doesn’t have to be. With the right tools, planning, and a little know-how, you can install a patio TV and turn your outdoor space into the ultimate sports-watching destination.
Whether you’re a die-hard football fan, a basketball enthusiast, or just love catching the big match with friends, an outdoor TV setup enhances the experience. But installing a TV outside isn’t as simple as mounting one on your living room wall. You’ll need to consider weather resistance, power supply, audio quality, and viewing angles. This comprehensive guide will walk you through every step—from choosing the perfect TV to testing your system before kickoff.
By the end of this guide, you’ll know exactly how to install a patio TV for outdoor sports watching, ensuring a safe, durable, and high-quality setup that lasts for seasons to come.
Step 1: Choose the Right Outdoor TV
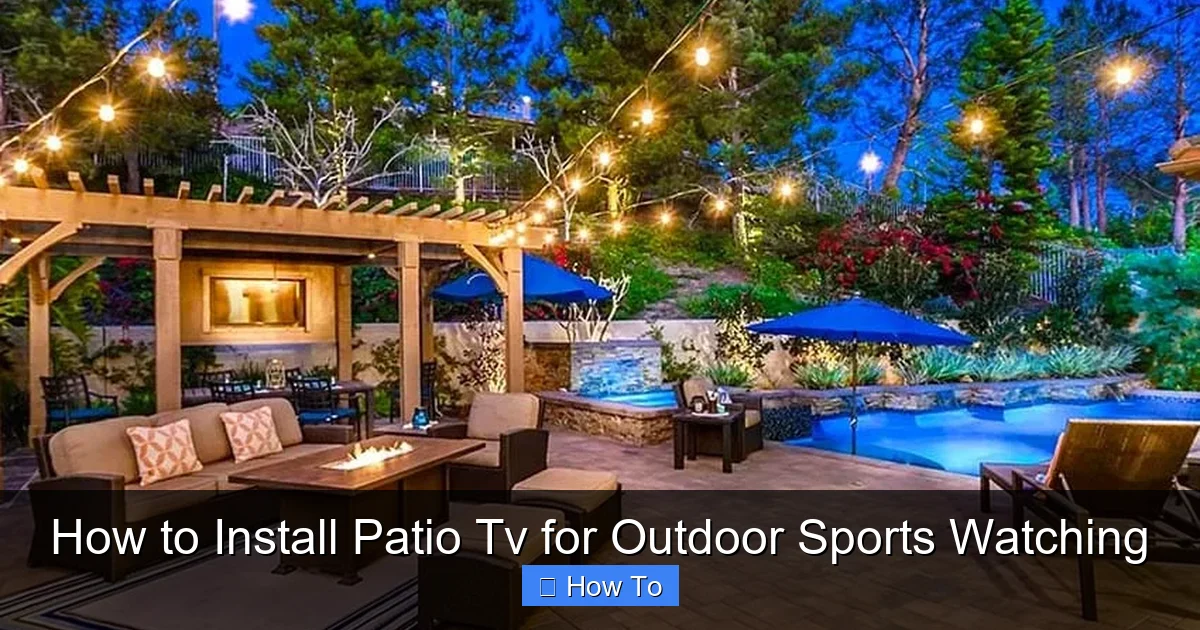
Visual guide about How to Install Patio Tv for Outdoor Sports Watching
Image source: designingidea.com
The foundation of any great outdoor TV setup is the TV itself. But not just any TV will do. Indoor TVs aren’t built to handle the elements—sunlight, humidity, rain, or temperature changes can damage them quickly. That’s why your first step is selecting a TV specifically designed for outdoor use.
Look for Outdoor-Rated Models
Outdoor TVs are engineered with weatherproof enclosures, sealed ports, and UV-resistant screens. Brands like SunBrite, Samsung Terrace, and LG Outdoor are leaders in this space. These TVs often come with an IP rating (like IP55 or IP65), which indicates their resistance to dust and water. An IP55 rating means the TV can withstand low-pressure water jets and dust, making it ideal for covered patios.
Consider Screen Brightness and Anti-Glare
Sunlight can wash out indoor TV screens, making them hard to see during daytime games. Outdoor TVs typically have much higher brightness levels—measured in nits—ranging from 700 to over 2,500 nits. For comparison, most indoor TVs range from 300 to 500 nits. A brighter screen ensures you can still enjoy the action even on a sunny afternoon.
Additionally, look for models with anti-glare or anti-reflective coatings. These reduce reflections from the sun or nearby lights, giving you a clearer picture.
Size Matters—But So Does Viewing Distance
Choose a TV size that fits your space and viewing distance. For a typical patio setup where viewers are 6 to 10 feet away, a 50- to 65-inch TV is ideal. If your seating is farther back, consider a 70-inch or larger model. But remember: bigger isn’t always better if the screen is too close—it can cause eye strain.
Smart Features and Connectivity
Most outdoor TVs come with built-in smart platforms like Roku, Android TV, or webOS, allowing you to stream live sports via apps like ESPN, YouTube TV, or Hulu + Live TV. Make sure your chosen model supports your preferred streaming services and has enough HDMI ports for devices like gaming consoles, soundbars, or cable boxes.
Step 2: Pick the Perfect Location
Where you install your TV is just as important as the TV itself. The right location ensures optimal viewing, protects your investment, and keeps your setup safe.
Choose a Covered Area
Even the best outdoor TVs aren’t meant to be exposed to direct rain or snow. Install your TV under a covered patio, pergola, gazebo, or awning. This provides shade and shelter while still allowing for open-air enjoyment. Avoid placing the TV where it will be hit by sprinklers or garden hoses.
Consider Viewing Angles and Seating
Mount the TV at a height and angle that allows comfortable viewing from your primary seating area. A good rule of thumb is to position the center of the screen at or slightly below eye level when seated—typically between 42 and 60 inches from the ground.
Avoid placing the TV where it will be viewed from extreme angles. If your seating wraps around the space, consider a swivel mount (more on that later) to adjust the screen as needed.
Check for Obstructions
Make sure trees, railings, or outdoor furniture won’t block the view. Also, consider the sun’s path throughout the day. If the TV faces west, it may be hit by harsh afternoon sun, causing glare. Use curtains, retractable shades, or strategic landscaping to minimize this.
Step 3: Install a Weather-Resistant TV Mount
A sturdy, weatherproof mount is essential for safety and performance. Standard indoor mounts aren’t built to withstand outdoor conditions and could fail over time.
Choose an Outdoor-Specific Mount
Look for mounts labeled “outdoor-rated” or “weatherproof.” These are typically made from corrosion-resistant materials like powder-coated steel or aluminum. They also include rubber gaskets and sealed joints to prevent moisture from entering.
Decide on Mount Type
You have several options:
- Fixed Mount: Keeps the TV flush against the wall. Best for permanent, straight-on viewing.
- Tilt Mount: Allows you to angle the TV up or down for better viewing from different heights.
- Full-Motion (Articulating) Mount: Lets you swivel and extend the TV for flexible positioning—great for patios with multiple seating zones.
For most sports fans, a tilt or full-motion mount offers the best versatility.
Secure the Mount Properly
Use a stud finder to locate wall studs or secure the mount to a solid surface like concrete or brick using appropriate anchors. Never mount a TV to drywall or siding alone—it won’t support the weight. If you’re unsure, consult a professional installer.
Allow for Ventilation
Even outdoor TVs generate heat. Leave at least 2–3 inches of space between the TV and the wall for airflow. Don’t cover the TV’s vents or block its cooling system.
Step 4: Run Power and Cables Safely
Powering your outdoor TV requires careful planning to ensure safety and compliance with electrical codes.
Install a Dedicated Outdoor Outlet
Your TV, streaming device, and any accessories will need power. Hire a licensed electrician to install a GFCI (Ground Fault Circuit Interrupter) outlet near your TV. GFCI outlets shut off power instantly if they detect a ground fault, preventing electric shock—especially important in damp outdoor areas.
The outlet should be installed under cover and at least 12 inches above the ground to avoid water exposure.
Use Outdoor-Rated Extension Cords and Surge Protectors
If you need extra length, use a heavy-duty, outdoor-rated extension cord rated for at least 13 amps. Never use indoor cords outside—they can degrade quickly and pose a fire hazard.
Protect your equipment with an outdoor surge protector. Power surges from lightning or grid fluctuations can damage electronics. Look for a protector with a high joule rating (at least 1,000 joules) and weatherproof housing.
Manage Cables with Conduit or Raceways
Exposed cables are unsightly and dangerous. Use PVC conduit or plastic cable raceways to run HDMI, power, and Ethernet cables from the TV to your devices. These protect wires from moisture, pests, and UV damage.
For a cleaner look, consider in-wall cable management if your patio has a wall structure. This requires professional installation but gives a sleek, built-in appearance.
Step 5: Set Up Audio for Maximum Impact
Great picture is only half the experience. Outdoor environments can muffle sound, so you’ll need a solid audio setup to hear every cheer, whistle, and commentator’s call.
Use Outdoor Speakers
Indoor speakers won’t hold up outside. Invest in weatherproof outdoor speakers designed for patios. Options include:
- Rock Speakers: Blend into landscaping and look like natural stones.
- Wall-Mounted Speakers: Attach to walls or posts for directional sound.
- Soundbars: Some outdoor TVs support weatherproof soundbars that mount below the screen.
For immersive sound, consider a 2.1 or 5.1 surround system with a subwoofer (placed under cover).
Connect via Bluetooth or Wired
Many outdoor TVs support Bluetooth audio, allowing you to pair wireless speakers easily. For better sound quality and reliability, use wired connections with outdoor-rated speaker wire.
Position Speakers Strategically
Place speakers at ear level and angle them toward the seating area. Avoid placing them too close to walls or corners, which can cause sound distortion.
Step 6: Ensure Strong Wi-Fi and Streaming
Watching live sports means you need a stable internet connection. Weak Wi-Fi can cause buffering, delays, or dropped signals—ruining the excitement of a close game.
Boost Your Signal with a Wi-Fi Extender
If your patio is far from your router, install a weatherproof Wi-Fi extender or mesh node. These devices amplify your signal and ensure strong coverage outdoors. Place the extender within range of your main router but close enough to the TV.
Use Ethernet for Best Performance
For the most reliable connection, run an outdoor-rated Ethernet cable from your router to the TV. This provides a direct, high-speed link ideal for 4K streaming and live sports.
Test Streaming Apps in Advance
Download and log into your preferred sports apps (ESPN, Fox Sports, YouTube TV, etc.) before game day. Make sure your subscription is active and your account works smoothly.
Step 7: Protect Your TV from the Elements
Even with a covered setup, your TV needs extra protection from dust, insects, and temperature changes.
Use a Weatherproof Cover
When not in use, cover your TV with a fitted, breathable outdoor TV cover. This prevents dust buildup and protects against accidental splashes. Avoid plastic covers that trap moisture—opt for breathable, UV-resistant fabric instead.
Install a Shade or Awning
If your patio isn’t fully covered, consider adding a retractable awning or outdoor shade sail to block direct sunlight. This reduces glare and helps regulate temperature around the TV.
Clean Regularly
Wipe the screen and casing with a soft, dry cloth weekly. Use a mild cleaner if needed, but avoid harsh chemicals or abrasive materials that can scratch the screen.
Step 8: Test and Optimize Before Game Day
Don’t wait until kickoff to discover a problem. Run a full system check a few days before your first outdoor sports event.
Check Picture and Sound Quality
Play a high-motion sports video to test brightness, color, and audio sync. Adjust settings like contrast, backlight, and audio delay if needed.
Test Remote and Voice Controls
Make sure your remote works from various seating positions. If your TV supports voice assistants (like Alexa or Google Assistant), test voice commands for changing channels or adjusting volume.
Verify Internet Speed
Use a speed test app to confirm your connection can handle HD or 4K streaming (at least 25 Mbps for 4K). If speeds are slow, reposition your Wi-Fi extender or switch to Ethernet.
Have a Backup Plan
Keep a portable battery pack or inverter on hand in case of power outages. Also, consider a secondary streaming device (like a Roku or Fire Stick) as a backup.
Troubleshooting Common Issues
Even with careful planning, problems can arise. Here’s how to handle common issues:
TV Won’t Turn On
Check the power outlet with another device. If it works, inspect the power cord and surge protector. Ensure the TV isn’t in standby mode or blocked by a cover.
Poor Picture Quality
Adjust brightness and contrast settings. If the screen is dim, increase the backlight. For glare, reposition the TV or add shading.
Weak or No Sound
Verify audio settings and volume levels. Check speaker connections and ensure Bluetooth is paired correctly.
Wi-Fi Drops During Streams
Move your extender closer to the TV or switch to a wired Ethernet connection. Avoid streaming during peak internet usage times.
Remote Not Working
Replace batteries and ensure there’s no obstruction between the remote and TV. Some outdoor remotes have limited range—stand closer or use a universal remote with better signal strength.
Conclusion
Installing a patio TV for outdoor sports watching is a rewarding project that enhances your home entertainment experience. By choosing an outdoor-rated TV, mounting it securely, protecting it from the elements, and optimizing audio and connectivity, you create a space where friends and family can gather to cheer, celebrate, and enjoy the game—no matter the weather.
Remember, safety and preparation are key. Always use weatherproof components, consult professionals for electrical work, and test your system before the big game. With the right setup, your backyard can become the go-to spot for sports fans everywhere.
So fire up the grill, invite your crew, and get ready to watch every touchdown, three-pointer, and home run in stunning clarity—right from your own patio.

