
This guide walks you through how to install garden TV for outdoor bar safely and effectively. You’ll learn about weatherproofing, mounting, wiring, and optimizing your outdoor entertainment space for year-round use.
Key Takeaways
- Choose a weatherproof outdoor TV: Standard indoor TVs aren’t built for outdoor conditions. Opt for a certified outdoor model designed to withstand rain, humidity, and temperature changes.
- Select the right mounting location: Pick a shaded, protected spot under an awning or pergola to reduce glare and extend TV life. Ensure it’s close to power and signal sources.
- Use outdoor-rated cables and connectors: Regular indoor cables can degrade quickly outdoors. Use UV-resistant, waterproof HDMI and power cables with protective conduits.
- Secure proper power and signal routing: Run cables through weatherproof conduits and use GFCI outlets to prevent electrical hazards. Hide wires for a clean look.
- Test and protect your setup: Always test the TV and connections before finalizing installation. Use surge protectors and consider a weatherproof cover when not in use.
- Enhance with smart features: Pair your outdoor TV with streaming devices, Bluetooth speakers, or voice assistants for a complete outdoor bar experience.
- Maintain regularly: Clean the screen and check seals, cables, and mounts seasonally to ensure long-term performance.
How to Install Garden TV for Outdoor Bar: A Complete Step-by-Step Guide
Imagine sipping a cold drink at your outdoor bar, watching the big game or your favorite show under the stars. With a garden TV installed, your backyard becomes the ultimate entertainment hub. Whether you’re hosting friends for a barbecue or enjoying a quiet evening outdoors, a properly installed outdoor TV adds comfort, convenience, and style.
But installing a TV outside isn’t as simple as mounting it on the wall and plugging it in. Outdoor environments pose unique challenges—rain, sun, dust, temperature swings, and electrical safety risks. That’s why it’s essential to follow a careful, step-by-step process to ensure your garden TV lasts for years and performs reliably.
In this comprehensive guide, you’ll learn how to install garden TV for outdoor bar the right way. We’ll cover everything from choosing the perfect TV and mounting location to running cables safely, protecting against the elements, and enhancing your setup with smart features. By the end, you’ll have a weather-resistant, high-quality outdoor entertainment system that turns your patio or garden bar into a true outdoor living space.
Let’s get started!
Step 1: Choose the Right Outdoor TV
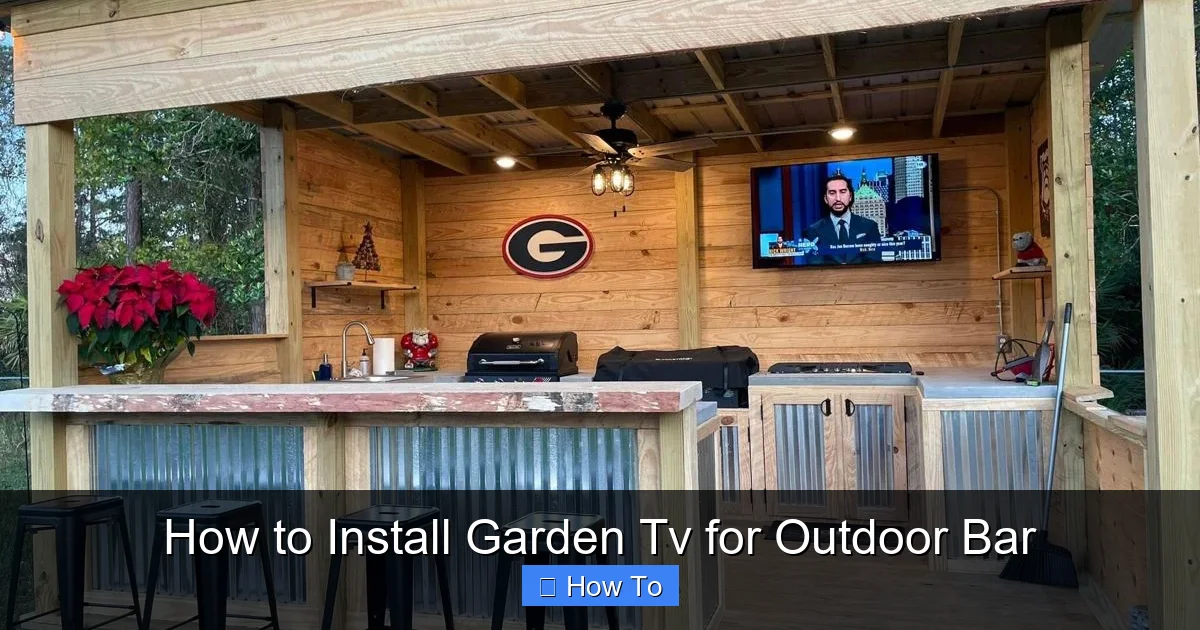
Visual guide about How to Install Garden Tv for Outdoor Bar
Image source: i.pinimg.com
The foundation of a successful outdoor TV installation is selecting the correct television. Not all TVs are created equal—especially when it comes to outdoor use.
Understand the Difference Between Indoor and Outdoor TVs
Standard indoor TVs are not designed to handle outdoor conditions. They lack protection against moisture, extreme temperatures, and UV exposure. Even if you place an indoor TV under a covered patio, condensation, humidity, and temperature fluctuations can damage internal components over time.
Outdoor TVs, on the other hand, are specifically engineered for exterior use. They feature:
– Weatherproof casings: Sealed enclosures prevent water and dust ingress.
– Temperature regulation: Built-in cooling and heating systems maintain optimal operating temperatures.
– Anti-glare screens: Brighter displays with anti-reflective coatings improve visibility in sunlight.
– UV-resistant materials: Prevent yellowing or cracking from sun exposure.
Look for TVs with an IP55 or higher rating, which indicates protection against water jets and dust.
Types of Outdoor TVs
There are two main types of outdoor TVs:
– All-Weather TVs: Fully sealed and rated for permanent outdoor installation. Ideal for uncovered areas or regions with harsh weather.
– Partial-Coverage TVs: Designed for use under covered patios, pergolas, or awnings. They offer some weather resistance but aren’t fully waterproof.
For an outdoor bar, a partial-coverage TV is usually sufficient—especially if your bar area is shaded or covered. However, if your setup is exposed to direct rain or snow, invest in an all-weather model.
Recommended Brands and Models
Some top-rated outdoor TV brands include:
– SunBriteTV: Known for durability and brightness. Models like the SunBriteTV Veranda Series are perfect for covered outdoor spaces.
– Seura: Offers sleek designs with excellent weather resistance. The Seura Outdoor TV is a popular choice for modern outdoor bars.
– SkyVue: Budget-friendly option with solid performance and weatherproofing.
When choosing a size, consider viewing distance. For most outdoor bars, a 43-inch to 55-inch TV provides a great balance of visibility and space efficiency.
Step 2: Pick the Perfect Mounting Location
Where you mount your TV is just as important as the TV itself. The right location ensures optimal viewing, protects the TV, and simplifies wiring.
Consider Sunlight and Glare
Even with an anti-glare screen, direct sunlight can wash out the picture. Avoid mounting the TV where it faces east or west, as morning and afternoon sun can create intense glare.
Instead, position the TV so it faces north or south (in the Northern Hemisphere), or install it under a pergola, awning, or roof overhang. This provides shade and reduces UV exposure.
Ensure Protection from Rain and Wind
Your outdoor bar should ideally be under a covered structure. If not, consider adding a weatherproof canopy or retractable awning. This protects not only the TV but also your seating and bar area.
Avoid mounting the TV near sprinklers, gutters, or areas where water might splash during rain.
Check for Power and Signal Access
Your TV needs power and a signal source (like a cable box, streaming device, or antenna). Choose a location within 10–15 feet of an outdoor electrical outlet and near your Wi-Fi router or cable line.
If your outdoor bar is far from the house, you may need to extend wiring or use a wireless HDMI transmitter (more on that later).
Mounting Height and Viewing Angle
Mount the TV at eye level when seated. For an outdoor bar, this is typically 42 to 48 inches from the floor to the center of the screen.
Use a tilting or full-motion outdoor mount to adjust the angle for different seating positions. This is especially helpful if your bar has high stools or lounge chairs at varying heights.
Step 3: Select the Right Mount and Install It Securely
A sturdy, weatherproof mount is essential for safety and performance.
Choose an Outdoor-Rated TV Mount
Standard indoor mounts aren’t built to withstand outdoor conditions. Look for mounts labeled “outdoor use” or “weatherproof.” These are made from rust-resistant materials like powder-coated aluminum or stainless steel.
Popular options include:
– Full-motion mounts: Allow you to swivel and tilt the TV for flexible viewing.
– Fixed mounts: Keep the TV flush against the wall—great for windy areas.
– Tilting mounts: Let you angle the TV downward to reduce glare.
Ensure the mount is compatible with your TV’s VESA pattern (the spacing of the mounting holes on the back of the TV).
Prepare the Mounting Surface
Most outdoor bars are built with wood, brick, or concrete walls. Each requires a different installation approach:
– Wood: Use lag bolts to secure the mount directly into wall studs. Pre-drill holes to prevent splitting.
– Brick or concrete: Use masonry anchors and a hammer drill. Apply silicone sealant around the anchor holes to prevent water infiltration.
– Metal framing: Use self-tapping screws designed for metal studs.
Always use a level to ensure the mount is straight before tightening.
Install the Mount Step-by-Step
1. Mark the desired height and center point on the wall.
2. Hold the mount in place and use a level to adjust.
3. Drill pilot holes according to the mount’s template.
4. Secure the mount with appropriate fasteners.
5. Apply waterproof sealant around all screw heads and edges.
6. Let the sealant dry completely before attaching the TV.
Never skip the sealing step—water can seep behind the mount and damage the wall or TV.
Step 4: Run Power and Signal Cables Safely
Running cables outdoors requires extra care to prevent damage and ensure safety.
Use Outdoor-Rated Cables
Standard indoor cables aren’t UV-resistant and can crack or degrade when exposed to sunlight and weather. Always use:
– Outdoor HDMI cables: Look for “direct burial” or “UV-resistant” labels.
– Outdoor power cords: Use heavy-duty, weatherproof extension cords rated for exterior use.
– Ethernet cables (if needed): Choose Cat6 or Cat6a with UV protection for wired internet.
Avoid using multiple extension cords. Instead, run a single, properly rated cable from the outlet to the TV.
Protect Cables with Conduit
To prevent tripping hazards and protect cables from damage, run them through a waterproof electrical conduit. PVC or flexible metal conduit works well.
Route the conduit along the wall, under the bar, or through the ground (if burying). Use conduit clips to secure it every 18–24 inches.
For underground runs, bury the conduit at least 18 inches deep and use a conduit sleeve at entry points.
Connect to a GFCI Outlet
Outdoor electrical outlets must be GFCI (Ground Fault Circuit Interrupter) protected to prevent shocks. If your outlet isn’t GFCI, have a licensed electrician install one.
Plug the TV and any accessories (like a streaming box) into a weatherproof outlet cover or outdoor power strip with surge protection.
Hide and Organize Cables
Use cable raceways, cord covers, or paintable cable channels to hide wires along the wall. This keeps your outdoor bar looking clean and professional.
Label each cable at both ends (e.g., “HDMI 1,” “Power”) to make troubleshooting easier.
Step 5: Connect and Test Your TV
Once everything is wired, it’s time to connect and test your setup.
Attach the TV to the Mount
With help from a friend, lift the TV and hook it onto the mount. Double-check that all locking mechanisms are secure.
Connect Power and Signal Sources
Plug in the power cable and connect your HDMI, antenna, or streaming device. If using a soundbar or external speakers, connect them now.
Power On and Configure
Turn on the TV and follow the on-screen setup guide. Connect to Wi-Fi, update software, and test all inputs.
Check for:
– Clear picture and sound
– Stable internet connection (if streaming)
– Proper HDMI input switching
Adjust Picture Settings for Outdoor Use
Outdoor lighting affects picture quality. Go into the TV’s settings and:
– Increase brightness and contrast
– Enable “Outdoor Mode” if available
– Adjust color temperature for natural tones
Some outdoor TVs have built-in ambient light sensors that auto-adjust brightness—make sure this feature is enabled.
Step 6: Enhance Your Outdoor Bar Setup
Your garden TV is installed—now make it even better with smart upgrades.
Add a Streaming Device
Even if your TV is smart, a dedicated streaming device like a Roku, Apple TV, or Amazon Fire Stick offers better performance and more apps.
Mount it behind the TV or in a nearby weatherproof enclosure.
Upgrade Your Audio
Built-in TV speakers often sound tinny outdoors. Consider:
– Outdoor Bluetooth speakers: Wireless and weather-resistant. Place them on the bar or mount them on posts.
– Weatherproof soundbar: Designed for outdoor use with enhanced bass and clarity.
– Wireless headphones: For private listening without disturbing others.
Install Smart Lighting
Add LED strip lights under the bar or around the TV for ambiance. Use smart bulbs or strips you can control via app or voice assistant.
Use a Voice Assistant
Pair your setup with Alexa or Google Assistant. Control the TV, lights, and music with voice commands—perfect for hands-free entertaining.
Step 7: Protect and Maintain Your Garden TV
Regular maintenance ensures your outdoor TV lasts for years.
Clean the Screen and Housing
Wipe the screen weekly with a microfiber cloth and mild cleaner. Avoid ammonia-based products.
Clean the exterior with a damp cloth and mild soap to remove dust, pollen, and grime.
Inspect Seals and Cables
Check the TV’s seals, mount, and cable connections every few months. Look for cracks, loose fittings, or corrosion.
Reapply sealant if needed.
Use a Weatherproof Cover
When the TV isn’t in use—especially during winter or storms—cover it with a breathable, waterproof TV cover. This prevents moisture buildup and UV damage.
Surge Protection
Install a whole-house surge protector or use a high-quality outdoor power strip to protect against lightning and power surges.
Troubleshooting Common Issues
Even with careful installation, problems can arise. Here’s how to fix common issues:
No Signal or Poor Picture Quality
– Check all cable connections.
– Ensure the HDMI cable is outdoor-rated and not damaged.
– Test with a different device or cable.
TV Won’t Turn On
– Verify the outlet has power (test with another device).
– Check the GFCI outlet—press the “Reset” button.
– Inspect the power cable for damage.
Wi-Fi Connection Drops
– Move the router closer or use a Wi-Fi extender.
– Switch to a 5GHz band for less interference.
– Consider a wired Ethernet connection via outdoor-rated cable.
Screen Glare or Washed-Out Colors
– Adjust the TV’s picture settings.
– Reposition the TV to avoid direct sunlight.
– Install a glare-reducing screen protector.
Moisture Inside the TV
– This indicates a seal failure. Power off immediately.
– Contact the manufacturer—most outdoor TVs have warranties covering weather damage.
Conclusion
Installing a garden TV for your outdoor bar transforms your space into a year-round entertainment destination. By choosing a weatherproof TV, mounting it securely, running cables safely, and maintaining it properly, you’ll enjoy crystal-clear viewing in any season.
Remember, the key to success is planning. Take time to select the right equipment, protect against the elements, and test everything before finalizing your setup. With the steps in this guide, you’re well on your way to creating an outdoor oasis where friends and family can gather, relax, and enjoy great content under the open sky.
So grab your tools, follow this guide, and get ready to elevate your outdoor bar experience. Your perfect garden TV setup is just a few steps away.

