
Transform your outdoor space into an entertainment hub with a backyard TV setup designed for large patios. This guide walks you through selecting the right TV, mounting it safely, running cables, and protecting it from the elements—all while ensuring great picture and sound.
Key Takeaways
- Choose an outdoor-rated TV: Standard indoor TVs aren’t built for weather, so invest in a weatherproof or outdoor-specific model designed for patios and decks.
- Pick the right mounting location: Ensure the screen is visible from all seating areas, protected from direct sunlight and rain, and securely attached to a sturdy wall or structure.
- Use weatherproof cables and enclosures: Protect HDMI, power, and audio cables with conduit, waterproof boxes, and outdoor-rated connectors to prevent damage.
- Optimize audio with outdoor speakers: Built-in TV speakers often lack volume outdoors—add weather-resistant speakers for clear, immersive sound.
- Plan for power and signal sources: Run power safely from a GFCI outlet and consider wireless streaming devices to reduce cable clutter.
- Test and maintain regularly: Check connections, clean the screen, and inspect seals seasonally to keep your setup running smoothly year-round.
- Consider a retractable or portable option: If permanent installation isn’t ideal, explore motorized lifts or portable outdoor TVs for flexibility.
How to Install Backyard TV for Large Patio
Imagine hosting summer barbecues, movie nights under the stars, or watching the big game with friends—all from the comfort of your spacious backyard patio. With the right setup, your outdoor space can become the ultimate entertainment zone. Installing a backyard TV for a large patio isn’t just about hanging a screen outside; it’s about creating a durable, weather-resistant, and high-performing system that enhances your outdoor lifestyle.
In this comprehensive guide, you’ll learn everything you need to know to install a backyard TV safely and effectively. We’ll cover how to choose the right TV, select the best mounting location, run cables without creating hazards, protect your equipment from the elements, and optimize audio and video quality. Whether you’re a DIY enthusiast or working with a contractor, these step-by-step instructions will help you build a setup that lasts.
By the end of this guide, you’ll have a fully functional outdoor entertainment system that’s ready for year-round use—rain or shine.
Step 1: Choose the Right Outdoor TV
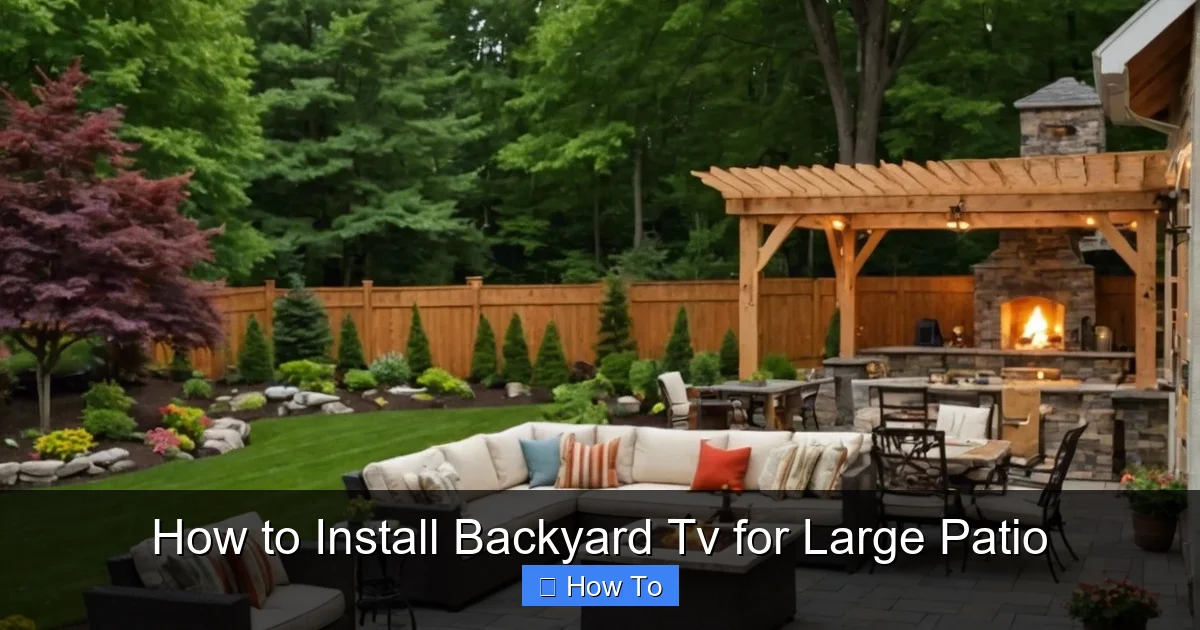
Visual guide about How to Install Backyard Tv for Large Patio
Image source: toolzgeek.com
The foundation of any great backyard TV setup is the television itself. Not all TVs are created equal, especially when it comes to outdoor use. Indoor TVs may seem like a budget-friendly option, but they’re not built to withstand humidity, temperature swings, dust, or UV exposure. Using one outdoors can lead to overheating, screen damage, or even electrical hazards.
Outdoor-Rated vs. Indoor TVs
Outdoor TVs are specifically engineered for exterior environments. They feature:
– Weatherproof casings that protect internal components from rain, snow, and dust.
– Temperature-regulated cooling systems to prevent overheating in direct sunlight.
– Anti-glare screens that maintain visibility even on bright days.
– Vandal-resistant designs in some models, ideal for public or high-traffic areas.
Popular brands like SunBriteTV, Samsung Terrace, and Seura offer full-outdoor models with brightness levels exceeding 2,000 nits—far brighter than typical indoor TVs (which average 300–500 nits). This ensures a clear picture even at noon.
Partial-Shade vs. Full-Sun Models
Outdoor TVs are categorized based on their intended placement:
– Partial-shade models are ideal for covered patios, pergolas, or areas with some overhead protection. They’re more affordable and still offer excellent durability.
– Full-sun models are built for open, unprotected areas. They have enhanced brightness, superior cooling, and stronger UV protection—but come at a higher price.
For a large patio, assess how much direct sunlight the TV will receive. If your seating area is under a roof or awning, a partial-shade model may suffice. But if the screen will be exposed to full sun for several hours a day, invest in a full-sun TV to avoid washed-out images.
Screen Size and Viewing Distance
On a large patio, you’ll likely have multiple seating zones—loungers, dining tables, and fire pits. To ensure everyone gets a great view, choose a screen size based on the farthest viewing distance.
A good rule of thumb:
– For every 1.5 feet of viewing distance, use 1 inch of screen size.
– So, if your farthest seat is 15 feet away, a 75-inch TV is ideal.
Larger screens also help combat glare and improve immersion. Consider a 65-inch or 75-inch model for most large patios.
Step 2: Select the Best Mounting Location
Where you mount your TV is just as important as the TV itself. A poor location can lead to glare, obstructed views, or exposure to water—ruining the experience and potentially damaging your equipment.
Assess Sunlight and Glare
Direct sunlight is the enemy of outdoor TVs, even weatherproof ones. Over time, UV rays can degrade screen coatings and cause discoloration. Plus, glare makes it hard to see the picture.
To minimize glare:
– Mount the TV on a north- or east-facing wall (in the Northern Hemisphere) to avoid harsh afternoon sun.
– Avoid west-facing walls, which receive intense evening sunlight.
– Use a pergola, awning, or retractable shade to provide overhead coverage.
If you can’t avoid direct sun, consider a TV with an anti-reflective coating or install a glare-reducing screen protector.
Ensure Clear Sightlines
Walk around your patio and sit in each seating area. Can you see the proposed TV location without craning your neck or leaning forward? Are there trees, railings, or furniture blocking the view?
For large patios, consider mounting the TV at a slight angle or using a swivel mount so it faces multiple zones. A full-motion wall mount allows you to adjust the screen for different events—like turning it toward the grill during a cookout or the fire pit at night.
Check for Structural Support
The wall or structure you mount to must be strong enough to hold the TV and withstand wind, vibration, and weight. Avoid mounting to thin wood siding, vinyl, or hollow walls unless you reinforce them.
Ideal mounting surfaces include:
– Concrete or brick walls
– Solid wood beams
– Steel-framed pergolas
– Reinforced outdoor cabinets
Use a stud finder to locate solid supports. For concrete, use masonry anchors. For wood, lag bolts into studs. Never rely on drywall anchors or plastic screws for outdoor TVs—they can fail under stress.
Protect from Rain and Sprinklers
Even with a weatherproof TV, avoid placing it where rain can directly hit the screen or run down the wall behind it. If your patio has sprinklers, ensure the spray pattern doesn’t reach the TV.
Mount the TV under an eave, roof overhang, or pergola with a waterproof cover. If that’s not possible, install a weatherproof hood or visor above the screen to deflect water.
Step 3: Choose the Right Mount and Install It
A sturdy, properly installed mount is critical for safety and performance. A falling TV can cause injury or property damage—especially in windy conditions.
Types of Outdoor TV Mounts
– Fixed mounts: Hold the TV flush against the wall. Best for permanent setups with no need to adjust the angle.
– Tilting mounts: Allow you to angle the screen up or down to reduce glare and improve viewing.
– Full-motion (articulating) mounts: Let you pull the TV away from the wall and swivel it left or right. Ideal for large patios with multiple seating areas.
For most large patios, a full-motion mount offers the most flexibility. Just ensure it’s rated for outdoor use and can support your TV’s weight and size.
Installation Steps
1. Turn off power to the area to avoid electrical hazards.
2. Mark the mounting holes on the wall using a level and tape measure. Double-check alignment.
3. Drill pilot holes into studs or use masonry bits for concrete.
4. Secure the mount with lag bolts or concrete anchors. Use a torque wrench to avoid over-tightening.
5. Attach the TV brackets to the back of the TV using the provided screws.
6. Hang the TV on the mount and lock it in place. Have a helper assist—TVs can be heavy and awkward to handle.
Always follow the manufacturer’s instructions. Some outdoor mounts require additional weatherproofing, like silicone seals around bolt holes.
Step 4: Run and Protect Cables
Exposed cables are not only unsightly—they’re a tripping hazard and vulnerable to weather damage. Proper cable management is essential for safety and longevity.
Plan Your Cable Route
Map out the path from your TV to the power source, streaming device, and audio system. Keep cables as short as possible to reduce signal loss and clutter.
Common connections include:
– Power cable
– HDMI (to streaming box, cable box, or game console)
– Audio cable (if using external speakers)
– Ethernet (for wired internet, if needed)
Use Outdoor-Rated Cables
Standard indoor cables aren’t designed for moisture, UV exposure, or temperature changes. Use:
– Outdoor HDMI cables with UV-resistant jackets and corrosion-proof connectors.
– Weatherproof power cords rated for exterior use (look for “SJTW” or “SJTOW” labels).
– Ethernet cables with waterproof shielding if running underground or through conduit.
Avoid cheap, unshielded cables—they can degrade quickly and cause signal issues.
Protect Cables with Conduit or Raceway
Run cables through:
– PVC conduit: Bury it underground or attach it to the wall. Ideal for long runs or areas with foot traffic.
– Surface-mounted raceway: A plastic or metal channel that hides cables along walls. Easy to install and access for future upgrades.
– Weatherproof junction boxes: Use these where cables enter the wall or connect to devices. Seal all openings with silicone caulk.
Never staple cables directly to outdoor surfaces—this can damage insulation and create fire risks.
Connect to a GFCI Outlet
Outdoor electrical outlets must be protected by a Ground Fault Circuit Interrupter (GFCI). This shuts off power if it detects a fault, preventing shocks.
If your patio doesn’t have a GFCI outlet, hire a licensed electrician to install one. Never use extension cords as a permanent solution—they’re not rated for continuous outdoor use.
Step 5: Set Up Streaming and Audio
A great picture is only half the experience. To fully enjoy your backyard TV, you’ll need reliable streaming and quality sound.
Choose a Streaming Device
Most outdoor TVs don’t have built-in smart features, so add a streaming box like:
– Roku Ultra (weather-resistant case available)
– Apple TV 4K (use in a weatherproof enclosure)
– Fire TV Stick 4K Max (compact and powerful)
Mount the device in a weatherproof outdoor media box near the TV. These enclosures protect electronics from rain and dust while allowing infrared or Wi-Fi signals to pass through.
Optimize Wi-Fi Signal
Weak Wi-Fi is a common issue outdoors. To boost signal:
– Install a weatherproof Wi-Fi extender on the patio.
– Use a mesh network system with outdoor nodes.
– Run an Ethernet cable from your router to the TV area for a wired connection (most reliable).
Test your connection before finalizing the setup. Buffering ruins the fun.
Add Outdoor Speakers
TV speakers are usually too quiet for open spaces. Enhance audio with:
– Weather-resistant wireless speakers (like Sonos Move or Bose SoundLink)
– Outdoor rock speakers that blend into landscaping
– In-wall or in-ceiling speakers for a clean, permanent setup
Place speakers near seating areas, angled toward listeners. Use a Bluetooth transmitter or audio receiver to connect to the TV.
For large patios, consider a multi-zone audio system so you can play music in different areas simultaneously.
Step 6: Weatherproof and Secure the Setup
Even with a weatherproof TV, extra protection ensures long-term reliability.
Seal All Connections
Apply silicone sealant around:
– Wall penetrations
– Cable entry points
– Mounting bracket edges
This prevents water from seeping behind the TV or into the wall.
Use a TV Cover When Not in Use
A fitted outdoor TV cover protects the screen from dust, bird droppings, and UV damage. Choose a breathable, waterproof material that doesn’t trap moisture.
Install a Surge Protector
Power surges from lightning or grid fluctuations can fry electronics. Use a heavy-duty outdoor surge protector with indicator lights to monitor protection status.
Anchor Loose Components
Secure speakers, streaming boxes, and cables so they don’t blow away in strong winds. Use zip ties, clips, or mounting brackets.
Troubleshooting Common Issues
TV Won’t Turn On
– Check the GFCI outlet—press the “reset” button.
– Ensure the power cord is fully plugged in.
– Test the outlet with another device.
Poor Picture Quality
– Clean the screen with a microfiber cloth and screen-safe cleaner.
– Adjust brightness and contrast settings for outdoor viewing.
– Check HDMI connections and replace damaged cables.
Weak or No Sound
– Verify audio settings on the TV and streaming device.
– Ensure speakers are powered and paired correctly.
– Test with a different audio source.
Wi-Fi Drops Frequently
– Move the extender closer to the router or TV.
– Switch to a less congested Wi-Fi channel.
– Consider a wired Ethernet connection.
TV Overheats
– Ensure ventilation around the TV—don’t block vents.
– Install in a shaded area or add a cooling fan.
– Avoid running the TV continuously in extreme heat.
Conclusion
Installing a backyard TV for a large patio is a rewarding project that transforms your outdoor space into a year-round entertainment destination. By choosing a weatherproof TV, mounting it securely, protecting cables, and optimizing audio and streaming, you create a setup that’s both functional and durable.
Remember, safety and preparation are key. Invest in quality components, follow best practices for weatherproofing, and don’t hesitate to consult professionals for electrical or structural work. With the right approach, your backyard TV will deliver crystal-clear pictures, rich sound, and endless enjoyment—rain or shine.
Now grab your tools, gather your friends, and get ready to enjoy movie nights, sports games, and backyard parties like never before.

