
Hiding cables outside your TV on a small patio doesn’t have to be complicated. With the right tools and techniques, you can keep wires out of sight, protect them from weather, and maintain a clean, safe outdoor entertainment area. This guide walks you through simple, effective methods to conceal and secure cables for a polished look.
Key Takeaways
- Choose weather-resistant cable management products: Use outdoor-rated raceways, conduits, and clips to protect cables from rain, sun, and temperature changes.
- Plan your cable route before installation: Map out the shortest, safest path from your TV to power sources and devices to minimize exposure and tripping hazards.
- Use cable raceways for a clean, hidden look: Surface-mounted raceways blend with walls and railings, offering an easy way to conceal multiple cables.
- Secure loose wires with zip ties and adhesive clips: Keep cables tidy and prevent sagging or damage from wind or foot traffic.
- Consider in-wall solutions for permanent setups: If your patio has siding or drywall, running cables inside walls provides the most discreet option.
- Label and organize cables for easy maintenance: Use color-coded tags or labels so you can quickly identify and replace wires when needed.
- Prioritize safety and code compliance: Always use GFCI outlets and avoid overloading circuits to prevent electrical hazards.
How to Hide Cables Outside TV for Small Patio
Setting up an outdoor TV on your small patio is a fantastic way to enjoy movies, sports, and shows under the stars. But one common challenge? The messy tangle of cables snaking across your deck, railing, or wall. Not only do exposed wires look unappealing, but they can also pose tripping hazards and get damaged by weather, pets, or foot traffic.
The good news? You don’t need to be an electrician or spend a fortune to solve this problem. With a few smart strategies and the right tools, you can hide cables outside your TV and create a clean, safe, and stylish outdoor entertainment zone. Whether you’re working with a balcony, a compact backyard patio, or a screened-in porch, this guide will show you step-by-step how to manage and conceal your cables effectively.
In this comprehensive how-to guide, you’ll learn:
- How to assess your patio layout and plan the best cable route
- The best outdoor cable management products for small spaces
- Step-by-step instructions for installing raceways, conduits, and clips
- Tips for weatherproofing and protecting your cables
- Safety considerations and common mistakes to avoid
- Creative DIY solutions for tight or tricky spaces
By the end, your patio will look neat, professional, and ready for movie night—without a single visible wire in sight.
Step 1: Assess Your Patio Layout and Cable Needs
Before you buy any products or start drilling holes, take a few minutes to evaluate your space. Every patio is different, and the best cable-hiding solution depends on your setup, available surfaces, and the number of devices you’re connecting.
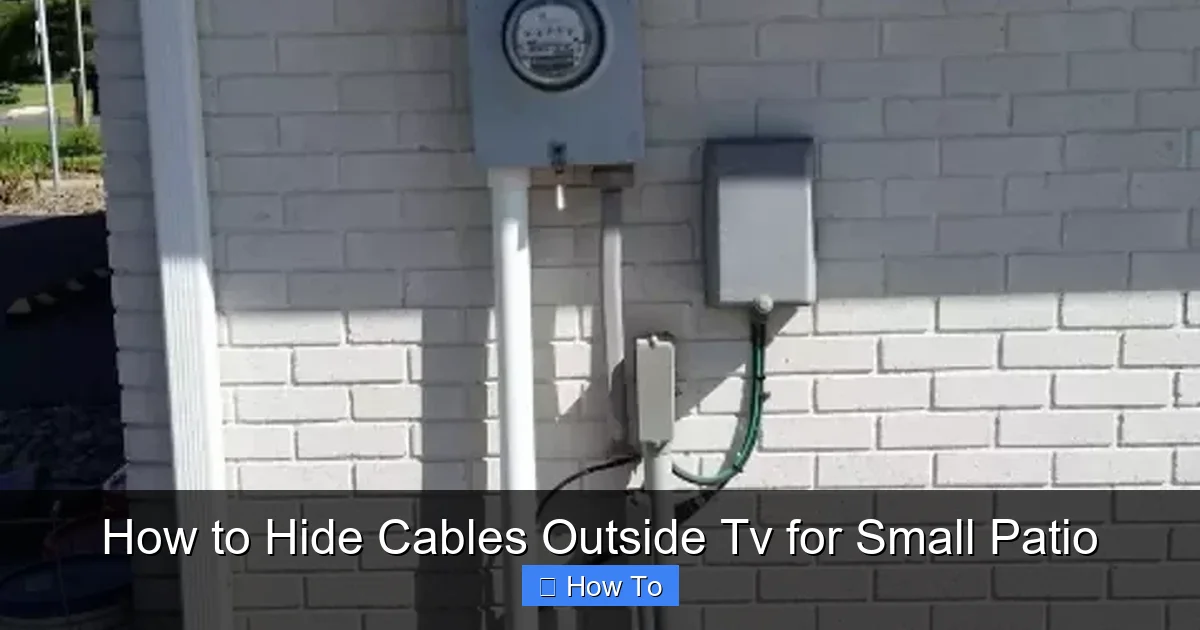
Visual guide about How to Hide Cables Outside Tv for Small Patio
Image source: cdn-fastly.hometalk.com
Identify Your Devices and Power Sources
Start by listing all the equipment connected to your outdoor TV. Common items include:
- Streaming devices (like Roku, Apple TV, or Fire Stick)
- Soundbars or outdoor speakers
- Game consoles
- Power strips or surge protectors
- Wi-Fi extenders or outdoor routers
Each of these requires a power cable and possibly HDMI or audio cables. Count the total number of cables you’ll need to manage. This will help you choose the right size and type of cable management system.
Map Out the Cable Route
Walk from your TV to the nearest power outlet, noting any obstacles like railings, furniture, or plants. Look for the shortest and safest path. Ideally, you want to:
- Avoid high-traffic areas where people walk
- Keep cables away from water sources (like sprinklers or pools)
- Minimize exposure to direct sunlight, which can degrade plastic over time
If your TV is mounted on a wall, consider running cables vertically down the wall and then horizontally along the baseboard or under a railing. For freestanding TVs on a stand, you might route cables behind furniture or along the edge of the patio.
Check for Existing Conduits or Channels
Some patios come with built-in cable channels, especially in newer constructions or screened porches. Look for grooves in the wall, under decking, or along railings. If you find one, you’re in luck—this can simplify your installation.
If not, don’t worry. There are plenty of surface-mounted options that don’t require major renovations.
Step 2: Choose the Right Cable Management Products
Not all cable organizers are created equal—especially when it comes to outdoor use. You need products that can withstand rain, UV rays, temperature swings, and physical wear. Here are the best options for small patios.
Outdoor Cable Raceways
Cable raceways are one of the most popular and effective solutions. These are plastic or metal channels that attach to walls, railings, or posts and hold multiple cables inside. They come in various sizes and colors to match your patio’s style.
Why they’re great:
- Easy to install with screws or adhesive
- Hide multiple cables in one sleek channel
- Available in white, black, gray, and wood-grain finishes
- Weather-resistant and UV-protected
For small patios, choose a raceway that’s 1–2 inches wide. Look for models with a snap-on cover for easy access when you need to add or remove cables.
Flexible Conduit Tubing
If you need to run cables around corners or under furniture, flexible conduit is a smart choice. This corrugated plastic tubing bends easily and protects wires from moisture and abrasion.
Best for:
- Running cables under outdoor rugs or decking
- Protecting wires near water features
- Creating a clean path along curved railings
Use conduit with a diameter large enough to fit all your cables with room to spare. Avoid overstuffing, as this can make future upgrades difficult.
Adhesive Cable Clips and Zip Ties
For quick, temporary fixes, adhesive clips and zip ties are handy. They’re perfect for bundling loose wires or securing cables to railings, posts, or under tables.
Tips for use:
- Choose outdoor-rated adhesive clips with strong bonding (look for 3M VHB tape)
- Use UV-resistant zip ties to prevent brittleness
- Don’t overtighten zip ties—this can damage cables
These are best for light-duty use or as supplementary support alongside raceways.
In-Wall Cable Kits (For Permanent Setups)
If your patio has drywall, siding, or wood paneling, consider an in-wall cable management kit. These allow you to run HDMI and power cables inside the wall for a completely hidden look.
What’s included:
- Wall plates for TV and outlet sides
- Flexible tubing to guide cables through walls
- Mounting hardware and instructions
This is a more advanced option and may require drilling, but it’s ideal if you want a professional, clutter-free finish.
Step 3: Install Cable Raceways (Step-by-Step)
Cable raceways are the go-to solution for most small patios. They’re affordable, easy to install, and provide excellent protection. Here’s how to install them properly.
Gather Your Tools and Materials
You’ll need:
- Outdoor cable raceway (cut to length or adjustable)
- Measuring tape
- Pencil or marker
- Drill and screws (or heavy-duty adhesive)
- Level
- Utility knife or saw (if cutting raceway)
- Cable ties (optional, for bundling inside)
Measure and Cut the Raceways
Measure the distance from your TV to the power source. Add a few extra inches for flexibility. If your raceway isn’t pre-cut, use a utility knife or hacksaw to trim it to size. Most plastic raceways score and snap easily.
Mark the Installation Path
Use a pencil to mark where the raceway will go. Start at the TV and follow your planned route. Use a level to ensure straight lines—this keeps the final look clean and professional.
Attach the Raceways
There are two main ways to secure raceways:
Option 1: Screw Mounting (Most Secure)
- Drill pilot holes at the marked spots
- Align the raceway base and screw it into place
- Space screws every 12–18 inches for stability
Option 2: Adhesive Mounting (No Drilling)
- Clean the surface with rubbing alcohol
- Apply outdoor-rated adhesive strips to the back of the raceway
- Press firmly and hold for 30 seconds
- Wait 24 hours before loading cables
Adhesive is great for railings, glass, or painted surfaces, but screws are better for long-term durability.
Route and Secure the Cables
Open the raceway cover and lay your cables inside. Bundle them loosely with zip ties if needed—don’t pull too tight. Close the cover and snap it shut.
If you’re running multiple cables, consider labeling them with colored tape or tags. This makes troubleshooting easier later.
Step 4: Use Conduit for Tight or Exposed Areas
For areas where raceways won’t fit—like under a deck, around a corner, or along a curved railing—flexible conduit is your best friend.
Cut and Bend the Conduit
Measure the path and cut the conduit to length. Most types can be bent by hand or with a conduit bender. Avoid sharp kinks, as they can restrict cable movement.
Thread the Cables
Use a fish tape or string to pull cables through the conduit. If you’re adding cables later, leave a pull string inside for future use.
Secure the Conduit
Attach the conduit to surfaces using outdoor clips or straps. Space them every 12–18 inches. For under-deck runs, use UV-resistant zip ties to hang the conduit from joists.
Tip: Paint the conduit to match your deck or railing for a seamless look.
Step 5: Hide Cables Under Furniture or Rugs
Sometimes the simplest solution is the best. If your TV is near a couch, bench, or outdoor rug, you can route cables underneath.
Use Furniture as a Shield
Place your TV stand or media console against the wall and run cables behind it. Use adhesive clips to guide wires along the back legs or underside of the furniture.
Lift Outdoor Rugs
If you have a patio rug, lift one corner and tuck cables underneath. Use a flat conduit or raceway to prevent tripping. Make sure the rug lies flat and doesn’t create a bump.
Caution: Avoid running power cables under rugs in high-traffic areas. This can cause overheating or wear.
Step 6: Weatherproof and Protect Your Cables
Outdoor cables face harsh conditions. Rain, snow, heat, and UV rays can degrade insulation and connectors over time. Protect them with these tips.
Use Outdoor-Rated Cables
Never use indoor cables outside. Look for labels like “outdoor,” “weather-resistant,” or “UV-protected.” These are designed to withstand moisture and sunlight.
Seal Connections with Electrical Tape or Heat Shrink
Wrap cable joints and plugs with waterproof electrical tape or use heat shrink tubing. This prevents water from seeping in.
Install a GFCI Outlet
Ground Fault Circuit Interrupter (GFCI) outlets shut off power if they detect a leak—essential for outdoor safety. Have one installed by a licensed electrician if you don’t already have it.
Use a Weatherproof Enclosure for Power Strips
If you’re using a power strip, place it in a waterproof outdoor junction box. These are available at hardware stores and keep electronics dry and safe.
Step 7: Organize and Label for Easy Maintenance
A clean setup isn’t just about looks—it’s about function. Organized cables are easier to troubleshoot, upgrade, or replace.
Bundle Cables Neatly
Use Velcro straps or reusable zip ties to group cables by function (e.g., power, audio, video). Avoid duct tape—it leaves residue and degrades outdoors.
Label Each Cable
Use colored tape, tags, or labels to mark each wire. For example:
- Red = Power
- Blue = HDMI
- Green = Audio
This saves time when you need to unplug or swap devices.
Create a Cable Map
Take a photo or sketch of your setup. Note where each cable goes and how it’s routed. Store this with your TV manual for future reference.
Troubleshooting Common Issues
Even with the best planning, problems can arise. Here’s how to fix common cable-hiding challenges.
Cables Keep Popping Out of Raceways
This usually happens if the raceway is too small or the cables are too stiff. Solution: Upgrade to a wider raceway or use a flexible conduit for tight bends.
Adhesive Clips Keep Falling Off
Outdoor adhesives can fail in heat or humidity. Fix: Clean the surface thoroughly, use 3M VHB tape, or switch to screw-mounted clips.
Water Is Getting Into the Raceways
If you see condensation or moisture inside, your raceway isn’t sealed. Solution: Use silicone caulk to seal the ends and seams, or switch to a fully enclosed conduit.
Tripping Hazard Persists
If cables still cross walkways, reroute them under furniture or use a low-profile raceway. Never leave loose wires on the ground.
Signal Loss After Installation
Bending HDMI cables too tightly can damage internal wires. Check for sharp kinks and replace damaged cables. Use HDMI extenders or wireless transmitters if needed.
Creative DIY Solutions for Small Patios
Don’t have the budget for commercial products? Try these clever DIY hacks.
Pvc Pipe Cable Cover
Cut a PVC pipe in half lengthwise and screw it to the wall. Paint it to match your patio. It’s cheap, durable, and hides cables effectively.
Hanging Basket Cable Hider
Use a decorative hanging basket or planter to conceal a power strip. Route cables through the bottom and let the plants do the rest.
Rope or Twine Wrap
Wrap cables in outdoor rope or jute twine for a rustic look. Secure with knots or clips. This won’t protect from weather but adds style.
Safety Tips You Can’t Ignore
Outdoor electrical setups come with risks. Follow these safety rules to protect yourself and your equipment.
- Always turn off power before working on cables
- Use only outdoor-rated extension cords and surge protectors
- Never overload outlets or power strips
- Keep cables away from pools, sprinklers, and damp areas
- Have a licensed electrician inspect your setup annually
Conclusion
Hiding cables outside your TV on a small patio is totally achievable—even if you’re not a DIY expert. With the right tools, a little planning, and attention to safety, you can create a clean, professional-looking outdoor entertainment space that’s both functional and beautiful.
Start by assessing your layout and choosing weather-resistant products like raceways or conduit. Install them carefully, protect your cables from the elements, and keep everything organized with labels and bundles. And remember: safety always comes first.
Once your cables are hidden, you can sit back, relax, and enjoy your favorite shows under the open sky—without a single wire in sight.

