
Want a clean, safe deck setup for your backyard TV? This guide shows you how to hide cables neatly using weatherproof channels, conduits, and smart routing. Enjoy a clutter-free outdoor entertainment space without tripping hazards or exposed wires.
Key Takeaways
- Plan your cable route first: Map out the shortest, safest path from your TV to power and signal sources to minimize exposure and damage risk.
- Use weatherproof cable management: Always choose outdoor-rated raceways, conduits, and covers designed to withstand rain, sun, and temperature changes.
- Secure cables along deck railings or under boards: Attach wires discreetly using clips, zip ties, or hidden channels to maintain a clean look.
- Protect connections with outdoor enclosures: Seal power and signal junctions in waterproof boxes to prevent corrosion and short circuits.
- Test everything before finalizing: Ensure audio, video, and power work properly after installation to avoid rework.
- Maintain access for future repairs: Use removable covers or labeled access points so you can troubleshoot or upgrade later.
- Prioritize safety and code compliance: Follow local electrical codes and avoid overloading circuits to prevent fire hazards.
How to Hide Cables for Backyard TV on Your Deck
Imagine this: You’ve just set up your outdoor TV on the deck. The sun is setting, the grill is fired up, and your favorite show is about to start. But then you notice it—the tangled mess of power cords, HDMI cables, and speaker wires snaking across your beautiful deck. Not only does it look messy, but it’s also a tripping hazard and vulnerable to weather damage.
Don’t let exposed cables ruin your backyard entertainment experience. With the right tools and a bit of planning, you can hide those wires safely and stylishly. In this guide, we’ll walk you through step-by-step how to hide cables for your backyard TV on your deck. Whether you’re mounting a TV under a pergola, on a wall, or on a freestanding stand, these tips will help you create a clean, professional-looking setup that’s safe and weather-resistant.
By the end of this guide, you’ll know exactly how to route, conceal, and protect your cables so your deck stays beautiful and functional. Let’s get started!
Step 1: Plan Your Cable Route
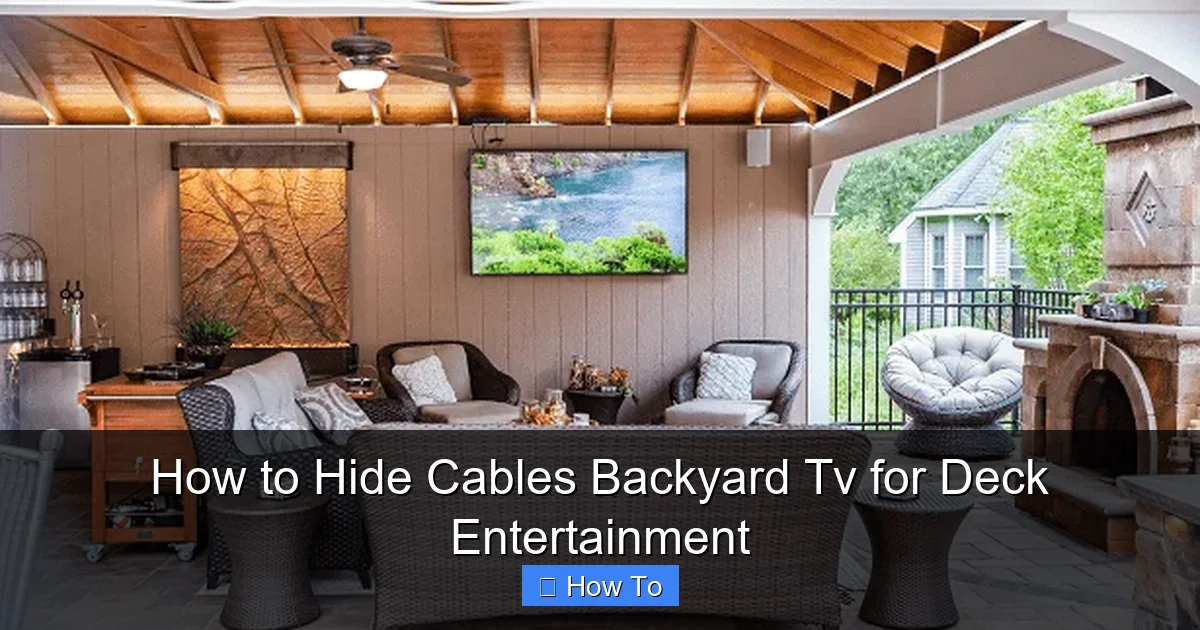
Visual guide about How to Hide Cables Backyard Tv for Deck Entertainment
Image source: thepatiocompanyma.com
Before you touch a single cable, take time to plan your setup. A good plan saves time, reduces frustration, and prevents costly mistakes.
Assess Your TV Location
Start by deciding where your TV will go. Is it mounted on a wall, under a covered area, or on a stand? Make sure the location has access to power and a strong Wi-Fi signal if you’re using streaming devices.
Next, identify where your power outlet is. Is it on the house wall, under the deck, or across the yard? The closer the outlet, the easier your job will be.
Also, consider where your cable box, streaming device (like a Roku or Apple TV), soundbar, or speakers will be placed. These devices all need power and signal connections.
Map the Shortest, Safest Path
Draw a simple sketch of your deck. Mark the TV location, power source, and any other devices. Then, trace the shortest route for your cables.
Avoid high-traffic areas where people walk. Don’t run cables across doorways or stairs. Instead, route them along walls, under railings, or beneath deck boards.
If your deck has a pergola or awning, that’s a great place to run cables overhead. Just make sure they’re secured and out of the way.
Check for Obstacles
Look for things that could block your path: planters, furniture, railings, or deck supports. You may need to go around or under them.
Also, check if your deck has a gap between the floorboards. This can be a handy hidden route for low-voltage cables like HDMI or speaker wire—just don’t use it for power cords, which need more protection.
Measure Cable Lengths
Buy cables that are long enough to reach, but not so long they create excess slack. Extra cable can get tangled or snagged.
For power cords, add a few extra feet for flexibility. For HDMI and audio cables, stick to the recommended maximum lengths (usually 25 feet for HDMI without a booster).
Step 2: Choose the Right Cable Management Products
Not all cable covers are created equal. Since your deck is outdoors, you need products that can handle rain, UV rays, and temperature swings.
Outdoor Cable Raceways
Cable raceways are plastic or metal channels that snap over wires to hide and protect them. Look for ones labeled “weatherproof” or “UV-resistant.”
These are great for running cables along walls or railings. They come in white, black, or brown to match your deck.
Some raceways have adhesive backs for easy mounting. Others require screws. Choose based on your deck material and how permanent you want the setup.
Flexible Conduit
For more protection, use flexible plastic or metal conduit. This is a hollow tube that you feed cables through.
It’s ideal for running wires under the deck or through walls. Conduit shields cables from moisture, pests, and physical damage.
Look for liquid-tight conduit if you’re running cables near the ground or in damp areas.
Cable Clips and Zip Ties
Use outdoor-rated zip ties or adhesive cable clips to secure wires along railings or under deck boards.
Avoid regular zip ties—they can become brittle in the sun. Instead, choose UV-resistant ones made for outdoor use.
For a cleaner look, use clips that match your deck color.
Weatherproof Junction Boxes
If you need to connect multiple cables (like power and HDMI), use a weatherproof junction box.
These sealed enclosures protect connections from rain and dust. Mount them in a dry, accessible spot—like under the deck or inside a storage box.
Make sure the box is rated for outdoor use and has grommets to seal cable entries.
Wireless Alternatives
Consider cutting down on cables altogether. Use wireless HDMI transmitters to send video from your source to the TV.
Or, use a wireless soundbar or Bluetooth speakers to eliminate speaker wires.
Just remember: wireless devices still need power, so you’ll still need to hide power cords.
Step 3: Run Power Cables Safely
Power cords are the most critical—and dangerous—cables to manage. Handle them with care.
Use Outdoor-Rated Extension Cords
Never use indoor extension cords outside. They’re not built to handle moisture or sunlight.
Instead, use a heavy-duty outdoor extension cord rated for at least 125 volts and 13 amps. Look for labels like “SJTW” or “SJTOW,” which indicate weather resistance.
Route Power Cables Along Walls or Under the Deck
Avoid running power cords across the deck floor. If you must, use a cable ramp or cover to protect them and prevent tripping.
Better yet, route them along the house wall or under the deck. Use conduit or raceways for protection.
If your deck is elevated, you can run the cord down a support post and into a weatherproof outlet box.
Install a GFCI Outlet
For safety, plug your outdoor setup into a Ground Fault Circuit Interrupter (GFCI) outlet. These shut off power if they detect a fault, preventing shocks.
If your outdoor outlet isn’t GFCI-protected, consider hiring an electrician to install one. It’s a small cost for big peace of mind.
Use a Power Strip with Surge Protection
Plug all your devices into a weatherproof surge protector. This protects your TV and gear from power surges caused by storms.
Mount the surge protector in a dry, covered area—like under a deck bench or inside a storage box.
Step 4: Hide HDMI and Audio Cables
Signal cables like HDMI and audio wires are less dangerous than power cords, but they still need protection.
Use In-Wall Rated HDMI Cables
If you’re running HDMI through walls or under the deck, use in-wall rated (CL2 or CL3) cables. These are safer and meet building codes.
For outdoor runs, choose cables with weather-resistant jackets.
Run Cables Through Conduit
Feed HDMI and audio cables through flexible conduit for maximum protection. This is especially important if the cables are exposed to rain or foot traffic.
Use a fish tape or string to pull the cable through the conduit.
Secure Cables with Clips or Raceways
Once the cable is in place, secure it with outdoor clips or snap it into a raceway.
Avoid sharp bends or kinks, which can damage the cable and affect signal quality.
Label Your Cables
Use labels or colored tape to mark each cable at both ends. This makes troubleshooting much easier later.
For example, label one “HDMI to Roku” and another “Speaker Wire Left.”
Step 5: Conceal Cables Under or Behind Deck Features
Get creative with hiding spots. Your deck likely has built-in features you can use.
Under the Deck
If your deck is raised, run cables underneath. Use conduit to protect them from moisture and critters.
Attach the conduit to the underside of the deck boards with straps or clips.
Make sure the cables are high enough to avoid puddles but low enough to stay hidden.
Behind Railings
Many deck railings have a gap between the posts and the deck floor. Run cables through this space.
Use a raceway or conduit to keep them tidy and protected.
Inside Deck Storage Boxes
If you have a storage box on your deck, use it to hide your streaming device, soundbar, or power strip.
Drill a small hole in the back of the box for cables. Seal the hole with a rubber grommet to keep water out.
Along Support Posts
Run cables up or down a deck support post. Wrap them in conduit or use a vertical raceway.
Paint the raceway to match the post for a seamless look.
Step 6: Protect Connections and Junctions
Where cables connect is where problems often start. Keep these areas dry and secure.
Use Weatherproof Enclosures
Any place where cables join—like a power strip or HDMI splitter—should be inside a weatherproof box.
Choose a box with a tight seal and drainage holes if needed.
Mount it in a dry spot, like under the deck or inside a cabinet.
Seal Cable Entry Points
When cables enter a box or wall, seal the hole with silicone caulk or a rubber grommet.
This prevents water from seeping in and causing shorts or corrosion.
Use Dielectric Grease
Apply dielectric grease to metal connectors (like speaker terminals) to prevent rust and improve conductivity.
Just don’t use it on HDMI or USB ports—it can interfere with signals.
Step 7: Test and Secure Your Setup
Before you call it done, test everything.
Power On and Check Signals
Turn on your TV, streaming device, and speakers. Make sure the picture and sound work.
Check for flickering, static, or dropped signals—these could mean a loose or damaged cable.
Tighten All Connections
Go back and double-check every clip, screw, and seal. Make sure nothing is loose or exposed.
Add Final Touches
Trim excess zip ties. Tuck away any loose wires. Wipe down raceways to remove fingerprints or dirt.
Troubleshooting Common Issues
Even with careful planning, problems can happen. Here’s how to fix the most common ones.
Cable Gets Wet
If a cable gets soaked, unplug it immediately. Let it dry completely before reconnecting.
Check for corrosion on connectors. Replace any damaged cables.
Signal Loss or Interference
This could be due to a damaged cable, loose connection, or interference from power lines.
Try reseating HDMI connectors. Move signal cables away from power cords.
If using wireless HDMI, make sure there’s a clear line of sight between transmitter and receiver.
Tripping Hazard Remains
If cables still cross walkways, add a cable ramp or cover. These rubber or plastic covers protect wires and prevent trips.
Or, reroute the cable under the deck or along a wall.
Raceway Won’t Stick
Adhesive-backed raceways can fail in heat or humidity. Use screws instead.
Pre-drill holes to avoid splitting wood.
Animals Chew Cables
Squirrels and raccoons love chewing on wires. Use metal conduit or run cables through PVC pipe for extra protection.
Spray a pet-safe deterrent around the area.
Maintaining Your Hidden Cable System
Once your cables are hidden, keep them that way.
Inspect Regularly
Check your setup every few months. Look for loose clips, cracked raceways, or frayed wires.
Clean dust and debris from enclosures.
Re-Seal After Changes
If you move devices or add new cables, re-seal any holes or joints.
Update labels if needed.
Upgrade When Necessary
Technology changes fast. If you upgrade your TV or sound system, reassess your cable needs.
Replace old cables with newer, higher-quality ones.
Conclusion
Hiding cables for your backyard TV doesn’t have to be complicated or expensive. With a little planning and the right tools, you can create a clean, safe, and professional-looking outdoor entertainment space.
Start by mapping your cable route. Choose weatherproof raceways, conduits, and enclosures. Run power safely, protect signal cables, and secure all connections. Test everything before you relax with your favorite show.
Remember: safety comes first. Use outdoor-rated products, follow electrical codes, and avoid overloading circuits. And don’t forget to maintain your setup over time.
Now, sit back, grab a drink, and enjoy your movie night—without tripping over wires or worrying about the weather. Your deck is ready for summer barbecues, game nights, and quiet evenings under the stars.
With these tips, your backyard TV setup will look great and work flawlessly for years to come.

