
Installing an outdoor TV in hot climates requires special planning to protect your investment from extreme heat, UV rays, and humidity. This guide walks you through choosing the right TV, proper mounting, ventilation, and long-term maintenance to ensure peak performance and longevity.
Key Takeaways
- Choose a weatherproof outdoor TV: Standard indoor TVs can overheat and fail quickly in high temperatures. Opt for models rated for outdoor use with built-in cooling and weather resistance.
- Install in a shaded, ventilated area: Direct sunlight and poor airflow increase heat buildup. Use a covered patio, pergola, or awning to reduce exposure.
- Use a proper outdoor-rated mount: Ensure the mounting bracket is corrosion-resistant and rated for outdoor conditions. Tilt and swivel features help adjust for sun glare.
- Protect cables and connections: Use UV-resistant, waterproof conduit and connectors to prevent damage from heat and moisture.
- Monitor temperature and airflow: Consider adding a small fan or ventilation system if the TV is in an enclosed space to prevent overheating.
- Schedule regular maintenance: Clean vents, check seals, and inspect for dust or debris buildup every few months to maintain performance.
- Use a surge protector and smart plug: Power surges are common in summer storms. A weatherproof surge protector adds an extra layer of safety.
How to Install Outdoor TV for Hot Climates
Imagine relaxing on your patio on a warm summer evening, watching your favorite show under the stars. Sounds perfect, right? But if you live in a hot climate—think Arizona, Texas, or Southern California—installing an outdoor TV isn’t as simple as mounting a screen and plugging it in. Extreme heat, direct sunlight, and high humidity can damage even the most durable electronics. That’s why proper installation is key to enjoying your outdoor entertainment for years to come.
In this guide, we’ll walk you through everything you need to know about how to install an outdoor TV for hot climates. From choosing the right TV to mounting it safely and protecting it from the elements, we’ve got you covered. Whether you’re setting up a backyard movie night or upgrading your poolside lounge, these steps will help you get the most out of your outdoor TV—without the risk of overheating or premature failure.
Why Standard TVs Don’t Work Outdoors
Before we dive into installation, it’s important to understand why you can’t just bring your living room TV outside. Most indoor TVs are designed for climate-controlled environments. They don’t have the cooling systems, weatherproofing, or UV protection needed to survive in harsh outdoor conditions.
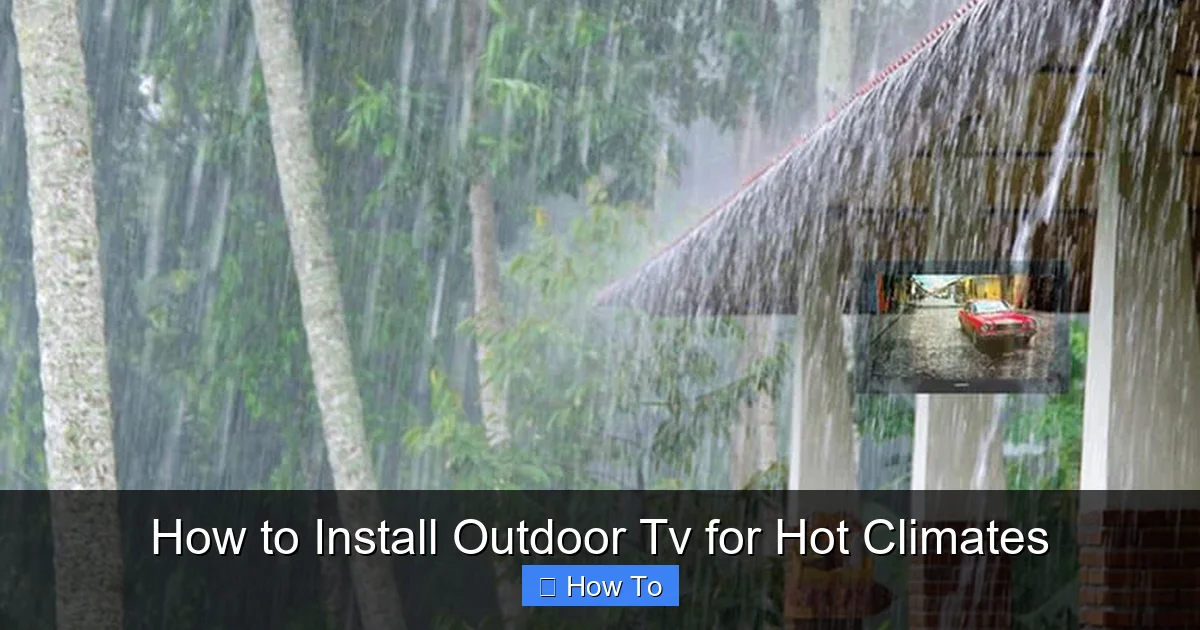
Visual guide about How to Install Outdoor Tv for Hot Climates
Image source: content.osgnetworks.tv
In hot climates, temperatures can soar above 100°F (38°C), especially in direct sunlight. Indoor TVs can overheat quickly, leading to:
- Screen discoloration or burn-in
- Reduced brightness and contrast
- Internal component failure
- Shortened lifespan
Even if your TV survives the heat, dust, rain, and insects can cause damage over time. That’s why investing in a purpose-built outdoor TV is the first and most important step.
Step 1: Choose the Right Outdoor TV
Not all outdoor TVs are created equal. When shopping for a TV for hot climates, look for models specifically designed for outdoor use. These TVs come with features that protect them from heat, moisture, and UV exposure.
Look for Weatherproof Ratings
Check the TV’s IP (Ingress Protection) rating. This tells you how well the TV resists dust and water. For outdoor use, aim for at least IP55 or higher. IP55 means the TV is protected against dust and low-pressure water jets—perfect for patios and covered areas.
Some top-rated outdoor TV brands include:
- SunBriteTV: Known for rugged, all-weather designs with built-in cooling fans.
- Seura: Offers ultra-bright screens and weather-resistant enclosures.
- Avip: Budget-friendly options with solid heat and moisture protection.
Consider Screen Brightness and Anti-Glare
In sunny areas, screen glare can make it hard to see your show. Look for a TV with high brightness—measured in nits. Outdoor TVs typically range from 700 to 2,500 nits, compared to 300–500 nits for indoor models. A brightness of at least 1,000 nits is recommended for hot, sunny climates.
Also, choose a TV with an anti-reflective coating. This reduces glare from the sun and improves visibility during the day.
Check for Built-In Cooling Systems
Heat is the biggest enemy of electronics. Outdoor TVs designed for hot climates often include built-in cooling fans or passive ventilation systems. These help regulate internal temperature and prevent overheating.
Some models even have temperature sensors that automatically adjust brightness or shut down if the TV gets too hot. This is a great safety feature for areas with extreme summer heat.
Step 2: Pick the Perfect Location
Where you install your TV matters just as much as the TV itself. The right location can reduce heat exposure, improve viewing angles, and protect your investment.
Avoid Direct Sunlight
Even the best outdoor TV can struggle in direct sunlight. Over time, UV rays can fade the screen and damage internal components. Try to install your TV in a shaded area, such as:
- Under a covered patio or pergola
- On a north-facing wall (in the Northern Hemisphere)
- Behind an awning or retractable shade
If shade isn’t possible, consider installing a sunshade or outdoor TV enclosure with UV protection.
Ensure Proper Airflow
Heat builds up quickly in enclosed spaces. Avoid installing your TV in a tight cabinet, behind glass, or in a sealed box unless it’s specifically designed for that. Good airflow helps dissipate heat and keeps the internal temperature stable.
If you must install in a semi-enclosed area, leave at least 6–8 inches of space around the TV for ventilation. Never block the vents on the back or sides.
Consider Viewing Height and Angle
Mount your TV at a comfortable viewing height—typically 42 to 60 inches from the ground to the center of the screen. This works well for both seated and standing viewers.
Use a tilt or full-motion mount to adjust the angle. This helps reduce glare and gives you flexibility if you’re watching from different spots, like a lounge chair or outdoor sofa.
Step 3: Choose the Right Mounting Hardware
A sturdy, weatherproof mount is essential for safety and performance. Don’t skimp on this step—your TV could fall or get damaged if the mount fails.
Use an Outdoor-Rated Mount
Standard indoor mounts aren’t built to withstand rain, wind, or temperature swings. Look for a mount labeled “outdoor use” or “all-weather.” These are made from corrosion-resistant materials like powder-coated steel or aluminum.
Popular outdoor mount brands include:
- Sanus Outdoor
- Peerless-AV
- Mounting Dream
Check Weight and Size Compatibility
Make sure the mount supports your TV’s size and weight. Most outdoor mounts list a VESA pattern (the spacing of the screw holes on the back of the TV) and maximum weight capacity. Double-check these specs before buying.
Install on a Solid Surface
Mount your TV on a sturdy wall—like concrete, brick, or wood studs. Avoid drywall, stucco, or weak siding. Use appropriate anchors and lag bolts for your wall type.
If you’re mounting on a post or freestanding structure, ensure it’s securely anchored to the ground. A wobbly mount can damage the TV or create a safety hazard.
Step 4: Run and Protect Your Cables
Exposed cables are vulnerable to heat, moisture, and pests. Proper cable management protects your connections and keeps your setup looking clean.
Use Outdoor-Rated Cables
Standard HDMI and power cables aren’t built for outdoor conditions. Use cables labeled “outdoor,” “direct burial,” or “UV-resistant.” These have tougher insulation and are less likely to crack or degrade in the sun.
Route Cables Through Conduit
Run cables through a waterproof conduit or cable raceway. This protects them from rain, rodents, and UV damage. PVC or metal conduit works well for most installations.
If running cables through a wall, seal the entry point with silicone caulk to prevent water intrusion.
Keep Connections Dry
Use weatherproof cable connectors or junction boxes for any splices or adapters. These have rubber gaskets and seals to keep moisture out.
For extra protection, wrap connections with electrical tape and place them inside a sealed enclosure.
Step 5: Power and Surge Protection
Outdoor electronics are at higher risk of power surges, especially during summer thunderstorms. A surge protector is a must.
Use a Weatherproof Surge Protector
Install a heavy-duty, outdoor-rated surge protector near your TV. Look for one with a high joule rating (at least 1,000 joules) and built-in circuit breaker.
Some models even have USB ports for charging devices—perfect for outdoor remotes or streaming sticks.
Consider a Smart Plug
A weatherproof smart plug lets you control your TV’s power remotely. You can turn it off when not in use, reducing heat buildup and saving energy.
Some smart plugs also monitor temperature and send alerts if the area gets too hot—great for peace of mind.
Step 6: Install and Test Your TV
Now it’s time to put it all together. Follow these steps for a safe and successful installation.
Mount the TV
1. Attach the mounting bracket to the wall using a level and appropriate anchors.
2. Secure the mounting plate to the back of the TV.
3. Carefully lift the TV and hook it onto the wall bracket.
4. Lock the TV in place using the provided security screws.
Have a helper assist with lifting—TVs can be heavy and awkward to handle.
Connect Cables
Plug in your HDMI, power, and any other cables. Double-check that all connections are secure and routed through the conduit.
Power On and Test
Turn on the TV and check the picture quality. Adjust the angle if needed to reduce glare. Test all inputs (cable, streaming device, etc.) to ensure everything works.
Let the TV run for a few hours to monitor temperature. Feel the back of the TV—it should be warm, not hot. If it’s too hot to touch, improve ventilation or consider a cooling fan.
Step 7: Maintain Your Outdoor TV
Regular maintenance keeps your TV running smoothly and extends its life.
Clean the Screen and Vents
Wipe the screen weekly with a microfiber cloth and mild cleaner. Avoid ammonia-based products, which can damage anti-glare coatings.
Use a soft brush or compressed air to clear dust from vents and fans every month.
Inspect Seals and Cables
Check rubber gaskets and cable connections every few months. Replace any that show signs of cracking or wear.
Monitor for Pests
Insects and rodents love warm electronics. Look for nests or chew marks around cables. Use pest deterrents if needed.
Troubleshooting Common Issues
Even with proper installation, problems can arise. Here’s how to fix the most common issues.
TV Overheats and Shuts Off
If your TV turns off during hot days, it’s likely overheating. Solutions include:
- Improving airflow around the TV
- Installing a small fan nearby
- Moving the TV to a shadier spot
- Using a TV with better cooling
Screen Glare or Poor Visibility
If you can’t see the screen in sunlight, try:
- Adjusting the tilt angle
- Installing a sunshade or awning
- Using a TV with higher brightness
Cables Get Damaged or Loose
Check cable routing and connections. Replace any cracked or frayed cables immediately. Use conduit and weatherproof connectors to prevent future damage.
Final Thoughts
Installing an outdoor TV in a hot climate doesn’t have to be complicated—but it does require careful planning. By choosing the right TV, mounting it in a shaded, ventilated area, and protecting it from heat and moisture, you can enjoy outdoor entertainment all summer long.
Remember, the key to success is preparation. Invest in quality equipment, follow best practices for installation, and maintain your setup regularly. With these steps, your outdoor TV will stay cool, clear, and reliable—even in the hottest weather.
So go ahead, fire up that grill, invite some friends over, and enjoy your favorite shows under the open sky. Your perfect outdoor oasis is just a few steps away.

