
Installing an outdoor TV in your gazebo lets you enjoy movies, sports, and shows in the fresh air. This guide walks you through choosing the right TV, mounting it safely, and protecting it from weather—all while keeping your setup stylish and functional.
Key Takeaways
- Choose a true outdoor TV: Regular indoor TVs aren’t built for sun, rain, or temperature swings. Opt for a certified outdoor model with weatherproofing and anti-glare screens.
- Pick the right mounting location: Install your TV where it’s shaded, protected from direct rain, and has a clear view from seating areas. Avoid spots near sprinklers or gutters.
- Use a weatherproof outdoor mount: Standard mounts can rust or fail outdoors. Invest in a rust-resistant, tilt or full-motion mount rated for outdoor use.
- Protect all connections and cables: Use outdoor-rated cables, conduit, and weatherproof boxes to prevent water damage and electrical hazards.
- Ensure safe power supply: Plug into a GFCI outlet and consider a surge protector. Never run extension cords across walkways.
- Test and maintain regularly: Check seals, clean the screen, and inspect mounts seasonally to keep your setup safe and functional year-round.
- Enhance with smart accessories: Add outdoor speakers, a streaming device, or a soundbar for a complete entertainment experience.
How to Install Outdoor TV for Gazebo
Imagine relaxing in your backyard gazebo, sipping lemonade, and watching the big game or your favorite movie under the stars. With an outdoor TV, that dream becomes reality. But installing a TV outside isn’t as simple as mounting one indoors. You need to consider weather, power, safety, and visibility.
In this complete guide, we’ll walk you through every step of installing an outdoor TV in your gazebo—from choosing the right TV to securing it safely and protecting it from the elements. Whether you’re a DIY enthusiast or hiring a pro, this guide ensures your outdoor entertainment setup is safe, durable, and enjoyable for years to come.
Why Install an Outdoor TV in Your Gazebo?
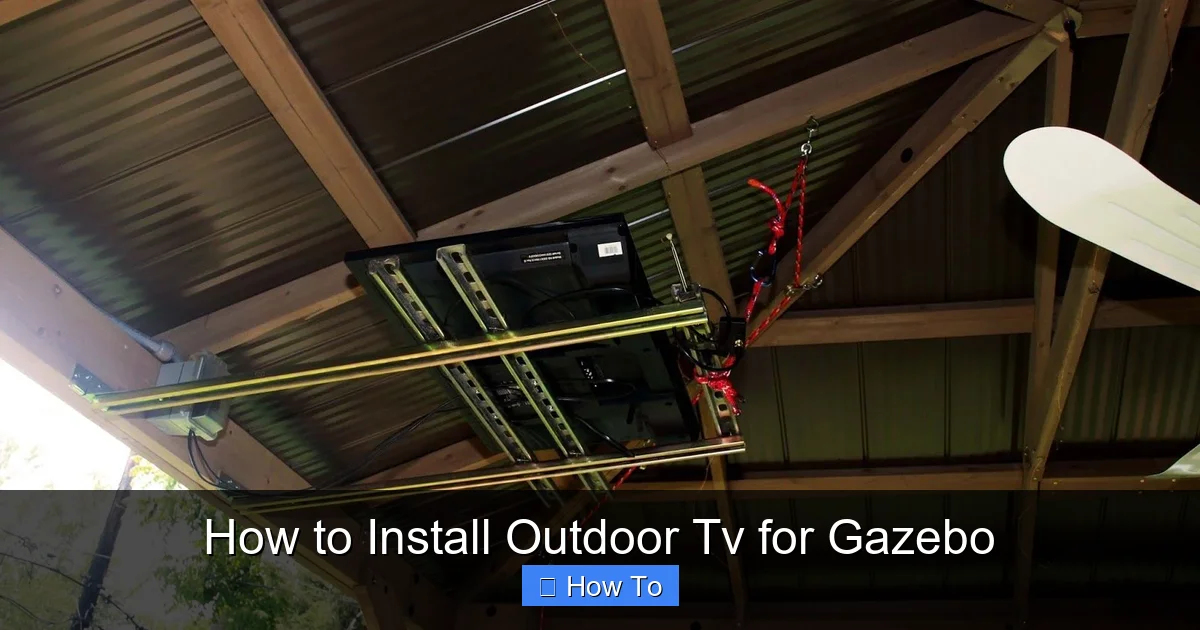
Visual guide about How to Install Outdoor Tv for Gazebo
Image source: i.pinimg.com
Gazebos are perfect for outdoor living—they offer shade, shelter, and a cozy space to gather with family and friends. Adding a TV turns your gazebo into an outdoor living room. You can watch movies on summer nights, catch the playoffs during a barbecue, or stream music videos while hosting a party.
But unlike indoor TVs, outdoor setups face unique challenges: rain, humidity, temperature changes, dust, and UV exposure. That’s why proper installation is crucial. A poorly installed outdoor TV can short-circuit, fall, or degrade quickly—ruining your investment and posing safety risks.
This guide helps you avoid those pitfalls. We’ll cover everything you need to know to install your outdoor TV safely and effectively.
Step 1: Choose the Right Outdoor TV
Not all TVs are created equal—especially when it comes to outdoor use. Regular indoor TVs aren’t designed to handle moisture, heat, or cold. Using one outside can lead to overheating, screen damage, or electrical failure.
Look for a Certified Outdoor TV
True outdoor TVs are built with weatherproof enclosures, sealed components, and anti-reflective screens. They’re tested to withstand rain, snow, dust, and temperature extremes. Brands like SunBrite, Samsung Terrace, and LG Outdoor are popular choices.
These TVs often come with:
– IP55 or higher weather resistance rating
– Anti-glare, high-brightness screens (2,000+ nits)
– Wide operating temperature range (e.g., -30°F to 120°F)
– Built-in ventilation or cooling systems
Consider Screen Size and Viewing Distance
Choose a screen size based on how far you’ll be sitting. A general rule: for every 1.5 feet of viewing distance, use 1 inch of screen size. So if you’re sitting 8 feet away, a 55-inch TV is ideal.
But in a gazebo, space may be limited. Measure your wall or mounting area to ensure the TV fits comfortably without blocking walkways or doors.
Decide Between Partial and Full Sun Models
Outdoor TVs come in two main types:
– Partial Sun: Best for shaded areas like gazebos, patios, or under eaves. They’re more affordable and energy-efficient.
– Full Sun: Designed for direct sunlight. They have brighter screens and better cooling but cost more.
Since most gazebos offer shade, a partial sun model is usually sufficient—unless your gazebo gets direct sun for long periods.
Step 2: Select the Best Mounting Location
Where you mount your TV affects visibility, safety, and longevity. A poor location can lead to glare, water damage, or an awkward viewing angle.
Find a Shaded, Protected Spot
Avoid mounting your TV where it’s exposed to direct rain or sprinklers. Look for a wall under the gazebo’s roof overhang. If your gazebo has open sides, consider installing a small awning or retractable shade above the TV for extra protection.
Check for Clear Viewing Angles
Mount the TV at eye level when seated—typically 42 to 48 inches from the floor to the center of the screen. Make sure everyone in your seating area has a clear, unobstructed view.
Avoid placing the TV near windows, doors, or reflective surfaces that cause glare. If glare is unavoidable, choose a TV with an anti-reflective screen.
Ensure Structural Support
The mounting surface must be strong enough to hold the TV and mount. Wooden gazebo walls are usually sturdy, but check for rot or weakness. If mounting on a post, ensure it’s thick and securely anchored.
Use a stud finder to locate wall studs. Mounting into studs provides the strongest support. If studs aren’t available, use heavy-duty toggle bolts or anchors rated for outdoor use.
Step 3: Choose the Right Outdoor TV Mount
A standard indoor mount won’t cut it outdoors. You need a mount designed for weather resistance and durability.
Types of Outdoor Mounts
– Fixed Mount: Holds the TV flat against the wall. Simple and secure, but no adjustability.
– Tilt Mount: Allows you to angle the TV up or down for better viewing. Great for reducing glare.
– Full-Motion (Articulating) Mount: Lets you swivel, tilt, and extend the TV. Ideal if you want to adjust the angle based on seating or sun position.
For most gazebos, a tilt or full-motion mount offers the best flexibility.
Look for Weatherproof Features
Choose a mount made from powder-coated aluminum or stainless steel to resist rust. It should have:
– Sealed joints and bolts
– Drainage holes to prevent water buildup
– UV-resistant coating
Check the weight and size compatibility. Most mounts list a maximum TV size and weight—don’t exceed these limits.
Consider Cable Management
Some outdoor mounts include built-in cable channels or covers to hide wires. This keeps your setup neat and protects cables from exposure.
Step 4: Gather Tools and Materials
Before you start, make sure you have everything you need. Here’s a checklist:
Essential Tools
- Stud finder
- Drill and drill bits
- Level
- Tape measure
- Screwdrivers (Phillips and flathead)
- Pencil or marker
- Safety goggles and gloves
Materials
- Outdoor TV
- Weatherproof outdoor mount
- Mounting screws and anchors (stainless steel recommended)
- Outdoor-rated HDMI and power cables
- Weatherproof cable conduit or raceway
- Weatherproof electrical box (if needed)
- Silicone sealant (for sealing holes)
- GFCI outlet or extension cord (if outlet is far)
- Surge protector (outdoor-rated)
Step 5: Prepare the Gazebo and Mounting Surface
A clean, dry, and level surface ensures a secure installation.
Clean the Wall
Wipe down the mounting area with a damp cloth to remove dust, dirt, or grease. Let it dry completely.
Locate Studs or Reinforce the Wall
Use a stud finder to mark the center of each stud. If you can’t mount into studs, use heavy-duty toggle bolts or masonry anchors suitable for outdoor use.
Mark the Mounting Holes
Hold the mount against the wall at the desired height. Use a level to ensure it’s straight. Mark the screw hole locations with a pencil.
Drill Pilot Holes
Drill pilot holes slightly smaller than your screws. This prevents wood from splitting and makes driving screws easier.
Step 6: Install the Mount
Now it’s time to secure the mount to the wall.
Attach the Mount Bracket
Line up the mount with your marked holes. Insert screws through the bracket and into the wall. Tighten securely, but don’t over-tighten—this can strip the wood or damage the mount.
Double-check with a level to ensure the mount is perfectly horizontal.
Seal the Screw Holes
Apply a small bead of outdoor silicone sealant around each screw head. This prevents water from seeping into the wall and causing rot.
Test the Mount
Gently tug on the mount to ensure it’s firmly attached. If it moves, reinforce with additional anchors or longer screws.
Step 7: Run and Protect Cables
Exposed cables are a tripping hazard and can get damaged by weather. Proper cable management is essential.
Plan the Cable Route
Decide how to route power and HDMI cables from the TV to the outlet and source (like a streaming box or cable box). The cleanest method is to run cables through the wall or use a surface-mounted conduit.
Use Outdoor-Rated Cables
Standard indoor cables aren’t UV-resistant or waterproof. Use outdoor-rated HDMI and power cables with weatherproof jackets.
Install Conduit or Raceway
For surface mounting, use a plastic or metal conduit to cover and protect cables. Secure it to the wall with screws or adhesive. Make sure it’s rated for outdoor use.
If running cables through the wall, drill a hole from inside the gazebo to the outside. Seal the hole with silicone to prevent water entry.
Connect to a GFCI Outlet
Outdoor electrical outlets should be GFCI (Ground Fault Circuit Interrupter) protected. This shuts off power if it detects a fault, preventing shocks.
If your outlet isn’t GFCI, hire an electrician to install one. Never use indoor extension cords outside.
Use a Surge Protector
Power surges from lightning or grid fluctuations can damage electronics. Plug your TV and devices into an outdoor-rated surge protector.
Step 8: Mount the TV
With the mount secure and cables in place, it’s time to attach the TV.
Attach Mounting Brackets to the TV
Most outdoor TVs have VESA mounting holes on the back. Attach the mounting brackets (usually included with the mount) using the provided screws.
Lift and Secure the TV
With a helper, lift the TV and hook it onto the wall mount. Follow the mount’s instructions—some require locking screws or safety bolts.
Connect Cables
Plug in the power cable and HDMI cables. Route them through the mount’s cable management system or conduit.
Test the TV
Turn on the TV and check the picture and sound. Adjust the tilt or angle if needed for the best view.
Step 9: Weatherproof and Secure the Setup
Even with an outdoor TV, extra protection helps it last longer.
Seal All Openings
Use silicone sealant around the mount, cable entry points, and any drilled holes. This prevents water and insects from getting in.
Install a TV Cover (Optional)
When not in use, cover the TV with a weatherproof cover. This protects the screen from dust, pollen, and UV damage.
Trim Nearby Plants
Keep vines, leaves, or branches away from the TV and cables. Overgrown plants can trap moisture or scratch the screen.
Step 10: Add Accessories for a Complete Experience
Your outdoor TV is installed—now make it awesome.
Outdoor Speakers or Soundbar
Built-in TV speakers often lack volume and clarity outdoors. Add weatherproof Bluetooth speakers or a soundbar for richer sound.
Streaming Device
Use a streaming stick (like Roku, Apple TV, or Fire Stick) for access to Netflix, YouTube, and more. Choose a model that works well in bright conditions.
Remote Control Extender
If your streaming device is hidden in a cabinet, use an IR extender so you can control it from the seating area.
Lighting
Add soft LED strip lights around the TV or gazebo for ambiance. Choose warm white lights to avoid glare on the screen.
Troubleshooting Common Issues
Even with careful planning, problems can arise. Here’s how to fix common issues.
TV Won’t Turn On
– Check the power connection and GFCI outlet.
– Test the outlet with another device.
– Ensure the surge protector is on and working.
Poor Picture Quality or Glare
– Adjust the TV’s brightness and contrast settings.
– Reposition the TV to avoid direct sunlight.
– Use an anti-glare screen protector.
Cables Get Wet or Corroded
– Replace with outdoor-rated cables.
– Re-seal conduit and entry points.
– Use dielectric grease on connectors to prevent corrosion.
Mount Feels Loose
– Tighten all screws and bolts.
– Check for wall damage or rot.
– Reinforce with additional anchors if needed.
Overheating
– Ensure the TV has proper ventilation.
– Avoid covering the vents.
– Install in a shaded area.
Maintenance Tips for Long-Term Use
To keep your outdoor TV in top shape, follow these maintenance steps:
Monthly
– Wipe the screen with a microfiber cloth.
– Check cables for wear or damage.
– Inspect the mount for rust or looseness.
Seasonally
– Reapply silicone sealant if needed.
– Clean around the TV to remove dirt and debris.
– Test all connections and power sources.
Before Winter
– Cover the TV if you live in a cold climate.
– Disconnect and store streaming devices if not in use.
– Check for ice or snow buildup on the mount.
Conclusion
Installing an outdoor TV in your gazebo is a fantastic way to elevate your outdoor living space. With the right TV, mount, and installation steps, you can enjoy your favorite shows and movies in comfort and style—rain or shine.
Remember: safety and weather protection are key. Choose a certified outdoor TV, use a weatherproof mount, protect your cables, and maintain your setup regularly. Whether you’re watching a movie under the stars or catching the game with friends, your gazebo will become the heart of your backyard entertainment.
Take your time, follow this guide, and soon you’ll be relaxing with your favorite content—right in your own outdoor oasis.

