
Installing a garden TV in your outdoor kitchen lets you enjoy entertainment while cooking or dining alfresco. This guide walks you through choosing the right TV, planning the layout, mounting, wiring, and protecting your setup from the elements—so you can enjoy movie nights under the stars.
Key Takeaways
- Choose a weatherproof outdoor TV: Regular indoor TVs aren’t built for moisture, UV rays, or temperature swings. Look for models rated for outdoor use with IP55 or higher protection.
- Plan your layout before drilling: Consider viewing angles, distance from seating, sun exposure, and proximity to power and Wi-Fi sources to avoid costly mistakes.
- Use proper outdoor-rated cables and conduits: Standard indoor wiring can degrade quickly outside. Always use UV-resistant, waterproof cables and protective conduit.
- Mount securely with the right hardware: Use a sturdy, rust-resistant outdoor TV mount that can handle wind and weight. Anchor it into solid structures like concrete or studs.
- Protect connections with weatherproof enclosures: Even with outdoor-rated gear, seal all electrical connections in waterproof junction boxes to prevent short circuits.
- Test everything before finalizing: Power up the system, check signal strength, and verify remote control range before sealing enclosures or covering wires.
- Maintain your setup seasonally: Clean the screen, inspect seals, and check for corrosion or loose mounts at least twice a year.
How to Install Garden TV for Outdoor Kitchen
Imagine hosting a summer barbecue with friends, grilling juicy burgers while your favorite cooking show plays on a crisp, clear screen just above the counter. Or picture a cozy autumn evening where you’re sipping wine outdoors, wrapped in a blanket, watching the game under string lights. Installing a garden TV in your outdoor kitchen makes these moments possible—and surprisingly straightforward if you follow the right steps.
In this comprehensive guide, you’ll learn everything you need to know about installing a garden TV safely and effectively. We’ll cover how to choose the perfect outdoor television, plan your layout, run power and signal cables, mount the TV securely, protect it from the elements, and troubleshoot common issues. Whether you’re a DIY enthusiast or working with a contractor, this guide ensures your outdoor entertainment setup is both functional and durable.
Let’s get started!
Why Install a Garden TV in Your Outdoor Kitchen?
Outdoor kitchens have evolved from simple grilling stations to fully equipped culinary and entertainment hubs. Adding a garden TV enhances the experience by providing entertainment, recipe guidance, music streaming, or live sports—all while you cook, eat, or relax outside.
Unlike indoor TVs, garden TVs are specifically designed to withstand harsh outdoor conditions. They feature weatherproof casings, anti-glare screens, and temperature-regulated internal components. This means you won’t have to worry about rain, humidity, or extreme heat damaging your investment.
Plus, a well-placed TV can serve as a focal point for your outdoor space, encouraging family gatherings and social events. It’s not just about watching TV—it’s about creating a lifestyle.
Step 1: Choose the Right Outdoor TV
Not all TVs are created equal—especially when it comes to outdoor use. Here’s what to look for:
Weather Resistance Rating
Look for an IP (Ingress Protection) rating of at least IP55. This means the TV is protected against dust and low-pressure water jets from any direction. Higher ratings like IP65 offer even better protection.
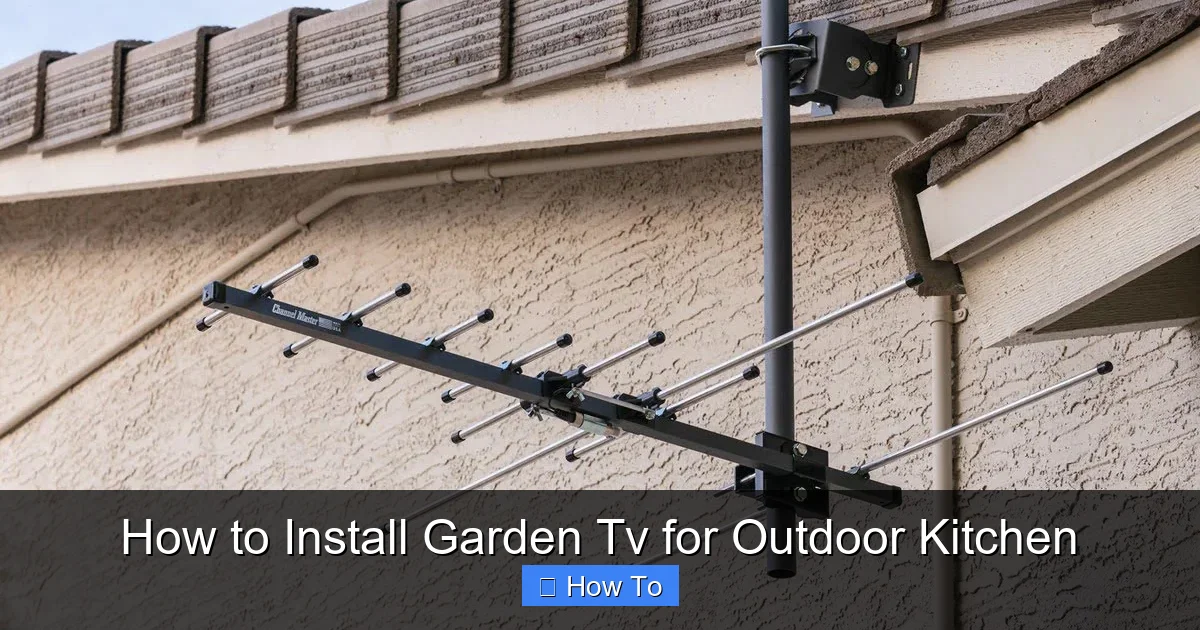
Visual guide about How to Install Garden Tv for Outdoor Kitchen
Image source: storables.com
Screen Type and Brightness
Outdoor TVs often use high-brightness LED or OLED panels with anti-reflective coatings. Aim for a minimum brightness of 700 nits—indoor TVs typically range from 300–500 nits, which isn’t enough in direct sunlight.
Temperature Tolerance
Outdoor TVs should operate in temperatures from -22°F to 122°F (-30°C to 50°C). Some models include built-in heaters or cooling fans to prevent overheating or freezing.
Smart Features
Many garden TVs come with built-in Wi-Fi, streaming apps (like Netflix, YouTube, or Apple TV), and voice control. This eliminates the need for external devices like streaming sticks.
Size and Viewing Distance
For most outdoor kitchens, a 43-inch to 55-inch screen works well. Sit about 6 to 9 feet away for optimal viewing. Measure your space and seating area before buying.
Pro Tip: Brands like SunBrite, Samsung Terrace, and LG Outdoor are known for reliable garden TVs. Read customer reviews and check warranty coverage—most outdoor models come with 2–3 years of protection.
Step 2: Plan Your Layout and Location
Before you buy tools or drill holes, take time to plan where your TV will go. A poor layout can lead to glare, awkward viewing angles, or difficult access to power.
Consider Viewing Angles
Mount the TV at eye level when seated. For an outdoor kitchen, this is usually between 42 and 48 inches from the ground to the center of the screen. Avoid placing it too high—looking up for long periods causes neck strain.
Account for Sun and Glare
Direct sunlight can wash out even the brightest screens. If possible, install the TV under a covered patio, pergola, or awning. Use a shade or retractable canopy to reduce glare during peak hours.
Check for Obstructions
Make sure there are no cabinets, railings, or plants blocking the view. Also, avoid placing the TV directly above a grill or smoker—heat and smoke can damage electronics over time.
Power and Signal Access
Your TV will need electricity and a strong Wi-Fi signal. Locate the nearest outdoor GFCI (Ground Fault Circuit Interrupter) outlet. If Wi-Fi is weak, consider installing a weatherproof outdoor Wi-Fi extender or using a wired Ethernet connection.
Example Layout
Imagine your outdoor kitchen has a built-in grill, countertop, and bar seating. Mount the TV on the wall above the counter, angled slightly downward toward the seating area. Run cables through the wall or along the ceiling to a nearby outlet. This keeps the setup clean and safe.
Pro Tip: Use painter’s tape to mark the TV’s position on the wall. Sit in your usual spot and check the view from different angles before committing.
Step 3: Gather Tools and Materials
Having the right tools saves time and prevents mistakes. Here’s what you’ll need:
- Weatherproof outdoor TV
- Outdoor-rated TV mount (full-motion or fixed)
- Drill and drill bits (masonry bits if mounting into concrete)
- Level
- Tape measure
- Stud finder (for wood-frame walls)
- Outdoor-rated power cable (if not included)
- Weatherproof conduit or cable raceway
- Waterproof junction box
- Silicone sealant (outdoor grade)
- Screws and anchors (stainless steel or coated for rust resistance)
- Electrical tape and wire nuts
- Wi-Fi extender or Ethernet cable (optional)
- Ladder or step stool
Pro Tip: Buy a few extra feet of cable than you think you’ll need. It’s better to have slack than to come up short.
Step 4: Install the TV Mount
A secure mount is critical—your TV could fall and cause injury or damage if not installed correctly.
Find the Right Mounting Surface
Mount into solid material like concrete, brick, or wood studs. Avoid drywall or siding alone. Use a stud finder to locate studs in wood-frame walls. For concrete or brick, use a masonry drill bit.
Mark and Drill Holes
Hold the mount against the wall and use a level to ensure it’s straight. Mark the screw holes with a pencil. Drill pilot holes slightly smaller than your anchors.
Secure the Mount
Insert wall anchors if needed, then screw the mount into place. Use at least four screws for stability. Double-check that the mount is level and tightly secured.
Attach the TV Brackets
Most outdoor TVs come with VESA-compatible brackets. Attach these to the back of the TV using the provided screws. Make sure they’re tight—but don’t over-tighten and crack the casing.
Pro Tip: Have a helper hold the TV while you attach it to the mount. Outdoor TVs can be heavy and awkward to handle alone.
Step 5: Run Power and Signal Cables
Running cables safely and neatly is one of the most important—and often overlooked—steps.
Plan the Cable Route
Run cables from the TV to the power outlet and Wi-Fi source. The cleanest method is through the wall or under a soffit. If that’s not possible, use a surface-mounted conduit or cable raceway.
Use Outdoor-Rated Cables
Standard indoor cables degrade quickly in sunlight and moisture. Use UV-resistant, waterproof cables rated for outdoor use. For power, a 16/3 SJTW or SJOOW cord is ideal.
Protect Connections
All electrical connections must be housed in a weatherproof junction box. This includes the power cord splice and any HDMI or Ethernet connections. Seal the box with silicone caulk to prevent water intrusion.
Ground Fault Protection
Always plug into a GFCI outlet. These outlets shut off power if they detect a ground fault, preventing electric shock—especially important in wet environments.
Example Setup
Run the power cable from the TV down the wall, through a conduit, and into a GFCI outlet located under the counter. Use a waterproof outlet cover when the TV is not in use. For HDMI, run a high-speed outdoor-rated cable to a media box or streaming device stored in a weatherproof cabinet.
Pro Tip: Label your cables at both ends. This makes future troubleshooting or upgrades much easier.
Step 6: Mount the TV and Test the System
Now it’s time to hang the TV and make sure everything works.
Attach the TV to the Mount
Lift the TV and hook the brackets onto the wall mount. Ensure it locks securely. Most mounts have safety screws or latches to prevent accidental detachment.
Connect Cables
Plug in the power cable and any signal cables (HDMI, Ethernet, etc.). Tuck excess cable neatly behind the TV or into the conduit.
Power On and Test
Turn on the TV and check the picture quality. Test the remote control from different angles and distances. Make sure Wi-Fi connects and streaming apps load quickly.
Adjust Settings
Go into the TV’s settings and adjust brightness, contrast, and color for outdoor viewing. Enable motion smoothing if available—it helps with fast-moving sports content.
Pro Tip: Watch a variety of content—sports, movies, news—to ensure the picture looks good in different lighting conditions.
Step 7: Weatherproof and Secure the Setup
Even with an outdoor-rated TV, extra protection extends its life.
Seal All Openings
Use outdoor-grade silicone to seal gaps around the mount, conduit entries, and junction boxes. This prevents water, insects, and debris from entering.
Install a Weatherproof Cover (Optional)
When not in use, cover the TV with a fitted, breathable cover. Avoid plastic covers that trap moisture—opt for fabric with UV protection.
Secure Loose Cables
Use cable clips or zip ties to secure any exposed wires. This prevents wind from whipping them around and reduces tripping hazards.
Check for Wind Resistance
If you live in a windy area, ensure the mount is rated for high winds. Consider a fixed mount instead of a full-motion one, which can catch more wind.
Pro Tip: Take photos of your setup before sealing everything. These can help if you need to make repairs or upgrades later.
Troubleshooting Common Issues
Even with careful planning, problems can arise. Here’s how to fix the most common ones.
TV Won’t Turn On
Check the power outlet with another device. If it works, inspect the power cable for damage. Ensure the GFCI hasn’t tripped—press the reset button.
Poor Picture Quality
Adjust brightness and contrast settings. If the screen is blurry, clean it with a microfiber cloth and outdoor-safe cleaner. Check for loose HDMI connections.
Weak Wi-Fi Signal
Move your router closer or install an outdoor Wi-Fi extender. Use a wired Ethernet connection if possible—it’s faster and more reliable.
Remote Control Not Working
Replace the batteries. Ensure there’s no obstruction between the remote and the TV’s sensor. Some outdoor TVs come with RF remotes that work through walls.
Screen Flickering or Glitching
This could be due to overheating. Ensure the TV has proper ventilation. Avoid placing it in direct sunlight for long periods. If the issue persists, contact the manufacturer.
Water Inside the TV
If you suspect moisture intrusion, turn off the TV immediately and let it dry completely. Check seals and gaskets. If damage is severe, consult a professional.
Pro Tip: Keep the user manual and warranty information in a waterproof container near the TV for quick reference.
Maintenance Tips for Long-Term Performance
Regular maintenance keeps your garden TV running smoothly for years.
Clean the Screen Monthly
Use a soft, dry microfiber cloth. For smudges, lightly dampen the cloth with water or a screen-safe cleaner. Never spray liquid directly on the screen.
Inspect Seals and Cables
Every 3–6 months, check for cracks in seals, frayed cables, or loose mounts. Replace damaged parts immediately.
Check Mount Stability
Gently tug on the TV to ensure it’s secure. Tighten any loose screws.
Seasonal Checks
In spring and fall, inspect the entire setup. Look for signs of corrosion, pest nests, or water damage. Reapply silicone sealant if needed.
Pro Tip: Keep a maintenance log. Note dates, issues, and actions taken. This helps track patterns and plan future care.
Conclusion
Installing a garden TV in your outdoor kitchen transforms your space into a true entertainment destination. With the right TV, careful planning, and proper installation, you can enjoy your favorite shows, movies, and sports—rain or shine.
Remember: safety and weather protection are paramount. Always use outdoor-rated equipment, secure your mount, and protect all electrical connections. Take your time with the layout and cable routing—these details make a big difference in the long run.
Once your garden TV is up and running, you’ll wonder how you ever cooked or dined outside without it. Whether you’re flipping burgers, hosting a party, or enjoying a quiet evening under the stars, your outdoor kitchen will be the heart of your home.
So grab your tools, follow this guide, and start building the outdoor oasis you’ve always wanted. Your perfect alfresco movie night is just a mount away.

