
Transform your backyard into a cozy outdoor cinema with Garden TV. This guide walks you through choosing equipment, setting up screens and projectors, optimizing sound, and creating the perfect ambiance for unforgettable movie nights under the stars.
Key Takeaways
- Choose the right equipment: Select a weather-resistant projector and a durable outdoor screen or DIY alternative for the best viewing experience.
- Plan your layout: Position seating, screen, and projector with sightlines and safety in mind to ensure comfort and visibility for all guests.
- Optimize lighting and sound: Use ambient lighting and weatherproof speakers to enhance the atmosphere without overpowering the audio.
- Weatherproof your setup: Protect electronics from moisture, wind, and insects with covers, enclosures, and secure cabling.
- Test before you host: Run a trial night to check picture quality, sound levels, and connectivity to avoid last-minute issues.
- Add cozy touches: Use outdoor cushions, blankets, and themed snacks to make your Garden TV experience feel special and inviting.
- Maintain your setup: Clean and store equipment properly after each use to extend its lifespan and ensure readiness for future movie nights.
How to Install Garden TV for Backyard Movie Night
Imagine this: the sun sets, twinkling string lights flicker on, and your favorite film begins to play on a giant screen under the stars. No drive to the theater, no noisy crowds—just you, your loved ones, and a magical backyard movie night powered by your very own Garden TV setup. Whether you’re hosting a family movie night, a romantic date, or a neighborhood block party, creating an outdoor cinema is easier than you think.
In this complete guide, you’ll learn everything you need to know to install Garden TV for backyard movie night—from selecting the right projector and screen to optimizing sound, managing power, and adding those special finishing touches. We’ll walk you through each step with clear instructions, practical tips, and troubleshooting advice so you can enjoy a seamless, immersive outdoor viewing experience every time.
By the end of this guide, you’ll have a fully functional, weather-smart Garden TV system that turns your backyard into a private drive-in theater. Let’s get started!
Step 1: Choose the Right Equipment
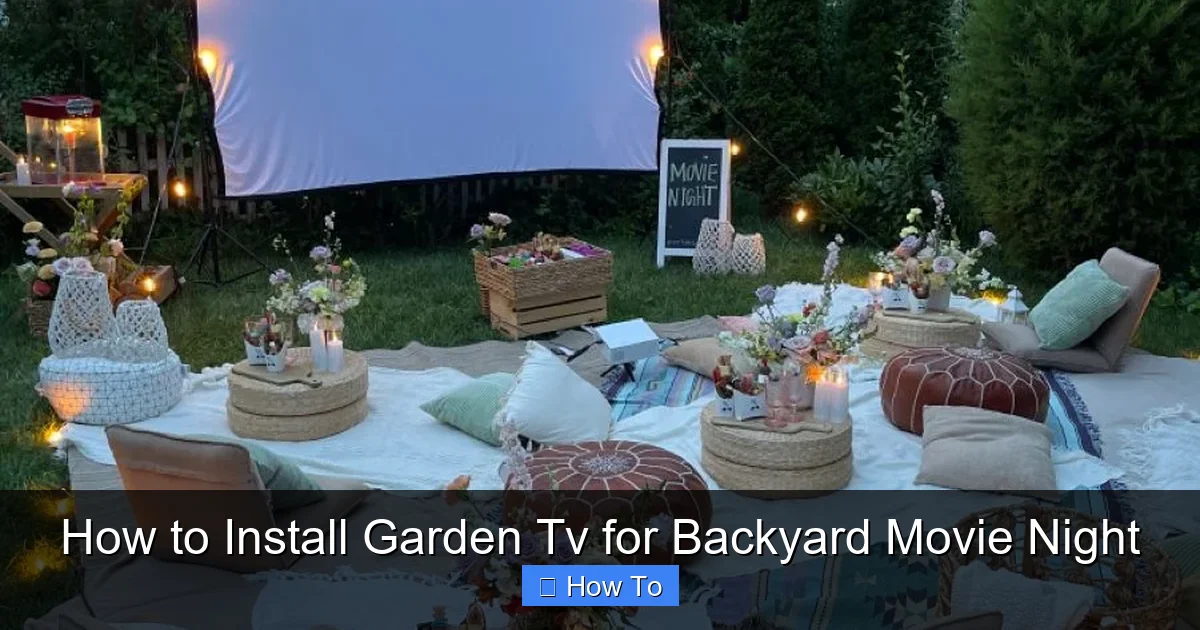
Visual guide about How to Install Garden Tv for Backyard Movie Night
Image source: i.pinimg.com
The foundation of any great Garden TV setup is the right gear. You don’t need to break the bank, but investing in quality equipment will make a huge difference in picture clarity, sound, and durability.
Select a Weather-Resistant Projector
Your projector is the heart of your outdoor cinema. For backyard use, look for a model with at least 2,000 lumens of brightness—this ensures the image remains visible even with ambient light from the moon or nearby houses. A resolution of 1080p (Full HD) or higher is ideal for sharp, detailed visuals.
Pro Tip: Choose a projector with built-in Wi-Fi or HDMI connectivity so you can stream directly from your phone, tablet, or laptop. Many modern projectors also support Bluetooth, making it easy to pair wireless speakers.
If you plan to use your setup frequently or in unpredictable weather, consider a projector with an IP rating (Ingress Protection) for dust and water resistance. While most projectors aren’t fully waterproof, some outdoor-rated models come with protective casings or are designed to withstand light rain when used under a canopy.
Popular options include the Epson Home Cinema 2250, BenQ HT2050A, or the more budget-friendly Anker Nebula Capsule. Each offers excellent brightness and portability, perfect for Garden TV.
Pick the Perfect Outdoor Screen
You have two main options: a dedicated outdoor projector screen or a DIY alternative.
Option 1: Inflatable or Portable Outdoor Screen
These are easy to set up and store. Inflatable screens come with built-in frames and often include a carrying bag. They’re lightweight, durable, and provide a smooth, wrinkle-free surface. Look for one with a high-gain surface (1.1 to 1.3 gain) to reflect more light and improve brightness.
Option 2: DIY Screen
If you’re on a budget, create your own screen using a white bedsheet, a large piece of seamless white paper, or a white-painted wall. For a more permanent solution, stretch a white vinyl tarp or projection fabric between two poles or trees. Use grommets and bungee cords to keep it taut.
Pro Tip: Avoid glossy surfaces—they can cause hotspots and glare. Matte white is best for even light distribution.
Choose Weatherproof Speakers
Good sound is just as important as a clear picture. Built-in projector speakers are often weak and tinny, so external speakers are a must.
Opt for outdoor-rated Bluetooth speakers like the JBL Charge 5, Bose SoundLink Revolve+, or the Ultimate Ears MEGABOOM 3. These are waterproof, portable, and deliver rich, room-filling sound. For larger gatherings, consider a pair of wired outdoor speakers mounted on stakes or posts around the seating area.
If you prefer a surround sound experience, use a soundbar with wireless rear speakers. Just make sure all components are protected from moisture.
Step 2: Plan Your Backyard Layout
A well-thought-out layout ensures everyone has a great view and feels comfortable throughout the movie.
Determine the Best Viewing Area
Start by identifying a flat, open space in your yard with minimal obstructions. Avoid areas near bright streetlights or neighbor’s windows, as light pollution can wash out the image.
Position the screen so it faces away from the setting sun and any direct light sources. Ideally, the screen should be placed on the north or east side of your yard to avoid afternoon glare.
Calculate Screen and Seating Distance
The distance between the screen and seating affects picture quality and comfort. A good rule of thumb is to sit 1.5 to 2.5 times the screen’s diagonal size away. For example, if your screen is 100 inches, place seats 12.5 to 20 feet back.
Use painter’s tape to mark seating spots during your trial run. This helps you visualize spacing and adjust before the big night.
Arrange Comfortable Seating
Comfort is key for a two-hour movie. Offer a mix of seating options:
- Outdoor lounge chairs or Adirondack chairs
- Bean bags or floor cushions
- Picnic blankets with waterproof backing
- Folding chairs with padded seats
Pro Tip: Elevate the back rows slightly using wooden pallets or small risers so everyone can see over the people in front.
Plan for Power and Cables
Your projector, speakers, and streaming device all need power. Use a heavy-duty outdoor extension cord rated for at least 15 amps. Run cables along the ground and secure them with duct tape or cable covers to prevent tripping.
If your yard lacks outdoor outlets, consider a portable power station like the Jackery Explorer 500 or EcoFlow Delta. These rechargeable battery packs can power your entire setup for several hours and are safe to use in dry conditions.
Step 3: Set Up the Screen and Projector
Now it’s time to bring your Garden TV to life.
Install the Outdoor Screen
If using an inflatable screen, inflate it according to the manufacturer’s instructions. Make sure it’s on level ground and secure the base with stakes or sandbags to prevent tipping in the wind.
For a DIY screen, stretch your fabric tightly between two sturdy supports—like trees, fence posts, or freestanding poles. Use zip ties, rope, or bungee cords to secure it. Check for wrinkles or sagging and adjust as needed.
Pro Tip: Test the screen at night with a flashlight to ensure it’s smooth and evenly lit.
Position the Projector
Place the projector on a stable, elevated surface—like a table, tripod, or projector stand. The ideal height is level with the center of the screen.
Use the projector’s keystone correction and zoom features to adjust the image size and shape. Avoid placing the projector too close or too far; refer to the user manual for the optimal throw distance.
Pro Tip: If your projector has vertical lens shift, use it to fine-tune the image without moving the unit.
Connect Your Streaming Device
Most projectors support HDMI input. Connect a streaming device like a Roku, Apple TV, Amazon Fire Stick, or Chromecast to access Netflix, Disney+, or your personal media library.
If your projector has Wi-Fi, you can stream directly from your phone or tablet using screen mirroring (AirPlay for Apple, Miracast for Android).
Pro Tip: Download movies in advance if your internet connection is slow or unreliable. Many streaming services allow offline viewing.
Step 4: Optimize Sound and Lighting
Great audio and thoughtful lighting elevate your Garden TV experience from good to unforgettable.
Set Up Weatherproof Speakers
Place speakers on either side of the screen or around the seating area for balanced sound. If using Bluetooth speakers, keep them within 30 feet of the streaming device to maintain a strong connection.
For wired setups, run speaker wire underground or along the edge of the patio. Use waterproof wire covers to protect connections.
Pro Tip: Test sound levels during daylight to avoid disturbing neighbors. Aim for clear dialogue without overwhelming bass.
Control Ambient Lighting
Too much light washes out the picture. Turn off outdoor floodlights, porch lights, and any nearby lamps. Use soft, indirect lighting instead:
- String lights or fairy lights around trees or pergolas
- LED candles or lanterns on tables
- Low-wattage path lights to illuminate walkways
Avoid blue or white LEDs, which can interfere with the movie’s color balance. Warm white or amber lights create a cozy, cinema-like glow.
Reduce Glare and Reflections
If your screen is near a reflective surface (like a glass door or shiny siding), angle it slightly to minimize glare. You can also use blackout fabric or outdoor curtains to block stray light.
Step 5: Weatherproof and Secure Your Setup
Mother Nature can be unpredictable, so protect your equipment.
Protect Electronics from Moisture
Even on clear nights, dew can form after sunset. Use a waterproof projector cover or place the unit under a small canopy or gazebo. Never leave electronics on the ground—elevate them on a table or stand.
For speakers, choose models with IPX5 or higher ratings. If using non-waterproof speakers, place them under a covered area or use a plastic storage bin with holes for sound.
Secure Cables and Equipment
Wind can knock over tripods or loosen cables. Use sandbags, weights, or stakes to stabilize your projector and screen. Tape down extension cords and use cable management clips to keep wires tidy.
Pro Tip: Label all cables with colored tape so you can quickly identify them during setup.
Prepare for Insects
Mosquitoes and flies can ruin the mood. Use citronella candles, outdoor fans, or a bug zapper to keep pests at bay. Avoid bug spray near electronics.
Step 6: Test and Troubleshoot
Never skip the trial run. Host a “dry run” movie night a few days before your event to test everything.
Check Picture Quality
Play a high-motion scene (like an action movie) to test brightness, focus, and color accuracy. Adjust the projector’s settings if needed. If the image is blurry, clean the lens with a microfiber cloth.
Test Audio Sync and Volume
Make sure the sound matches the video. If there’s a delay, adjust the audio sync settings on your streaming device or projector.
Walk around the seating area to ensure sound is consistent. If one side is too loud or quiet, reposition the speakers.
Verify Connectivity
Stream a movie and test Wi-Fi stability. If the signal drops, consider using a Wi-Fi extender or moving your router closer to the yard.
Common Issues and Fixes
- Image too dim: Increase projector brightness, reduce ambient light, or use a higher-gain screen.
- Sound out of sync: Adjust audio delay in settings or use a wired connection.
- Wi-Fi drops: Move the streaming device closer to the router or use an Ethernet cable with a weatherproof adapter.
- Screen sags: Retighten fabric or use a sturdier support frame.
- Projector overheats: Ensure proper ventilation and avoid covering vents.
Step 7: Add the Finishing Touches
The little details make your Garden TV night feel special.
Create a Snack Station
Set up a table with popcorn, candy, and drinks. Use themed snacks—like “Jurassic Park” dinosaur-shaped cookies or “Harry Potter” butterbeer—to match your movie.
Serve in reusable bowls and cups to reduce waste.
Offer Blankets and Pillows
Even in summer, evenings can get chilly. Provide extra blankets and outdoor-safe pillows for added comfort.
Set the Mood with Decor
Use movie-themed decorations like cardboard cutouts, posters, or a red carpet entrance. Play the film’s soundtrack softly before the movie starts.
Plan a Pre-Show
Start with trivia, a short behind-the-scenes video, or a countdown timer to build excitement.
Conclusion
Installing Garden TV for backyard movie night is a fun, rewarding project that brings people together under the stars. With the right equipment, thoughtful planning, and a few creative touches, you can create a magical outdoor cinema that rivals any commercial theater.
Remember: start with a quality projector and screen, plan your layout for comfort and visibility, protect your gear from the elements, and always test before you host. Add cozy seating, ambient lighting, and delicious snacks to complete the experience.
Your backyard is more than just grass and trees—it’s a stage for memories. So grab your remote, dim the lights, and press play. Your Garden TV adventure starts now.

