
Hiding cables for your patio TV doesn’t have to be complicated. This guide walks you through practical, weather-resistant methods to keep your deck entertainment setup clean and safe. Enjoy a clutter-free outdoor space without sacrificing function or style.
Key Takeaways
- Plan your cable route first: Map out the shortest, safest path from your TV to power and devices to minimize exposure and tripping hazards.
- Use outdoor-rated cable management products: Choose UV-resistant, waterproof conduit, raceways, and clips designed for exterior use.
- Secure cables along structural elements: Run wires along railings, under deck boards, or inside weatherproof channels to keep them out of sight and protected.
- Label and organize all connections: Clearly mark cables at both ends to simplify troubleshooting and future upgrades.
- Test everything before finalizing: Ensure audio, video, and power work properly after installation to avoid rework.
- Maintain accessibility for repairs: Use removable covers or access panels so you can service cables without dismantling your entire setup.
- Prioritize safety and code compliance: Avoid overloading circuits and follow local electrical codes, especially when running power outdoors.
How to Hide Cables Patio TV for Deck Entertainment
Imagine sipping your morning coffee on the deck, watching the sunrise on your outdoor TV—no messy wires in sight. That’s the dream, right? But reality often looks different: a tangled mess of HDMI, power, and audio cables snaking across your beautiful deck, tripping hazards included. The good news? You can achieve that clean, professional look with the right tools and techniques.
In this guide, we’ll show you exactly how to hide cables for your patio TV so your deck entertainment area stays stylish, safe, and functional. Whether you’re mounting your TV on a wall, placing it on a stand, or integrating it into a pergola, we’ve got you covered. From planning your layout to choosing weatherproof materials and installing cable management systems, every step is designed for real-world use.
You’ll learn how to route cables discreetly, protect them from the elements, and maintain easy access for future upgrades or repairs. No need to be an electrician—just follow our clear, step-by-step instructions and enjoy a clutter-free outdoor oasis.
Why Hiding Cables Matters for Your Patio TV
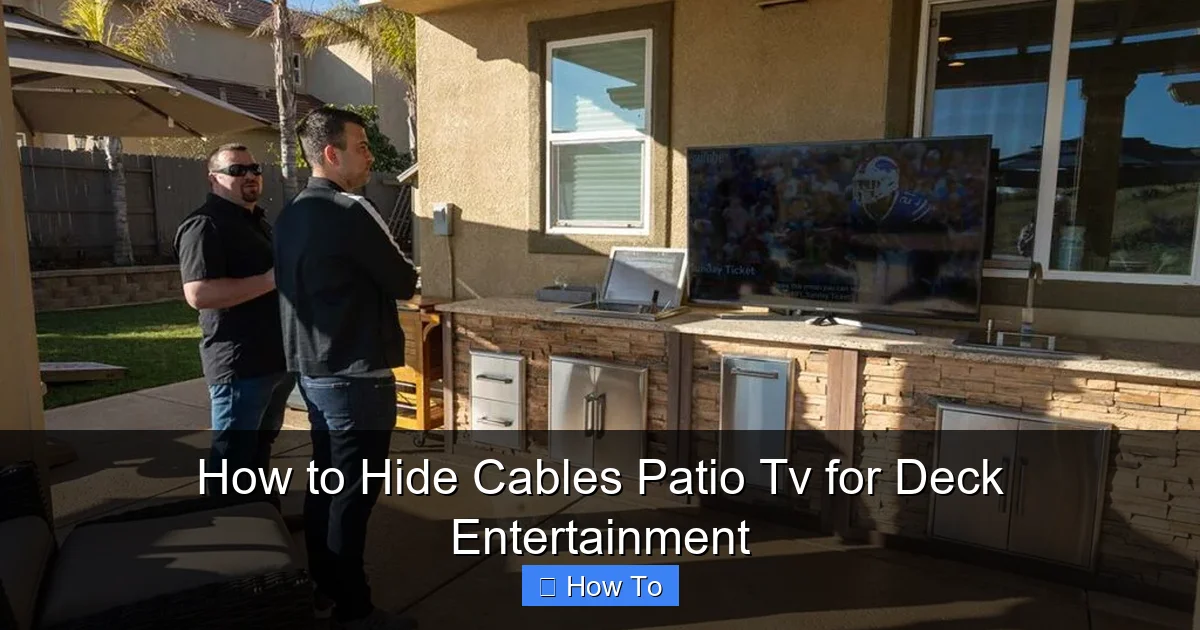
Visual guide about How to Hide Cables Patio Tv for Deck Entertainment
Image source: rtaoutdoorliving.com
Before diving into the how-to, let’s talk about why this matters. Exposed cables aren’t just an eyesore—they’re a liability.
First, safety. Loose wires can cause trips, especially in dim lighting or when guests are over. Wet conditions make it worse—water and electricity don’t mix. Second, durability. Sun, rain, snow, and temperature swings can degrade standard indoor cables quickly. Without protection, you’ll be replacing them every season.
Then there’s aesthetics. Your deck is an extension of your home. A clean, wire-free setup enhances the ambiance and makes the space feel more inviting. Plus, hidden cables give your setup a professional, built-in look that impresses guests and increases your home’s value.
Finally, functionality. Organized cables are easier to manage. If something goes wrong, you can quickly identify and fix the issue without unraveling a spaghetti junction behind your TV.
In short, hiding your patio TV cables isn’t just about looks—it’s about safety, longevity, and peace of mind.
Step 1: Plan Your Cable Layout
The first step to a successful cable hide job is planning. Rushing into installation without a map is like building a house without blueprints—it might stand, but it won’t last.
Assess Your TV Location
Start by deciding where your TV will go. Common spots include:
– Mounted on a wall or post
– On a weatherproof TV stand
– Inside a pergola or outdoor cabinet
Once you’ve chosen the spot, note the distance to your power source, streaming device (like a Roku or Apple TV), sound system, and any other components.
Map the Cable Paths
Sketch a simple diagram of your deck. Mark the TV location, power outlet, and all devices. Then, trace the shortest possible routes for each cable. Avoid high-traffic areas and places where water pools.
For example:
– If your TV is on the railing, run cables along the underside of the railing.
– If it’s on a wall, route wires inside the wall cavity (if possible) or along the baseboard.
– For freestanding setups, consider running cables under the deck or through a nearby planter.
Measure Cable Lengths
Buy cables that are just long enough—no longer. Excess length creates loops that are harder to hide and more prone to damage. Use a tape measure to get precise distances. Add 6–12 inches for slack, but don’t go overboard.
Pro tip: Use a laser distance measurer for accuracy, especially on larger decks.
Check for Obstructions
Look for obstacles like railings, furniture, or landscaping features. You’ll need to work around these. For instance, if your power outlet is on the opposite side of the deck, you might need to run cables under the deck boards or use a weatherproof extension cord with a built-in cover.
Step 2: Gather the Right Tools and Materials
Using the wrong products can lead to failure—especially outdoors. Here’s what you’ll need for a durable, weatherproof cable management system.
Outdoor-Rated Cable Management Products
Standard indoor raceways and clips won’t survive UV exposure or rain. Look for:
– UV-resistant plastic raceways: These are rigid or flexible channels that snap together to enclose cables. Choose ones rated for outdoor use (look for IP65 or higher).
– Weatherproof conduit: Flexible or rigid tubing that protects cables from moisture and physical damage. PVC or liquid-tight flexible conduit (LFMC) works well.
– Outdoor cable clips and ties: Use stainless steel or UV-stabilized plastic clips. Avoid rubber ties—they degrade in sunlight.
Power and Extension Solutions
– Weatherproof outdoor extension cord: Choose one with a GFCI plug and a cover for the outlet.
– Outdoor power inlet box: If you’re running power from inside, install a weatherproof inlet on the deck wall.
– Surge protector with outdoor rating: Protects your devices from power surges caused by lightning or grid fluctuations.
Tools You’ll Need
– Drill and drill bits (for mounting)
– Screwdriver or impact driver
– Measuring tape
– Level
– Cable stripper (if splicing)
– Zip ties or Velcro straps (outdoor-rated)
– Silicone sealant (for sealing entry points)
Optional but Helpful
– Cable labels and a label maker
– Fish tape (for running wires through walls or under decks)
– Outdoor-rated paint (to match raceways to your deck color)
Step 3: Choose the Best Cable Hiding Method
There’s no one-size-fits-all solution. The best method depends on your deck layout, TV placement, and aesthetic preferences. Here are the top options.
Option 1: Use Outdoor Cable Raceways
Raceways are the most popular choice for hiding patio TV cables. They’re easy to install, look clean, and protect wires from the elements.
How to Install:
1. Clean the surface where the raceway will go.
2. Measure and cut the raceway to length using a hacksaw or PVC cutter.
3. Plan the route—ideally along a wall, railing, or baseboard.
4. Drill pilot holes and secure the base with outdoor screws.
5. Lay the cables inside, then snap on the cover.
6. Seal the ends with silicone to prevent water entry.
Best for: Wall-mounted TVs, straight runs, modern decks.
Pro tip: Paint the raceway to match your deck or wall color for a seamless look.
Option 2: Run Cables Under the Deck
If your deck has space underneath, this is a nearly invisible solution.
How to Install:
1. Access the area under the deck (you may need to remove a board).
2. Use fish tape to pull cables from the TV location to the power source.
3. Secure cables to joists with outdoor-rated clips every 12–18 inches.
4. Protect the entry and exit points with conduit or grommets.
5. Seal any gaps with silicone to keep pests and water out.
Best for: Elevated decks, permanent installations.
Caution: Avoid low-clearance areas where water might pool. Ensure cables are rated for direct burial if running underground.
Option 3: Use Flexible Conduit
Conduit is ideal for curved paths or areas with obstacles.
How to Install:
1. Measure the route and cut the conduit to length.
2. Feed the cables through using a fish tape or string.
3. Secure the conduit with clamps every 2–3 feet.
4. Use 90-degree bends or elbows for corners.
5. Seal ends with conduit caps or silicone.
Best for: Railings, pergolas, irregular layouts.
Pro tip: Choose liquid-tight flexible conduit (LFMC) for maximum weather protection.
Option 4: Hide Cables in Planters or Furniture
Get creative with landscaping and outdoor decor.
How to Install:
1. Use a large planter with a hollow base or drill a small hole in the bottom.
2. Run cables through the planter to the TV.
3. Conceal the entry point with mulch or decorative stones.
4. For furniture, choose pieces with built-in cable management or modify them with hidden channels.
Best for: Freestanding TVs, small decks, rustic styles.
Note: Ensure the planter has drainage and isn’t blocking airflow to the TV.
Option 5: Wall-Mounted Channels or Trunking
If your TV is mounted on a wall, consider built-in trunking.
How to Install:
1. Mount a weatherproof trunking system directly to the wall.
2. Route cables through the channel.
3. Use removable covers for easy access.
4. Paint to match the wall.
Best for: Permanent wall mounts, modern designs.
Step 4: Install and Secure the Cables
Now that you’ve chosen your method, it’s time to install.
Step-by-Step Installation
1. Turn off power: Always disconnect power before working with electrical cables.
2. Run the cables: Feed HDMI, power, audio, and any other wires through your chosen pathway.
3. Secure with clips or ties: Use outdoor-rated fasteners every 12–18 inches to prevent sagging.
4. Label each cable: Use a label maker or colored tape to identify HDMI, power, etc.
5. Connect devices: Plug everything in and test before finalizing.
6. Seal entry points: Apply silicone around where cables enter raceways, walls, or conduits.
Tips for a Clean Finish
– Keep cables parallel and neat—no crossing or twisting.
– Use Velcro straps instead of zip ties for easy removal.
– Avoid sharp bends in HDMI cables—they can damage the internal wires.
– Leave a little slack near connections for flexibility.
Step 5: Test and Troubleshoot
Don’t assume everything works just because it’s plugged in.
Test All Connections
Turn on the TV and check:
– Is the picture clear?
– Is the sound working?
– Are streaming devices connecting to Wi-Fi?
– Is the power stable?
Common Issues and Fixes
- No signal: Check HDMI connections. Try a different cable or port.
- Intermittent power: Ensure the outdoor outlet is GFCI-protected and not overloaded.
- Audio delay: Update firmware on your sound system or TV.
- Cables overheating: Make sure they’re not pinched or exposed to direct sunlight without protection.
- Water ingress: Re-seal any gaps with silicone. Consider adding drip loops to prevent water from traveling along the cable.
Final Inspection
Walk around your deck. Look for:
– Exposed wires
– Loose clips or raceways
– Tripping hazards
– Signs of wear or damage
Make adjustments as needed.
Step 6: Maintain Your Setup
Cable management isn’t a one-and-done task. Outdoor environments demand regular upkeep.
Seasonal Checks
– Spring: Inspect for winter damage. Re-secure any loose clips.
– Summer: Check for UV degradation. Replace faded raceways.
– Fall: Clear debris from under the deck and around conduits.
– Winter: Ensure snow and ice aren’t weighing down cables.
Cleaning Tips
– Wipe raceways and conduits with a damp cloth.
– Avoid harsh chemicals that can degrade plastic.
– Use compressed air to blow out dust from tight spaces.
Upgrades and Repairs
If you add a soundbar or new streaming device, plan the cable route in advance. Use the existing raceway or conduit if possible. Label new cables clearly.
Safety and Code Compliance
Outdoor electrical work comes with risks. Follow these guidelines to stay safe and compliant.
Electrical Safety
– Always use GFCI-protected outlets for outdoor power.
– Never run extension cords under rugs or through walls permanently.
– Keep power cables away from water sources like pools or sprinklers.
– Hire a licensed electrician if you’re unsure about wiring.
Local Building Codes
Check with your local municipality. Some areas require:
– Permits for outdoor electrical work
– Specific conduit types
– Minimum burial depth for underground cables
Weatherproofing Essentials
– Use only outdoor-rated products.
– Seal all connections and entry points.
– Install drip loops—loops in the cable that let water drip off before reaching the outlet.
Conclusion
Hiding cables for your patio TV doesn’t have to be a headache. With the right planning, tools, and techniques, you can create a clean, safe, and stylish deck entertainment area that lasts for years.
Start by mapping your cable routes and choosing weatherproof management solutions like raceways, conduit, or under-deck routing. Install carefully, test thoroughly, and maintain regularly. And always prioritize safety—especially when dealing with outdoor power.
A wire-free deck isn’t just about looks. It’s about enjoying your outdoor space without worry. Whether you’re hosting a movie night under the stars or catching the big game with friends, your setup will be as functional as it is beautiful.
So grab your tools, follow this guide, and say goodbye to cable clutter. Your perfect patio TV experience starts now.

