
Installing an outdoor TV on a large patio can transform your outdoor living space into a premium entertainment zone. This guide walks you through every step—from choosing the right TV and mount to running cables safely and protecting your setup from the elements. Whether you’re a DIY enthusiast or hiring a pro, you’ll gain the knowledge to create a stunning, weather-resistant outdoor viewing experience.
Key Takeaways
- Choose a true outdoor TV: Not all weather-resistant TVs are built the same—opt for models specifically designed for outdoor use with sealed components and temperature regulation.
- Select the right mounting location: Ensure the TV is placed in a shaded, sheltered area with minimal glare and strong structural support for the mount.
- Use weatherproof cables and enclosures: Protect all wiring with outdoor-rated cables, conduit, and waterproof junction boxes to prevent damage and ensure safety.
- Plan for power and signal sources: Run power and HDMI/coaxial cables safely from indoor sources, using in-wall rated cables if passing through walls.
- Secure the mount properly: Use heavy-duty lag bolts into wall studs or concrete anchors for brick or concrete surfaces to support the TV’s weight.
- Test everything before finalizing: Power on the TV, check signal quality, and ensure all connections are stable before sealing enclosures.
- Maintain your setup regularly: Clean the screen, inspect seals, and check for corrosion or loose components to extend the TV’s lifespan.
How to Install Outdoor TV for Large Patio
Imagine hosting summer barbecues, movie nights under the stars, or watching the big game with friends—all from the comfort of your spacious patio. An outdoor TV can make that dream a reality. But installing one isn’t as simple as mounting a TV indoors. You need to consider weather, power, signal strength, and safety. This comprehensive guide will walk you through every step of installing an outdoor TV for a large patio, ensuring a professional, long-lasting setup.
Whether you’re upgrading your backyard oasis or building a new outdoor entertainment area, this guide covers everything from choosing the right TV to final testing. By the end, you’ll have a weatherproof, high-performance outdoor viewing system that stands up to rain, sun, and temperature swings.
Step 1: Choose the Right Outdoor TV
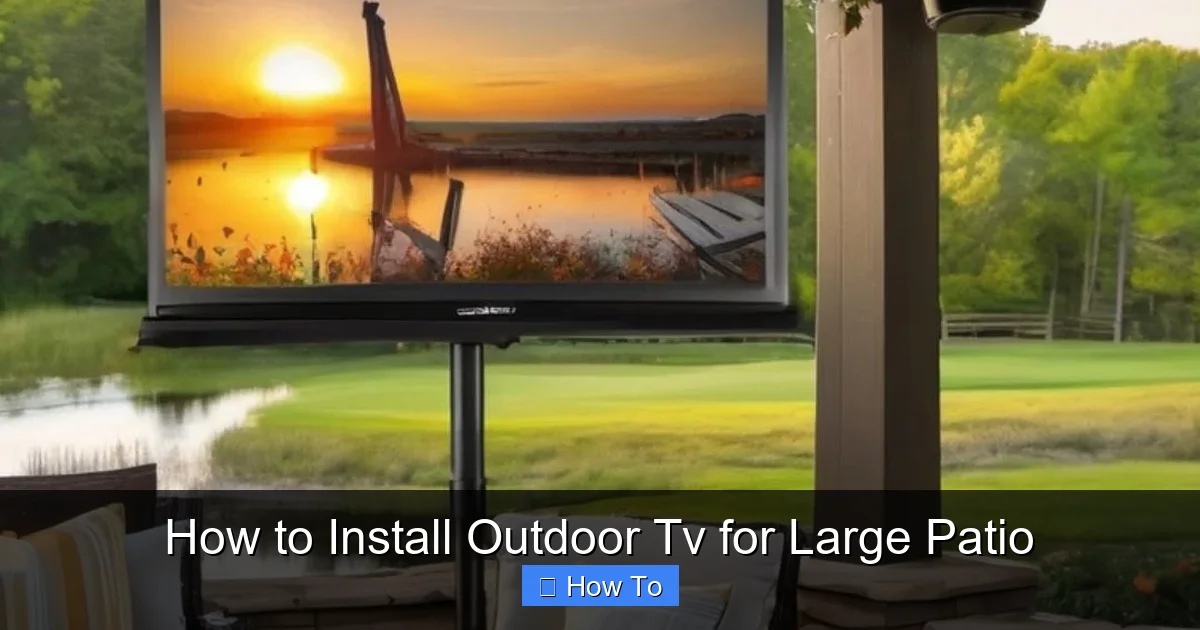
Visual guide about How to Install Outdoor Tv for Large Patio
Image source: i.pinimg.com
Not all TVs are created equal—especially when it comes to outdoor use. Standard indoor TVs may short out, overheat, or get damaged by moisture and temperature changes. That’s why selecting a true outdoor TV is the most important first step.
Understand the Types of Outdoor TVs
There are three main types of outdoor TVs:
- All-Weather Outdoor TVs: These are fully sealed, built to withstand rain, snow, dust, and extreme temperatures. They often include built-in cooling and heating systems to prevent overheating in summer or freezing in winter. Brands like SunBriteTV, Samsung Terrace, and Seura offer high-quality all-weather models.
- Weather-Resistant TVs: These are more affordable and designed for covered patios or areas with partial protection from the elements. They’re not fully sealed but can handle light rain and humidity if installed correctly.
- Indoor TVs with Outdoor Enclosures: You can use a regular indoor TV inside a weatherproof outdoor TV enclosure. This is a budget-friendly option, but enclosures can limit airflow and may fog up in humid conditions.
For a large patio, especially one exposed to direct sunlight or rain, we recommend an all-weather outdoor TV. It’s a long-term investment that ensures reliability and performance.
Consider Screen Size and Viewing Distance
On a large patio, you’ll likely have multiple seating areas. Choose a screen size that’s visible from all angles. A general rule is:
- For every 1.5 feet of viewing distance, use 1 inch of screen size. So, if your farthest seat is 15 feet away, a 65-inch TV is ideal.
- For very large patios (20+ feet), consider a 75-inch or 85-inch model for better visibility.
Also, look for high brightness (measured in nits). Outdoor TVs should have at least 700 nits, but 1000+ nits is better for sunny days. Anti-glare screens also help reduce reflections.
Step 2: Pick the Perfect Location
Where you mount your TV affects both viewing quality and longevity. A poor location can lead to glare, overheating, or water damage.
Find a Sheltered Spot
Avoid mounting the TV in direct sunlight or areas exposed to heavy rain. Ideal locations include:
- Under a covered pergola or roof overhang
- On a wall that faces north (in the Northern Hemisphere) to reduce sun exposure
- Near outdoor kitchen or seating areas for convenience
If your patio has no natural cover, consider installing a retractable awning or shade sail to protect the TV.
Check for Glare and Viewing Angles
Stand where your primary seating will be and look at the wall. Is the sun likely to reflect off the screen? Use a mirror to simulate the TV screen and check for glare. If glare is an issue, consider:
- Mounting the TV higher or at a slight downward angle
- Using a TV with an anti-reflective coating
- Adding outdoor curtains or plants to block direct sunlight
Also, ensure the TV is at eye level when seated—typically 42 to 60 inches from the ground to the center of the screen.
Step 3: Choose the Right Mount
The mount must support the TV’s weight and allow for optimal viewing angles. For large patios, a full-motion or tilting mount is often best.
Types of Outdoor TV Mounts
- Fixed Mount: Keeps the TV flush against the wall. Best for permanent, straight-on viewing. Least expensive but offers no adjustability.
- Tilting Mount: Allows you to angle the TV downward. Great for reducing glare and improving viewing from elevated seating.
- Full-Motion (Articulating) Mount: Lets you swivel, tilt, and extend the TV. Ideal for large patios with multiple seating zones. Most flexible but requires stronger anchoring.
For a large patio, we recommend a full-motion mount. It lets you adjust the TV for different events—like a movie night or a sports watch party.
Check Weight and VESA Compatibility
Make sure the mount supports your TV’s weight and VESA pattern (the screw hole layout on the back). Most outdoor mounts list compatibility details. For example, a 75-inch TV might weigh 70+ pounds and require a VESA 400×400 or 600×400 pattern.
Always choose a mount rated for outdoor use. Look for powder-coated steel or aluminum to resist rust.
Step 4: Prepare the Mounting Surface
The wall or structure you mount to must be strong enough to hold the TV and withstand wind, vibration, and weather.
Identify the Wall Type
Common patio wall types include:
- Wood Frame: Look for wall studs (usually 16 or 24 inches apart). Use a stud finder to locate them.
- Brick or Concrete: Requires masonry anchors or concrete screws. Drill pilot holes with a hammer drill.
- Metal Studs: Less common but possible. Use specialized toggle bolts or anchors designed for metal.
Never mount a TV to drywall alone—it won’t support the weight.
Reinforce if Necessary
If your wall is weak or you’re mounting on a freestanding post, consider adding a backing board. For example:
- Attach a 3/4-inch plywood sheet to wall studs, then mount the bracket to the plywood.
- For concrete, use a concrete backer board or install a metal mounting plate.
This adds stability and distributes the weight more evenly.
Step 5: Run Power and Signal Cables
This is one of the trickiest parts—running cables safely from your indoor power and signal sources to the outdoor TV.
Plan Your Cable Route
Map out the shortest, safest path from your indoor receiver (cable box, streaming device, etc.) to the TV. Common routes include:
- Through an exterior wall near the TV
- Under the house or deck (if accessible)
- Along the edge of the patio, hidden in conduit
Avoid running cables across walkways or areas where they can be tripped over.
Use Outdoor-Rated Cables
Never use standard indoor cables outside. They can degrade quickly and pose a fire hazard. Instead, use:
- Outdoor-rated power cables: Look for “SJTW” or “SJTOW” ratings, which are water-resistant and UV-protected.
- In-wall rated HDMI cables: If running through walls, use CL2 or CL3 rated HDMI cables to meet electrical codes.
- Coaxial cables with weatherproof connectors: For cable or satellite TV, use RG6 coaxial cable with waterproof F-connectors.
For long runs (over 50 feet), consider HDMI over Ethernet or wireless HDMI extenders to maintain signal quality.
Protect Cables with Conduit
Run all cables through PVC or flexible metal conduit. This protects them from moisture, pests, and physical damage. Seal all entry points with silicone caulk or rubber grommets to prevent water intrusion.
If running cables through a wall, drill a hole from the inside out at a slight downward angle to let water drain away from the house.
Install a GFCI Outlet
Outdoor electrical outlets must be GFCI (Ground Fault Circuit Interrupter) protected to prevent shocks. If you don’t have one nearby, hire a licensed electrician to install a weatherproof GFCI outlet near the TV.
Never use extension cords permanently. They’re not safe for outdoor use long-term.
Step 6: Mount the TV Bracket
Now it’s time to secure the mount to the wall.
Mark and Drill Pilot Holes
Hold the mounting bracket against the wall and use a level to ensure it’s straight. Mark the screw holes with a pencil. Drill pilot holes slightly smaller than your anchors or lag bolts.
For wood studs, drill directly into the stud. For brick or concrete, use a hammer drill and masonry bits.
Secure the Bracket
- For wood: Use 3/8-inch lag bolts with washers. Tighten with a socket wrench until snug—don’t over-tighten.
- For concrete: Use concrete anchors or sleeve anchors. Insert the anchor, then screw in the bolt.
- For metal studs: Use toggle bolts or snap-toggle anchors that expand behind the stud.
Double-check that the bracket is level and firmly attached. Give it a firm tug to test stability.
Step 7: Attach the TV to the Mount
This step requires at least two people—TVs are heavy and awkward to handle.
Attach Mounting Arms to the TV
Most mounts come with arms that screw into the VESA holes on the back of the TV. Use the provided screws and a screwdriver or drill with a low torque setting. Don’t overtighten.
Lift and Secure the TV
With a helper, lift the TV and hook the arms onto the wall bracket. Make sure it’s seated properly and locked in place if your mount has a locking mechanism.
Once attached, adjust the tilt or swivel to your preferred viewing angle. Tighten any adjustment knobs to lock the position.
Step 8: Connect Cables and Test
Now it’s time to connect everything and make sure it works.
Connect Power and Signal
- Plug the power cable into the GFCI outlet.
- Connect HDMI, coaxial, or other signal cables to your source device (e.g., cable box, streaming stick).
- If using a soundbar or outdoor speakers, connect them now.
Use cable ties or clips to secure loose wires to the mount or wall. Keep them neat and out of the way.
Power On and Test
Turn on the TV and source device. Check:
- Is the picture clear and bright?
- Is the audio working?
- Can you change channels or switch inputs?
- Is the signal strong (no pixelation or dropouts)?
If something isn’t working, double-check connections and cable integrity.
Step 9: Weatherproof and Secure
Even with an outdoor TV, extra protection helps it last longer.
Seal All Connections
Use silicone sealant around wall penetrations and cable entry points. Cover outdoor outlets with weatherproof covers.
Use a TV Cover (Optional)
When not in use, especially during storms or winter, use a breathable outdoor TV cover to protect the screen and vents.
Install a Surge Protector
Outdoor electronics are vulnerable to power surges. Plug the TV and all components into a high-quality outdoor surge protector.
Troubleshooting Common Issues
TV Won’t Turn On
- Check the GFCI outlet—press the “reset” button.
- Ensure the power cable is fully plugged in.
- Test the outlet with another device.
Poor Picture Quality
- Check HDMI cable connections—loose cables cause signal loss.
- Replace long HDMI cables with higher-quality or fiber optic versions.
- Ensure the source device is set to the correct resolution.
Overheating or Shutting Down
- Make sure the TV has proper ventilation—don’t block vents.
- Install in a shaded area or add a canopy.
- Check if the TV’s internal cooling fan is working.
Water Damage or Corrosion
- Inspect seals and gaskets regularly.
- Reapply silicone sealant if needed.
- Use dielectric grease on metal connections to prevent rust.
Maintenance Tips
To keep your outdoor TV in top shape:
- Clean the screen monthly with a microfiber cloth and screen-safe cleaner.
- Inspect cables and seals every 3–6 months.
- Check mount bolts for tightness annually.
- Remove debris (leaves, dirt) from vents and around the TV.
- Cover the TV during extreme weather or long periods of non-use.
Conclusion
Installing an outdoor TV for a large patio is a rewarding project that enhances your outdoor living experience. By choosing the right TV, mounting it securely, running cables safely, and protecting it from the elements, you can enjoy high-quality entertainment year-round.
While some steps—like electrical work or drilling into concrete—may require professional help, many homeowners can complete the installation themselves with the right tools and preparation. Always prioritize safety, use outdoor-rated materials, and plan for long-term maintenance.
With this guide, you’re equipped to create a stunning, weather-resistant outdoor entertainment setup that will impress guests and provide endless enjoyment. So grab your tools, pick a sunny day, and get ready to transform your patio into the ultimate outdoor theater.

