
Hiding cables for your deck TV in an outdoor kitchen doesn’t have to be complicated. This guide walks you through practical, weather-resistant methods to keep wires organized, safe, and out of sight. Enjoy a clean, professional look while protecting your electronics from the elements.
Key Takeaways
- Plan your cable route first: Map out the path from your TV to power and AV sources before drilling or installing anything.
- Use weatherproof conduits and raceways: Protect cables from rain, UV rays, and temperature swings with outdoor-rated materials.
- Choose the right mounting surface: Whether it’s a wall, post, or under-deck area, pick a spot that supports secure, hidden routing.
- Label and organize cables: Keep everything neat and easy to maintain with cable ties, labels, and management sleeves.
- Test before finalizing: Always power up and check connections before sealing everything in place.
- Consider wireless alternatives: Reduce cable clutter with wireless HDMI kits or streaming devices when possible.
- Follow local codes: Ensure outdoor electrical work meets safety standards and permits if required.
How to Hide Cables for Your Deck TV in an Outdoor Kitchen
So you’ve installed a sleek TV on your deck, right next to your outdoor kitchen. It’s perfect for watching the game while grilling burgers or catching a movie under the stars. But now you’re staring at a tangled mess of cables snaking across your deck, ruining the clean look you worked so hard to create. Sound familiar?
Don’t worry—you’re not alone. Hiding cables for a deck TV in an outdoor kitchen is one of the most common challenges homeowners face when upgrading their outdoor living spaces. The good news? With the right tools, planning, and a little elbow grease, you can make those wires disappear—safely and stylishly.
In this complete guide, we’ll walk you through every step of hiding cables for your outdoor TV setup. Whether you’re mounting your TV on a wall, a post, or under a pergola, we’ve got solutions that are weatherproof, durable, and easy to install. You’ll learn how to route cables through walls, under decks, or along railings—without compromising safety or performance.
By the end of this guide, you’ll have a clean, professional-looking outdoor entertainment area that’s as functional as it is beautiful. Let’s get started!
Why Hiding Cables Matters for Outdoor TVs
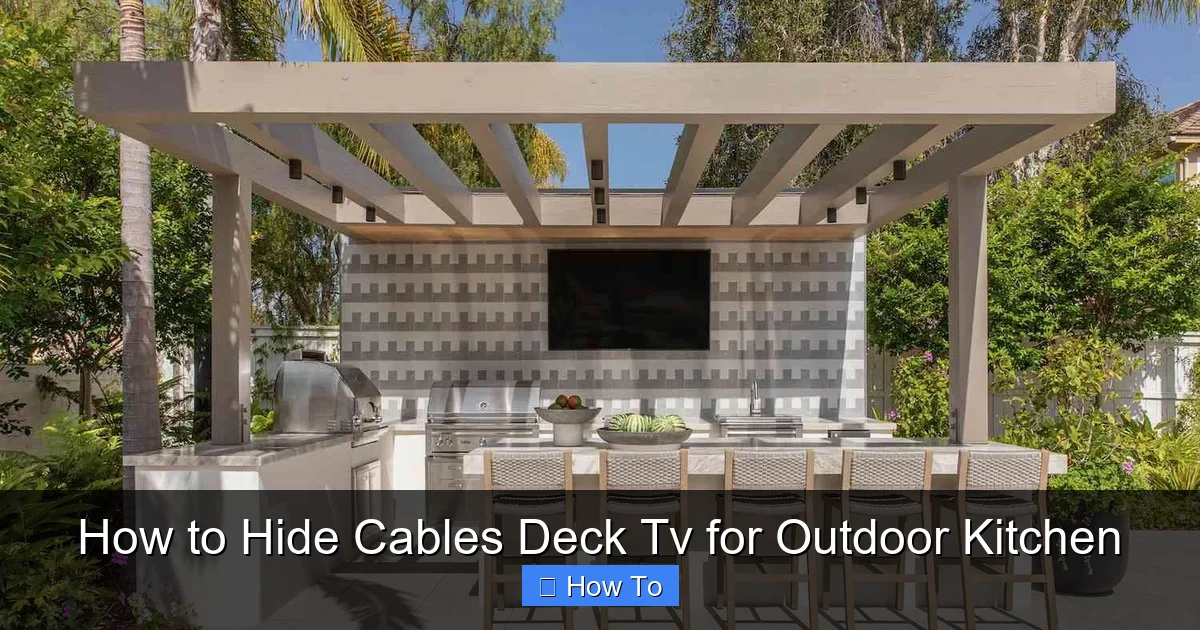
Visual guide about How to Hide Cables Deck Tv for Outdoor Kitchen
Image source: thespruce.com
Before diving into the how-to, let’s talk about why hiding cables is so important—especially in an outdoor kitchen setup.
First, safety. Exposed cables are tripping hazards, especially in high-traffic areas like decks and outdoor kitchens. A guest could easily trip over a loose HDMI or power cord, leading to injury or damage to your equipment.
Second, weather protection. Outdoor cables are exposed to rain, snow, UV rays, and temperature extremes. Over time, this can degrade insulation, cause shorts, or even create fire risks. Properly concealed cables are shielded from the elements, extending their lifespan and keeping your setup safe.
Third, aesthetics. Let’s face it—no one wants to look at a spaghetti junction of wires every time they step outside. A clean, cable-free deck enhances the overall ambiance of your outdoor space, making it more inviting and relaxing.
Finally, maintenance and upgrades. Hidden cables are easier to manage. If you need to replace a cable or add a new device, a well-organized system makes it simple. Plus, it protects your investment—your TV, soundbar, and streaming devices are expensive, and proper cable management helps preserve them.
Planning Your Cable Route
The key to successful cable hiding is planning. Rushing into installation without a clear path will lead to frustration, damaged walls, or unsafe setups.
Step 1: Identify Your Components
Start by listing all the devices that need to connect to your TV:
– Power source (outlet or extension)
– HDMI cables (for streaming devices, game consoles, etc.)
– Audio cables (if using external speakers or a soundbar)
– Ethernet cable (for wired internet, if needed)
– Antenna or satellite cable (if applicable)
Knowing what you’re working with helps determine how many cables you’ll need to hide and what kind of conduits or raceways to use.
Step 2: Map the Shortest, Safest Path
Trace the route from your TV to each power and signal source. Look for the shortest path that avoids high-traffic areas, water sources, and direct sunlight.
Common routes include:
– Along the wall behind the TV
– Down a support post
– Under the deck
– Through a soffit or ceiling
– Inside a railing or trim
Avoid running cables across open decking or under furniture—these areas are prone to wear and tear.
Step 3: Check for Obstructions
Look for potential obstacles:
– Electrical outlets (are they GFCI-rated for outdoor use?)
– Water lines or gas lines (never run cables near gas lines)
– Structural beams or joists
– Ventilation or drainage areas
If you’re unsure, consult a contractor or electrician before drilling.
Step 4: Measure and Label
Measure the distance of your cable run and add 10–15% extra length for slack and connections. Label each cable at both ends with tape or tags so you know what’s what during installation.
Choosing the Right Cable Hiding Solutions
Not all cable management products are created equal—especially for outdoor use. You need materials that can withstand moisture, heat, and UV exposure.
Weatherproof Conduits
Conduits are rigid or flexible tubes that protect cables from physical damage and weather. For outdoor use, choose:
– PVC conduit: Affordable, easy to cut, and resistant to moisture. Use schedule 40 or 80 for durability.
– Metal conduit: More durable but harder to install. Best for high-traffic or exposed areas.
– Flexible conduit: Great for tight spaces or curved paths. Look for UV-resistant types.
Install conduits using outdoor-rated straps or clips. Seal entry and exit points with silicone caulk to prevent water ingress.
Cable Raceways
Raceways are plastic or metal channels that snap or screw into place. They’re ideal for surface-mounted cable runs along walls or under cabinets.
Choose raceways labeled “outdoor” or “UV-resistant.” Some models come with adhesive backing, but for decks, screw-mounted raceways are more secure.
Under-Deck Cable Trays
If your deck has an open underside, consider installing a cable tray or wire mesh basket beneath the floor. This keeps cables off the ground, protected from pests and moisture.
Use stainless steel or galvanized trays to prevent rust. Secure them to joists with screws or brackets.
Post-Mounted Cable Channels
For TVs mounted on deck posts, use post-mounted cable channels. These are U-shaped covers that wrap around the post and hide cables running vertically.
They’re available in wood, metal, or composite finishes to match your deck.
Wireless Alternatives
Reduce cable clutter with wireless options:
– Wireless HDMI kits: Transmit video and audio from your source (like a streaming box) to your TV without cables. Look for models with outdoor range (up to 100 feet).
– Streaming devices with built-in Wi-Fi: Use devices like Roku, Apple TV, or Fire Stick to eliminate the need for long HDMI runs.
– Bluetooth speakers: Skip audio cables entirely with wireless outdoor speakers.
While wireless isn’t perfect (latency or interference can be issues), it’s a great way to minimize physical cables.
Step-by-Step Installation Guide
Now that you’ve planned your route and chosen your materials, it’s time to install.
Step 1: Turn Off Power
Before working near electrical outlets or wiring, turn off power at the breaker. Use a voltage tester to confirm the circuit is dead.
Safety first—especially outdoors where moisture increases shock risk.
Step 2: Mount the TV and Devices
Install your TV mount and secure the TV according to the manufacturer’s instructions. Mount streaming devices, soundbars, or receivers in a dry, ventilated spot—never in direct sunlight or exposed to rain.
Use weatherproof enclosures if needed.
Step 3: Run Cables Through Walls (If Possible)
If your TV is mounted on an exterior wall, running cables inside the wall is the cleanest option.
– Use a stud finder to locate studs and avoid drilling into them.
– Drill a small hole from the back of the TV mount area into the wall cavity.
– Feed cables through using a fish tape or flexible rod.
– Drill another hole near the power source or AV equipment.
– Pull cables through and connect.
Seal holes with exterior-grade caulk to prevent drafts and water entry.
Step 4: Use Conduits for Exposed Runs
For cables running along walls, posts, or under decks:
– Cut the conduit to length using a hacksaw or PVC cutter.
– Secure it with outdoor-rated clips every 12–18 inches.
– Feed cables through using a pull string or fish tape.
– Seal ends with silicone or rubber grommets.
Tip: Use colored tape to mark different cables inside the conduit for easy identification later.
Step 5: Install Raceways or Channels
For surface-mounted cable runs:
– Clean the surface with rubbing alcohol.
– Mark the raceway position with a pencil.
– Drill pilot holes and screw the raceway in place (avoid adhesive in humid climates).
– Open the raceway, lay cables inside, and snap it shut.
Paint raceways to match your deck or trim for a seamless look.
Step 6: Secure Under-Deck Cables
If routing under the deck:
– Attach a cable tray or mesh basket to the joists using screws.
– Bundle cables with zip ties or Velcro straps.
– Keep cables at least 6 inches above the ground to avoid moisture.
– Use drip loops where cables exit the deck to prevent water from running down into connections.
Step 7: Connect and Test
Once all cables are routed:
– Connect each cable to the correct device.
– Plug in power and turn on the breaker.
– Test video, audio, and internet connections.
– Adjust settings on your TV and streaming devices.
If something isn’t working, double-check connections and cable integrity.
Step 8: Finalize and Seal
Once everything works:
– Tighten all clips and screws.
– Apply silicone sealant around conduit entries and raceway joints.
– Trim excess zip ties.
– Tuck any loose cables into enclosures or trays.
Your setup should now look clean and professional.
Troubleshooting Common Issues
Even with careful planning, problems can arise. Here’s how to fix the most common ones.
Cable Signal Loss
If your picture is pixelated or audio cuts out:
– Check for bent or damaged cables.
– Ensure HDMI cables are rated for outdoor use (look for “outdoor” or “burial” ratings).
– Avoid running power and signal cables in the same conduit—electromagnetic interference can disrupt signals.
Water in Conduits
Moisture can accumulate inside conduits due to condensation or rain.
– Install drip loops where cables enter the conduit.
– Use conduit with drainage holes or add small weep holes at low points.
– Seal only the top ends—allow airflow to prevent condensation.
Loose or Sagging Raceways
If raceways come loose:
– Remove and clean the surface.
– Use longer screws or anchors for better grip.
– Avoid adhesive-only mounting in humid or rainy climates.
Overheating Devices
Streaming boxes or receivers can overheat if enclosed without ventilation.
– Use ventilated enclosures.
– Avoid direct sunlight.
– Leave space around devices for airflow.
Tripping Hazards
If cables are still visible:
– Re-evaluate your route—can you go under the deck or through a wall?
– Use flat, low-profile raceways that blend into the surface.
– Add outdoor rugs or mats to cover minor cable runs (but ensure they’re non-slip and weatherproof).
Maintenance Tips for Long-Term Success
Hiding cables isn’t a one-and-done task. Regular maintenance keeps your system safe and functional.
Inspect Every Season
Check cables, conduits, and raceways at least twice a year—spring and fall. Look for:
– Cracks or warping in plastic covers
– Loose clips or screws
– Signs of pests (chewed wires)
– Moisture or mold
Clean Connections
Dust and dirt can build up on ports. Use compressed air or a soft brush to clean HDMI and power connectors.
Update as Needed
If you add new devices, plan the cable route in advance. Avoid overloading conduits—leave room for future upgrades.
Label Everything
Keep a diagram of your cable layout. Store it with your TV manual or in a weatherproof box. This makes troubleshooting and upgrades much easier.
Conclusion
Hiding cables for your deck TV in an outdoor kitchen might seem like a daunting task, but with the right approach, it’s totally doable—and well worth the effort. A clean, organized setup not only looks better but also keeps your equipment safe, reduces hazards, and makes maintenance a breeze.
Remember: plan your route, choose weatherproof materials, and test everything before finalizing. Whether you’re running cables through walls, under decks, or along posts, the goal is the same—create a seamless, professional outdoor entertainment space.
And don’t forget the power of wireless technology. While it won’t eliminate all cables, it can significantly reduce clutter and simplify your setup.
So grab your tools, follow this guide, and say goodbye to messy wires. Your deck TV will look sleek, your outdoor kitchen will feel more inviting, and you’ll enjoy every moment—without tripping over a rogue HDMI cable.
Happy watching!

