
Hiding cables for your backyard TV in a coastal home requires special attention to corrosion, moisture, and UV exposure. This guide walks you through weatherproof cable management techniques using marine-grade materials, secure routing, and smart concealment strategies to keep your outdoor entertainment area safe and stylish.
Key Takeaways
- Use marine-grade, UV-resistant cable covers: Standard plastic conduits degrade quickly in salty, sunny coastal environments—opt for materials rated for marine use.
- Route cables above ground when possible: Avoid burying cables in sandy or damp soil, which increases corrosion risk and makes repairs difficult.
- Seal all connections with waterproof junction boxes: Prevent saltwater intrusion and humidity damage by using IP67-rated enclosures.
- Anchor cables securely to prevent wind damage: Coastal winds can loosen or snap exposed wires—use stainless steel clips and strain relief.
- Choose corrosion-resistant fasteners and hardware: Stainless steel or coated aluminum prevents rust and extends cable life.
- Plan for easy access and maintenance: Design your cable run with service panels or removable covers for future upgrades or repairs.
- Test your setup seasonally: Salt buildup and weather changes can affect performance—inspect and clean connections regularly.
Introduction: Why Cable Management Matters for Coastal Backyard TVs
Setting up a backyard TV in a coastal home is a dream for many homeowners who love outdoor entertaining. Whether you’re watching the sunset with friends or catching the big game under the stars, a weatherproof outdoor TV setup enhances your lifestyle. But coastal environments present unique challenges—salt air, high humidity, intense UV rays, and strong winds can quickly damage exposed cables and electronics.
Hiding cables isn’t just about aesthetics—it’s about safety, durability, and performance. Exposed wires are tripping hazards, attract pests, and are prone to corrosion. In coastal areas, salt-laden air accelerates rust and degrades standard plastic and rubber materials. Without proper protection, your TV cables can fail within months, leaving you with a non-functional setup and costly repairs.
This guide will show you how to hide cables for your backyard TV using proven, weather-resistant methods tailored for coastal homes. You’ll learn how to choose the right materials, route cables safely, protect connections, and maintain your system year-round. By the end, you’ll have a clean, professional-looking outdoor entertainment area that stands up to the elements.
Step 1: Assess Your Outdoor TV Setup and Cable Needs
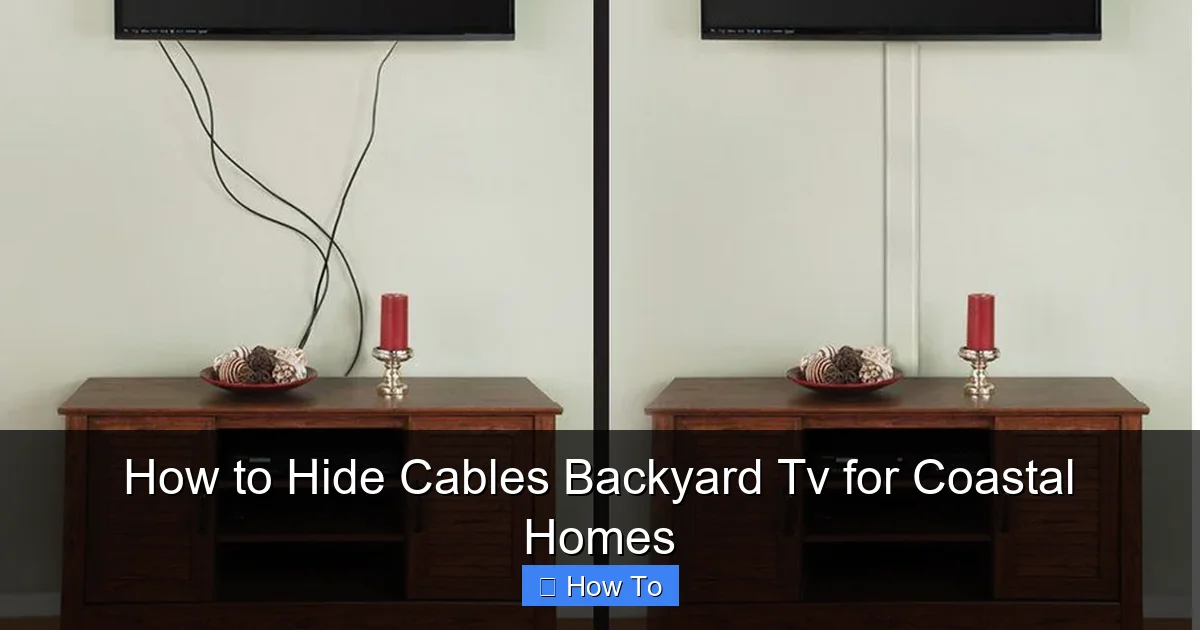
Visual guide about How to Hide Cables Backyard Tv for Coastal Homes
Image source: cleverlychanging.com
Before you start hiding cables, take time to evaluate your current setup and plan your cable management strategy.
Identify All Cables and Power Sources
List every cable that needs to be routed:
– Power cable for the TV
– HDMI or AV cables from source (streaming box, cable box, gaming console)
– Ethernet cable (if using wired internet)
– Speaker or soundbar wires (if applicable)
– Any additional accessories (e.g., outdoor lighting controllers)
Tip: Use a cable labeling system (like colored tape or tags) to keep track of each wire during installation.
Map the Cable Path
Walk from your TV location to the nearest power outlet and signal source (usually inside the house). Note obstacles like walls, decks, railings, or garden beds. Decide whether cables will run along the wall, under the deck, or across the yard.
Coastal Consideration: Avoid low-lying areas where salt spray or rainwater pools. Choose elevated paths that stay dry and are less exposed to wind-driven moisture.
Measure Cable Lengths
Buy cables that are 10–15% longer than the measured distance. This allows for slack during routing and prevents tension that can damage connectors. For coastal use, choose cables with thick, UV-resistant jackets and corrosion-proof connectors.
Step 2: Choose the Right Materials for Coastal Environments
Not all cable management products are created equal—especially in coastal zones. Standard plastic raceways or PVC conduits may crack, yellow, or degrade within a year due to salt and sun exposure.
Use Marine-Grade Conduits and Raceways
Opt for cable covers made from:
– **UV-stabilized polyethylene (PE)** – Resists sun damage and salt corrosion
– **Stainless steel conduits** – Ideal for high-exposure areas
– **Aluminum raceways with powder coating** – Lightweight and rust-resistant
Example: The Blue Sea Systems Marine Conduit is a popular choice for coastal installations. It’s flexible, salt-resistant, and rated for outdoor use.
Select Corrosion-Resistant Fasteners
Avoid regular steel screws, nails, or zip ties. Instead, use:
– **Stainless steel screws and anchors** (grade 316 for maximum salt resistance)
– **Marine-grade zip ties** (UV-stabilized and salt-tested)
– **Silicone-coated cable clamps** – Prevent chafing and resist rust
Invest in Waterproof Junction Boxes
Any connection point (like where indoor and outdoor cables meet) should be housed in a sealed enclosure. Look for boxes with an IP67 or higher rating—these are dust-tight and can withstand immersion in water up to 1 meter.
Pro Tip: Use silicone sealant around the edges of the junction box for extra protection against salt spray.
Step 3: Route Cables Safely and Strategically
How you run your cables determines both safety and longevity. In coastal homes, above-ground routing is often better than underground.
Avoid Burying Cables in Sand or Soil
Sandy, salty soil retains moisture and accelerates corrosion. Buried cables are also harder to access for repairs. If you must bury cables, use rigid metal conduit (RMC) and install a pull box every 10 feet for access.
Run Cables Along Walls or Under Decks
Mount raceways or conduits along exterior walls using stainless steel brackets. If you have a deck, run cables underneath using deck-mounted cable channels. This keeps them hidden and protected from foot traffic.
Tip: Use adhesive-backed cable clips for temporary routing during testing, then switch to screw-mounted clips for permanent installation.
Use Cable Ladders for Long Runs
For runs longer than 20 feet, consider a cable ladder system. These elevated trays keep cables organized, ventilated, and away from ground moisture. Choose aluminum or powder-coated steel models.
Secure Cables Against Wind
Coastal winds can whip loose cables, causing abrasion or disconnection. Use:
– **Cable ties every 12–18 inches**
– **Strain relief at connection points**
– **Windbreaks like lattice panels or trellises** to reduce direct exposure
Step 4: Hide Cables with Smart Concealment Methods
Once your cables are routed, it’s time to hide them from view. The goal is a clean, professional look that blends with your outdoor space.
Install Surface-Mounted Raceways
Raceways are plastic or metal channels that snap over cables and mount to walls. Choose paintable models so you can match your home’s exterior color.
Installation Steps:
1. Clean the wall surface with alcohol to remove salt residue.
2. Mark the raceway path with a level.
3. Drill pilot holes and secure with stainless steel screws.
4. Snap the cable cover into place.
Use Outdoor Cable Hiders or Trunking
These are larger, decorative covers that resemble baseboards or moldings. They’re ideal for running along the base of walls or under eaves.
Example: The D-Line Outdoor Cable Cover is weatherproof, paintable, and available in multiple colors.
Conceal Cables with Landscaping
For yard runs, hide cables behind:
– **Garden edging** – Use flexible plastic or metal borders to cover low cables
– **Mulch or gravel beds** – Place cables under a 2-inch layer (only if using armored cable)
– **Potted plants or trellises** – Strategically place decor to block view of conduits
Warning: Never bury cables under mulch without conduit—moisture and pests can still damage them.
Integrate Cables into Deck or Porch Design
If building or renovating, plan cable channels into the structure:
– Install **recessed cable trays** under deck boards
– Use **hollow railings** to run vertical cables
– Add **access panels** for easy maintenance
Step 5: Protect Connections and Power Sources
Exposed connections are the weakest point in any outdoor setup. Salt air and humidity can corrode terminals and cause shorts.
Use Weatherproof Outlets and Covers
Install a GFCI (Ground Fault Circuit Interrupter) outlet in a weatherproof enclosure. Look for models with in-use covers that protect plugs even when devices are connected.
Coastal Tip: Choose outlets with stainless steel faceplates and silicone gaskets.
Seal All Junction Boxes
When connecting indoor and outdoor cables:
1. Use a waterproof junction box mounted on the exterior wall.
2. Apply dielectric grease to wire connectors to prevent corrosion.
3. Seal entry points with silicone caulk or compression glands.
Use Surge Protectors Rated for Outdoor Use
Coastal storms bring lightning and power surges. Plug your TV and devices into a weatherproof surge protector with coaxial and Ethernet protection.
Recommended: The Tripp Lite Outdoor Surge Protector (Model: ISOBAR6OUTDOOR) includes coaxial and Ethernet ports.
Step 6: Test and Maintain Your System
A great installation isn’t complete without regular upkeep—especially in harsh coastal climates.
Initial Testing
After installation:
– Power on the TV and all devices
– Check for signal quality (no flickering or dropouts)
– Inspect all connections for tightness and corrosion
Seasonal Maintenance Checklist
Every 3–6 months:
– Wipe down cables and conduits with a damp cloth to remove salt buildup
– Inspect seals and gaskets for cracks or wear
– Tighten loose fasteners and replace rusted hardware
– Test GFCI outlets by pressing the “Test” button
Watch for Signs of Damage
Look for:
– Discolored or brittle cable jackets
– Corroded connectors (green or white residue)
– Loose or sagging raceways
– Reduced picture or sound quality
If you spot issues, address them immediately to prevent bigger problems.
Troubleshooting Common Coastal Cable Issues
Even with the best planning, problems can arise. Here’s how to fix the most common ones.
Problem: Cables Feel Stiff or Cracked
Cause: UV exposure and salt degradation.
Solution: Replace with UV-resistant cables. Apply a protective spray like 303 Aerospace Protectant to slow future damage.
Problem: Intermittent Signal or No Picture
Cause: Corroded HDMI or coaxial connectors.
Solution: Disconnect and clean connectors with isopropyl alcohol. Reapply dielectric grease and reconnect securely.
Problem: Raceways Are Loose or Falling Off
Cause: Adhesive failure due to salt and moisture.
Solution: Remove old adhesive, clean surface, and reattach with stainless steel screws instead of tape.
Problem: Power Outlet Trips Frequently
Cause: Moisture in the outlet or GFCI sensitivity.
Solution: Check for water ingress. Replace the outlet if damaged. Ensure all plugs are fully inserted and dry.
Conclusion: Enjoy a Clean, Safe, and Durable Backyard TV Setup
Hiding cables for your backyard TV in a coastal home isn’t just about making things look neat—it’s about building a system that lasts. By using marine-grade materials, routing cables above ground, sealing connections, and maintaining your setup, you protect your investment from the harsh coastal environment.
Remember: Salt air, sun, and wind are relentless, but with the right approach, your outdoor entertainment area can thrive for years. Take the time to plan, use quality components, and inspect regularly. The result? A beautiful, functional space where you can relax, entertain, and enjoy the ocean breeze—without worrying about frayed wires or corroded connections.
Whether you’re a DIY enthusiast or working with a professional, these steps will help you create a safe, stylish, and weatherproof cable management system. Now go enjoy that sunset—your TV is ready.

