
Struggling with messy cables from your backyard TV setup? This guide shows you how to hide cables safely and stylishly—perfect for apartment dwellers. From adhesive clips to weatherproof raceways, we cover renter-friendly, damage-free methods.
Key Takeaways
- Use adhesive cable clips or strips to secure wires along railings or walls without drilling—ideal for renters.
- Install a surface-mounted cable raceway to bundle and conceal multiple cables in a sleek, paintable channel.
- Opt for wireless HDMI transmitters to eliminate long cable runs and reduce clutter.
- Protect outdoor cables with weatherproof sleeves or conduits to prevent damage from sun, rain, and pests.
- Route cables along natural pathways like fences, planters, or deck edges to keep them out of sight and out of mind.
- Label and organize cables at the source to make future adjustments or troubleshooting easier.
- Always check your lease agreement before making any modifications to avoid violating rental terms.
How to Hide Cables for Backyard TV in Apartments: A Renter-Friendly Guide
So, you’ve set up a backyard TV in your apartment—maybe on a balcony, patio, or shared courtyard—and now you’re staring at a tangled mess of cables snaking across the floor. Not only is it an eyesore, but it’s also a tripping hazard and could damage your gear over time. The good news? You don’t need to be a DIY expert or break your lease to fix it. In this guide, we’ll walk you through how to hide cables for backyard TV in apartments using smart, safe, and renter-approved methods.
Whether you’re streaming movies under the stars or catching the big game with friends, a clean cable setup makes your outdoor space more enjoyable and functional. We’ll cover everything from simple adhesive solutions to wireless alternatives, all designed with apartment living in mind. No drilling, no permanent damage—just clever, effective cable management that keeps your space looking sharp.
Why Cable Management Matters for Backyard TVs
Before we dive into the how-to, let’s talk about why hiding those cables is so important—especially in an apartment setting.
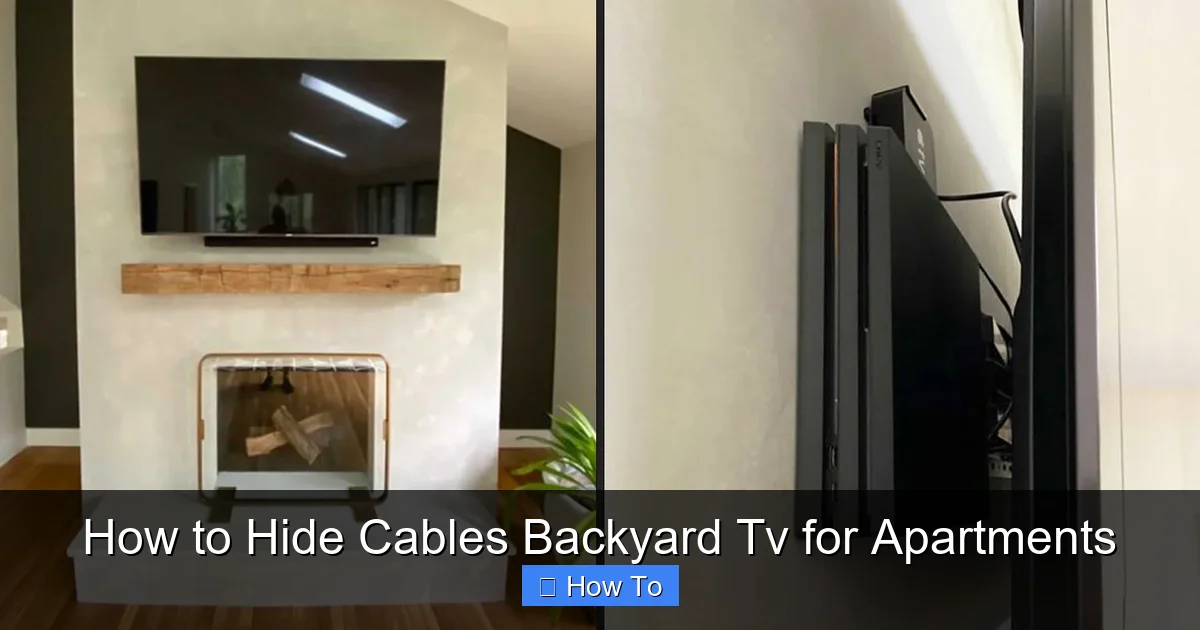
Visual guide about How to Hide Cables Backyard Tv for Apartments
Image source: cdn.shopify.com
First, safety. Exposed cables are a tripping hazard, especially in dim lighting or when guests are over. A single misstep could ruin your TV, soundbar, or worse—someone’s night. Second, durability. Outdoor cables exposed to sun, rain, and temperature swings degrade faster. UV rays can crack insulation, and moisture can cause corrosion or short circuits. Third, aesthetics. Let’s be honest—no one wants to look at a spaghetti junction of wires ruining their cozy outdoor vibe.
And finally, lease compliance. Most apartment leases prohibit drilling into walls or making permanent modifications. That means traditional cable routing through walls or under flooring is off the table. But don’t worry—there are plenty of clever, non-invasive ways to keep your setup tidy and compliant.
Assess Your Setup: Know What You’re Working With
Before you start hiding cables, take a moment to map out your current setup. This will help you choose the best solution.
Step 1: Identify All Cables
List every cable connected to your outdoor TV. Common ones include:
- Power cord (from TV to outlet)
- HDMI cable (from streaming device or cable box)
- Audio cables (if using external speakers)
- Ethernet cable (for wired internet, if applicable)
- Antenna or satellite cable (if using over-the-air TV)
Count how many cables you have and note their lengths. This will help you decide whether you need a single clip, a raceway, or a wireless alternative.
Step 2: Determine the Cable Path
Trace the route each cable takes from the TV to the power source and other devices. Are they running along the floor? Up a wall? Across a railing? Look for natural pathways like:
- Along the edge of a balcony or deck
- Behind planters or outdoor furniture
- Under a railing or along a fence
- Near existing outdoor lighting or outlets
Choose the path that’s shortest, least visible, and safest from foot traffic.
Step 3: Check for Power and Signal Sources
Make sure your outdoor outlet is GFCI-protected (required for outdoor use) and that your signal sources (like a streaming box) are placed where they won’t get wet. If your devices are indoors, you’ll need longer cables or a wireless solution.
Method 1: Use Adhesive Cable Clips and Strips
If you’re looking for a quick, damage-free fix, adhesive cable clips are your best friend. They’re affordable, easy to install, and perfect for renters.
How to Install Adhesive Cable Clips
- Clean the surface where you’ll attach the clips. Use rubbing alcohol or soapy water to remove dust and grease. Let it dry completely.
- Plan the clip placement along your cable path. Space them every 6–12 inches to keep cables secure.
- Peel and stick the adhesive backing onto the surface. Press firmly for 30 seconds to ensure a strong bond.
- Thread the cables through the clips. Most clips have a snap-in design—just push the cable in until it clicks.
Pro Tip: Use clear or paintable clips to blend with your wall or railing. For extra hold, choose clips with 3M VHB tape—they’re strong enough for outdoor use but removable without residue.
Best Clips for Apartments
- JOTO Cable Clips – Clear, weather-resistant, and hold multiple cables.
- Command Outdoor Clips – Designed for outdoor use, removable without damage.
- 3M Dual Lock Fasteners – Reusable and strong, great for bundling cables.
These clips work great on metal railings, wooden decks, and painted walls. Avoid using them on porous or uneven surfaces like brick or stucco unless you use a primer first.
Method 2: Install a Surface-Mounted Cable Raceways
For a more polished look, especially with multiple cables, a cable raceway is ideal. It’s like a protective tunnel that hides and organizes wires in one sleek channel.
Why Use a Raceways?
- Hides multiple cables in one place
- Protects wires from weather and physical damage
- Paintable to match your wall or railing
- Easy to open for adding or removing cables
How to Install a Cable Raceway
- Measure the cable path and cut the raceway to length using a hacksaw or utility knife.
- Clean the surface thoroughly. Dust or moisture can weaken the adhesive.
- Apply the raceway using the included adhesive strips or screws (if allowed). For renters, stick to adhesive-only models.
- Open the raceway cover and lay your cables inside. Bundle them with zip ties if needed.
- Snap the cover back on and smooth out any bumps.
Pro Tip: Choose a raceway with a hinged or removable cover for easy access. Look for UV-resistant, outdoor-rated models like the D-Line Cable Raceway or Legrand Surface Raceway.
You can paint the raceway to match your wall or railing for a seamless look. Just use outdoor paint and let it dry completely before installing.
Method 3: Go Wireless with HDMI Transmitters
If running long cables is impractical or unsightly, consider cutting the cord—literally. A wireless HDMI transmitter lets you send video and audio from your indoor device (like a streaming box or cable box) to your outdoor TV without any wires.
How Wireless HDMI Works
A wireless HDMI system includes two parts: a transmitter (connected to your source device) and a receiver (connected to your TV). They communicate via radio waves, usually in the 5GHz or 60GHz frequency range, delivering HD or 4K video with minimal lag.
Steps to Set Up Wireless HDMI
- Place the transmitter near your indoor device (e.g., cable box in the living room).
- Connect the transmitter to the device using an HDMI cable.
- Plug the receiver into your outdoor TV’s HDMI port.
- Power both units and sync them according to the manufacturer’s instructions.
- Test the connection to ensure video and audio are working.
Pro Tip: Choose a system with a long range (at least 100 feet) and strong signal penetration. Models like the J-Tech Digital Wireless HDMI or IOGEAR Wireless 4K HDMI are popular and reliable.
Keep in mind that wireless systems can be affected by interference from Wi-Fi, microwaves, or thick walls. For best results, keep the transmitter and receiver in line of sight or use a model with signal boosters.
Method 4: Use Cable Sleeves and Conduits
For a DIY-friendly, flexible solution, cable sleeves and conduits are great for bundling and protecting wires.
Cable Sleeves
These are flexible, braided tubes that wrap around your cables like a sleeve. They’re perfect for organizing multiple wires and adding a clean look.
How to Use Cable Sleeves
- Measure the total length of your cable bundle.
- Cut the sleeve to size using scissors.
- Open the sleeve (most have a zipper or Velcro closure) and insert your cables.
- Secure the ends with zip ties or Velcro straps.
- Route the sleeved bundle along your chosen path using clips or tape.
Pro Tip: Choose a UV-resistant, outdoor-rated sleeve like the Techflex Flexo PET or HellermannTyton FlexSleeve. They come in various colors to match your setup.
Flexible Conduits
If you need more protection, especially in high-traffic areas, use a flexible plastic conduit. It’s like a mini pipe that shields cables from crushing, moisture, and pests.
How to Install a Conduit
- Measure and cut the conduit to length.
- Insert your cables into the conduit before installing.
- Secure the conduit to the wall or railing using outdoor-rated adhesive mounts or zip ties.
- Cap the ends with end fittings to keep dirt and water out.
Pro Tip: Use a conduit with a smooth interior to make pulling cables easier. Look for UV-stabilized PVC models designed for outdoor use.
Method 5: Route Cables Along Natural Pathways
Sometimes the best hiding spot is right in front of you. Use your outdoor space’s existing features to conceal cables.
Under Railings and Along Fences
Tuck cables under balcony railings or along fence posts. Use adhesive clips or zip ties to secure them out of sight.
Behind Planters and Furniture
Route cables behind large potted plants, outdoor sofas, or storage boxes. This keeps them hidden and protected from foot traffic.
Under Decking or Along Edging
If you have a raised deck, run cables along the underside or tuck them into the gap between deck boards and the ground. Use conduit for extra protection.
Pro Tip: Avoid running cables under mulch or soil—moisture and pests can damage them. If you must bury cables, use a buried-rated conduit and check local codes.
Protecting Cables from the Elements
Outdoor cables face harsh conditions. Protect them to extend their life and prevent hazards.
Use Weatherproof Covers
Cover outdoor outlets and connections with weatherproof outlet covers. These flip-up shields keep rain and dust out.
Apply Silicone Sealant
For cable entry points (like where a wire passes through a wall), apply a bead of outdoor silicone sealant to prevent water intrusion.
Elevate Cables Off the Ground
Use cable ramps or hooks to keep wires off wet or muddy surfaces. This reduces the risk of short circuits and tripping.
Use UV-Resistant Materials
Choose cables, clips, and raceways rated for outdoor use. Look for UV-resistant labels to ensure they won’t crack or fade in the sun.
Troubleshooting Common Cable Issues
Even with the best setup, problems can happen. Here’s how to fix common issues.
Cables Keep Falling Off Clips
This usually happens if the surface wasn’t clean or the adhesive isn’t strong enough. Re-clean the area and use higher-quality clips with 3M tape. For extra hold, add a dab of outdoor adhesive.
Signal Loss or Interference
If your wireless HDMI is glitching, check for interference from other devices. Move the transmitter closer or switch to a less crowded frequency. For wired setups, ensure HDMI cables are high-speed and not damaged.
Cables Are Too Short
Use high-quality extension cables rated for outdoor use. Avoid daisy-chaining multiple extensions—this can cause voltage drop or signal loss.
Raceway Looks Bulky
Paint it to match your wall or choose a slim-profile model. You can also run it along a less visible edge, like the back of a planter or under a bench.
Final Tips for a Clean, Safe Setup
- Label your cables at both ends with tape or tags. This makes troubleshooting and upgrades much easier.
- Use cable ties sparingly—over-tightening can damage wires. Opt for Velcro straps for reusable, gentle bundling.
- Check your lease before installing anything. Even adhesive products can sometimes leave residue, so test a small area first.
- Regularly inspect your setup for wear, especially after storms or extreme weather.
- Keep a cable management kit on hand with extra clips, ties, and sealant for quick fixes.
Conclusion
Hiding cables for your backyard TV doesn’t have to be complicated or permanent. With the right tools and techniques, you can create a clean, safe, and stylish outdoor entertainment space—even in an apartment. From adhesive clips to wireless HDMI, there’s a solution for every setup and budget.
Remember, the goal isn’t just to hide the wires—it’s to enhance your outdoor experience. A tidy cable setup means fewer tripping hazards, longer-lasting equipment, and a space you’re proud to show off. So grab your tools, follow these steps, and enjoy your backyard TV in peace—no messy cables in sight.

