
Keeping your patio TV for pool area clean ensures clear picture quality and extends its lifespan. This guide walks you through safe cleaning methods, tools, and maintenance routines designed specifically for outdoor environments.
Key Takeaways
- Use only approved cleaning solutions: Avoid ammonia-based cleaners like Windex—opt for distilled water or screen-safe sprays to prevent damage.
- Turn off and unplug the TV before cleaning: Safety first—always disconnect power to avoid electrical hazards, especially near water.
- Clean regularly but gently: Dust and chlorine residue build up quickly outdoors; wipe down weekly with a microfiber cloth.
- Protect from direct sunlight and moisture: Use a weatherproof cover when not in use and ensure proper ventilation to prevent overheating.
- Inspect seals and vents: Check for cracks or gaps that could let water or debris inside the TV casing.
- Avoid spraying liquid directly on the screen: Always apply cleaner to the cloth first to prevent seepage into internal components.
- Schedule seasonal deep cleans: Every 3–4 months, do a thorough inspection and cleaning to maintain optimal performance.
How to Clean Patio TV for Pool Area: A Complete Guide
If you’ve invested in an outdoor TV for your poolside oasis, you know how amazing it is to enjoy movies, sports, or music while lounging by the water. But with that convenience comes responsibility—your patio TV for pool area faces unique challenges: chlorine mist, humidity, dust, pollen, bird droppings, and intense sun exposure. Without proper care, these elements can degrade picture quality, cause overheating, or even lead to permanent damage.
The good news? Cleaning your outdoor TV doesn’t have to be complicated or risky. With the right tools, techniques, and routine, you can keep your screen sparkling and functioning like new for years. In this comprehensive guide, we’ll walk you through everything you need to know—from safety precautions and recommended cleaning supplies to step-by-step instructions and long-term maintenance tips.
Whether you’re a first-time outdoor TV owner or just looking to refine your cleaning routine, this guide will help you protect your investment and enjoy uninterrupted entertainment under the sun.
Why Cleaning Your Patio TV Matters
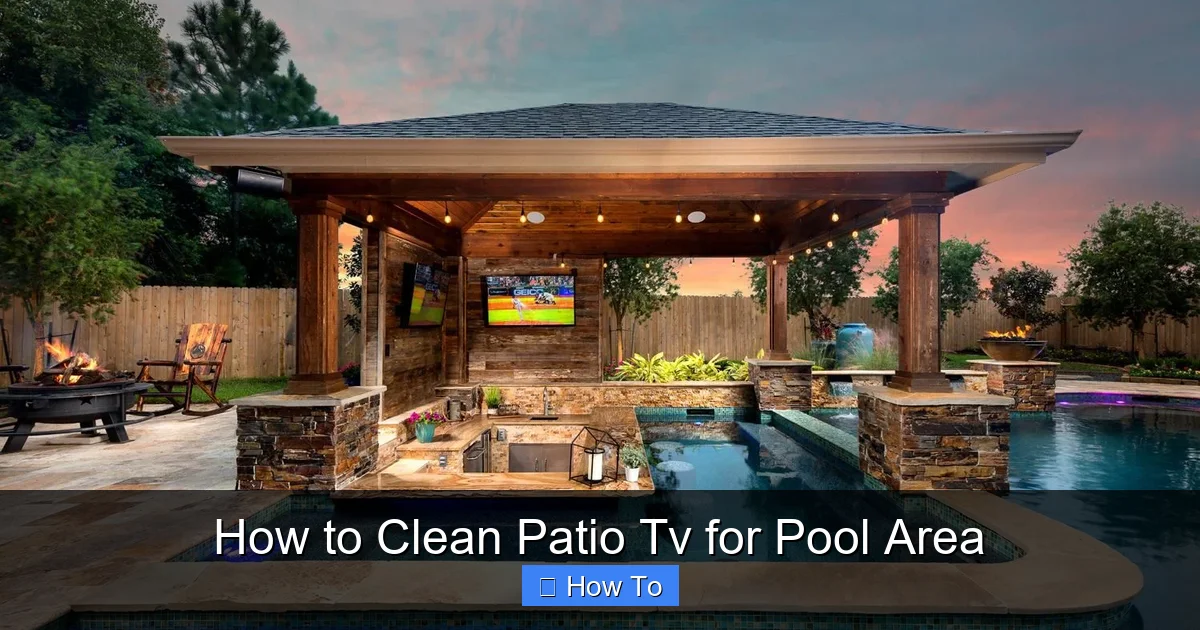
Visual guide about How to Clean Patio Tv for Pool Area
Image source: i.pinimg.com
Outdoor TVs are built to withstand the elements—but “weather-resistant” doesn’t mean “maintenance-free.” Unlike indoor TVs, your patio TV for pool area is constantly exposed to airborne contaminants. Chlorine from pool water evaporates and settles on surfaces, creating a corrosive film. Salt air (if you’re near the coast) accelerates wear. Dust and pollen accumulate in vents, blocking airflow and causing overheating. Bird droppings and tree sap can etch the screen if left too long.
Regular cleaning isn’t just about aesthetics—it’s about performance and longevity. A dirty screen reduces brightness and clarity. Grime buildup traps heat, which can shorten the lifespan of internal components. And if moisture seeps into unsealed areas, you risk electrical shorts or mold growth.
Think of cleaning your outdoor TV like washing your car: it’s not just about looking good—it’s about protecting the finish and mechanics underneath. By establishing a consistent cleaning routine, you’ll preserve image quality, prevent costly repairs, and get the most out of your outdoor entertainment setup.
Essential Tools and Supplies
Before you start, gather the right tools. Using improper cleaners or abrasive materials can scratch the screen or damage anti-reflective coatings. Here’s what you’ll need:
- Microfiber cloths: These are non-abrasive and won’t leave lint or streaks. Use one for dry dusting and a second for wet cleaning.
- Distilled water: Tap water contains minerals that can leave spots. Distilled water ensures a streak-free finish.
- Screen-safe cleaning solution: Look for products labeled “safe for LED/LCD screens” or “no ammonia.” Avoid glass cleaners like Windex—they’re too harsh.
- Soft-bristle brush or compressed air: For cleaning vents and crevices where dust accumulates.
- Isopropyl alcohol (70% or less): Optional, for stubborn grime—but use sparingly and only on non-screen parts.
- Weatherproof cover: Not a cleaning tool, but essential for protection between uses.
Pro tip: Keep your cleaning kit in a sealed container near your TV so it’s always ready. Label your microfiber cloths—“dry use only” and “wet use only”—to avoid cross-contamination.
Step-by-Step Cleaning Process
Follow these steps every 1–2 weeks for routine maintenance, or immediately after heavy use (like a pool party).
Step 1: Power Down and Unplug
Safety is paramount—especially near water. Always turn off your TV and unplug it from the power source before cleaning. Even if your TV is on a GFCI outlet (which is recommended for outdoor use), disconnecting eliminates any risk of electrical shock. Wait at least 10–15 minutes for the TV to cool down if it’s been running.
Step 2: Dust the Screen and Frame
Use a dry microfiber cloth to gently wipe the screen in circular motions. Start from the top and work your way down. Don’t press hard—let the cloth do the work. This removes loose dust, pollen, and light debris without scratching the surface.
Next, wipe the bezel (the frame around the screen) and the back of the TV. Pay special attention to ventilation grilles—dust here can block airflow and cause overheating.
Step 3: Clean the Screen with a Damp Cloth
If the screen still looks smudged or hazy, it’s time for a light wet clean. Never spray liquid directly onto the screen—this can seep into the edges and damage internal components.
Instead, lightly dampen a clean microfiber cloth with distilled water. Wring it out thoroughly so it’s just slightly moist—not dripping. Gently wipe the screen using the same circular motion. Avoid the edges where the screen meets the bezel.
For tougher spots (like dried sunscreen or chlorine residue), add a drop of screen-safe cleaner to the cloth—not the screen. Always test on a small corner first.
Step 4: Tackle Stubborn Stains Carefully
Bird droppings, tree sap, or pool chemicals can be stubborn. Don’t scrub—this can scratch the anti-glare coating.
Soak a corner of your microfiber cloth in distilled water and lay it over the stain for 30–60 seconds to soften it. Then, gently wipe it away. If needed, use a 50/50 mix of distilled water and isopropyl alcohol (70% or less) on the cloth—but avoid getting any liquid near ports or vents.
Never use paper towels, tissues, or rough sponges—they’re too abrasive for modern screens.
Step 5: Clean Vents and Ports
Use a soft-bristle brush or can of compressed air to remove dust from ventilation slots, speaker grilles, and input ports. Hold the can upright and spray in short bursts to avoid moisture buildup. This helps maintain proper airflow and prevents overheating.
If you notice crusted grime around ports, lightly dampen a cotton swab with distilled water and carefully clean the area. Let it dry completely before reconnecting cables.
Step 6: Wipe Down the Mount and Surroundings
Don’t forget the mounting bracket, wall, or ceiling near the TV. These areas collect dust and moisture too. Use a damp microfiber cloth to wipe them down. If your TV is on a swing arm, check for rust or stiffness—lubricate joints if needed (use a silicone-based lubricant, not oil).
Step 7: Let It Dry and Reconnect
Allow the TV to air-dry for 10–15 minutes before plugging it back in. Make sure no moisture remains, especially around ports. Once dry, reconnect power and test the TV to ensure everything works properly.
Seasonal Deep Cleaning and Maintenance
While weekly light cleaning keeps your TV looking good, a deeper clean every 3–4 months ensures long-term health.
Inspect Seals and Gaskets
Outdoor TVs have rubber seals around the screen and ports to keep moisture out. Over time, these can crack or degrade. Check them during your deep clean. If you see cracks, gaps, or brittleness, contact the manufacturer—they may offer replacement parts or warranty service.
Check for Corrosion
Look for white or greenish powder around metal parts—this is corrosion caused by salt or chlorine. Wipe it off with a cloth dampened with vinegar (diluted 1:1 with water), then rinse with distilled water and dry thoroughly. Apply a thin layer of dielectric grease to metal connectors to prevent future corrosion.
Clean the Back and Internal Vents
If your TV has removable panels (check the manual), carefully open them to clean internal vents. Use compressed air to blow out dust. Never use a vacuum—it can create static electricity that damages circuits.
Test the Weatherproof Cover
Your cover should fit snugly and be made of breathable, UV-resistant material. Check for tears, mold, or loose straps. Clean the cover with mild soap and water, then let it dry completely before storing.
Troubleshooting Common Issues
Even with regular cleaning, you might encounter problems. Here’s how to handle them:
Hazy or Streaked Screen After Cleaning
This usually happens when too much liquid is used or tap water leaves mineral deposits. Re-clean with a cloth dampened only with distilled water. Buff dry with a second microfiber cloth.
TV Overheats or Shuts Off
Dust-clogged vents are often the culprit. Clean the vents thoroughly and ensure nothing is blocking airflow (like plants or furniture). If the problem persists, the internal fan may be failing—contact support.
Water Spots or Fogging Under the Screen
This indicates a seal failure. Moisture has entered the TV. Immediately unplug it and let it dry in a warm, dry place for 48 hours. If fogging remains, the internal components may be damaged—seek professional repair.
Corrosion on Cables or Ports
Disconnect power and clean affected areas with a cotton swab dipped in vinegar solution. Rinse with distilled water and dry completely. Replace damaged cables.
Cover Traps Moisture
If you notice condensation under the cover, it’s not breathable enough. Switch to a vented, moisture-wicking cover designed for outdoor electronics.
Tips for Preventing Future Buildup
Cleaning is easier when you prevent grime from accumulating in the first place.
- Use a timer or smart plug: Turn off the TV when not in use to reduce heat and dust attraction.
- Install a shade or awning: Direct sun degrades screens over time. A simple overhang reduces UV exposure.
- Keep pool chemicals balanced: Proper pH and chlorine levels reduce airborne residues.
- Trim nearby plants: Overhanging branches drop sap, leaves, and attract birds.
- Use a cover nightly: Even if it’s just for a few hours, a cover protects against dew, bugs, and accidental splashes.
What NOT to Do
Avoid these common mistakes:
- Don’t use household cleaners: Ammonia, alcohol, or bleach-based products strip protective coatings.
- Don’t spray liquid on the screen: Always apply to the cloth first.
- Don’t use paper products: They scratch and leave lint.
- Don’t clean in direct sunlight: Liquid dries too fast, leaving streaks.
- Don’t ignore the manual: Your TV may have specific cleaning instructions—always check first.
Conclusion
Your patio TV for pool area is more than just a screen—it’s the centerpiece of your outdoor living space. With regular, gentle cleaning and smart maintenance, you can enjoy crystal-clear viewing season after season. Remember: safety first, use the right tools, and never rush the process. A little care goes a long way in protecting your investment and enhancing your poolside experience.
By following this guide, you’ll keep your TV looking great, performing optimally, and lasting for years—even in the harshest outdoor conditions. So grab your microfiber cloth, power down that TV, and give it the spa treatment it deserves. Your future self (and your guests) will thank you.

