
Transform your gazebo into an outdoor entertainment hub by installing an outside TV. This guide walks you through choosing the right TV, mounting it securely, running cables safely, and protecting it from the elements—all while keeping your setup stylish and functional.
Key Takeaways
- Choose a weatherproof outdoor TV: Standard indoor TVs aren’t built for rain, humidity, or temperature swings. Opt for a certified outdoor model designed for year-round use.
- Use a sturdy, weather-resistant mount: A heavy-duty, rust-proof mount ensures your TV stays secure even in windy conditions.
- Plan cable routing carefully: Protect power and HDMI cables with conduit or outdoor-rated wiring to prevent damage and tripping hazards.
- Ensure proper ventilation and sun protection: Avoid direct sunlight and allow airflow to prevent overheating, even with outdoor-rated TVs.
- Test everything before finalizing: Power on the TV, check signal quality, and verify remote functionality before sealing cables or closing access panels.
- Consider a retractable or swivel mount: These add flexibility, letting you angle the screen for better viewing or stow it away when not in use.
- Follow local electrical codes: Hire a licensed electrician if you’re unsure about outdoor wiring to ensure safety and compliance.
How to Install Outside TV for Gazebo
Imagine sipping your morning coffee under the shade of your gazebo while catching up on the news, or hosting friends for a backyard movie night under the stars. Adding an outdoor TV to your gazebo can turn this dream into reality. But unlike setting up a TV indoors, installing one outside requires extra planning, the right equipment, and attention to weatherproofing.
In this comprehensive guide, you’ll learn how to install an outside TV for gazebo safely and effectively. We’ll cover everything from choosing the perfect outdoor TV and mounting it securely, to running cables, protecting against the elements, and troubleshooting common issues. Whether you’re a DIY enthusiast or working with a professional, this step-by-step guide will help you create a durable, high-quality outdoor entertainment space that lasts for years.
Step 1: Choose the Right Outdoor TV
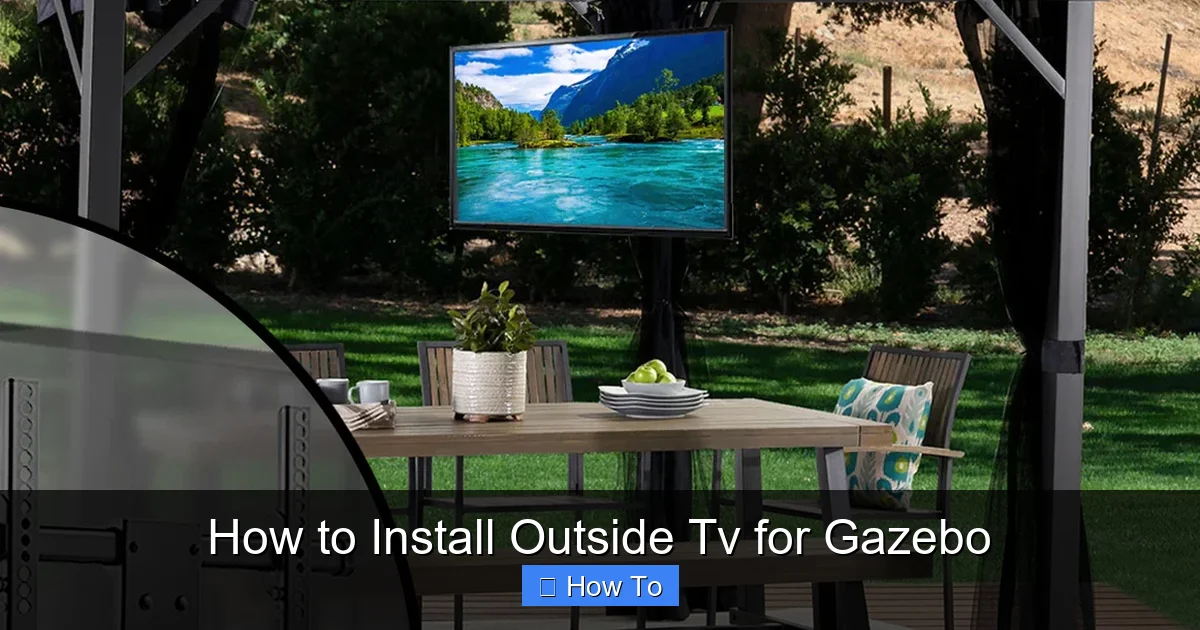
Visual guide about How to Install Outside Tv for Gazebo
Image source: zebozap.com
Not all TVs are created equal—especially when it comes to outdoor use. Standard indoor TVs may short-circuit, overheat, or get damaged by moisture, even under a covered gazebo. That’s why your first step should be selecting a TV specifically designed for outdoor environments.
Types of Outdoor TVs
There are two main types of outdoor TVs: fully weatherproof (all-weather) and partial-weather (covered-area) models.
- All-weather TVs: These are built to withstand rain, snow, dust, and extreme temperatures. They come with sealed casings, anti-glare screens, and internal cooling/heating systems. Brands like SunBrite, Samsung Terrace, and Seura offer reliable all-weather options.
- Covered-area TVs: These are designed for use under patios, gazebos, or porches where they’re protected from direct rain and sunlight. They’re more affordable than all-weather models but still offer better durability than indoor TVs.
Key Features to Look For
When shopping for an outdoor TV, prioritize these features:
- Weather resistance rating: Look for IP55 or higher (Ingress Protection) ratings, which indicate protection against dust and water jets.
- Brightness (nits): Outdoor screens need high brightness—aim for at least 700 nits, with 1000+ nits ideal for sunny areas.
- Anti-glare coating: Reduces reflections from sunlight, improving visibility.
- Wide operating temperature range: Ensure the TV can handle your local climate, especially if you live in areas with freezing winters or scorching summers.
- Built-in speakers or audio output: Some outdoor TVs have enhanced speakers, but you may still want to connect external weatherproof speakers.
Size and Placement Considerations
Choose a screen size that fits your gazebo’s dimensions and viewing distance. A 43-inch to 55-inch TV is ideal for most gazebos, but go larger if you have a spacious setup and plan to view from 8–12 feet away.
Also, consider where people will sit. The TV should be mounted at eye level when seated—typically 42 to 48 inches from the ground to the center of the screen.
Step 2: Select the Right Mounting Hardware
A strong, weather-resistant mount is just as important as the TV itself. A flimsy or indoor-rated mount can rust, loosen, or fail in outdoor conditions.
Types of Outdoor TV Mounts
- Fixed mounts: Keep the TV in one position. Best for permanent setups where viewing angle won’t change.
- Tilt mounts: Allow you to angle the TV up or down for better viewing, especially if mounted high.
- Full-motion (articulating) mounts: Let you swivel, tilt, and extend the TV. Great for flexible viewing or retracting the screen when not in use.
Mount Features to Prioritize
- Rust-proof materials: Choose mounts made from powder-coated aluminum or stainless steel.
- Weight and VESA compatibility: Ensure the mount supports your TV’s weight and matches its VESA pattern (the screw hole layout on the back).
- Weatherproofing: Some mounts come with protective covers or seals to keep moisture out of the mounting area.
Retractable Mounts for Extra Protection
If you want to protect your TV from harsh weather or extend its lifespan, consider a retractable or ceiling-mounted lift system. These allow you to pull the TV down when in use and tuck it away when not needed. While more expensive, they’re ideal for seasonal use or areas with heavy rain or snow.
Step 3: Plan Your Installation Location
Before drilling any holes, carefully assess your gazebo’s structure and layout.
Check the Gazebo Structure
Ensure the wall or beam you’re mounting to is strong enough to support the TV and mount. Wooden beams should be at least 2×6 inches thick and securely anchored. Avoid mounting to thin siding or decorative panels.
If your gazebo has a slanted or curved roof, make sure the TV won’t be exposed to rain runoff. Ideally, the mounting spot should be under a solid overhang with at least 6–12 inches of coverage on all sides.
Consider Sun and Shade Patterns
Observe how sunlight hits your gazebo throughout the day. Direct sunlight can cause glare and overheating, even on outdoor-rated TVs. If possible, choose a shaded side or install a retractable awning or shade sail to protect the screen.
Plan Cable Routes
Map out where power, HDMI, and antenna cables will run. Keep cables away from foot traffic to avoid tripping. Use outdoor-rated conduit or cable raceways to protect wires from moisture and UV damage.
Ensure Easy Access for Maintenance
Leave enough space around the TV for ventilation and future servicing. Avoid mounting it too high or in a hard-to-reach spot.
Step 4: Prepare Tools and Materials
Gather everything you’ll need before starting. Here’s a checklist:
- Outdoor TV and compatible mount
- Power drill and drill bits (including masonry bits if mounting to stone or concrete)
- Level
- Tape measure
- Screwdrivers (Phillips and flathead)
- Socket wrench or adjustable wrench
- Stud finder (if mounting to wood)
- Outdoor-rated extension cord or direct wiring kit
- Weatherproof conduit or cable raceways
- Silicone sealant (for sealing screw holes)
- Ladder or step stool
- Safety goggles and gloves
If you’re running electrical wiring, you may also need:
- Outdoor electrical box
- Weatherproof outlet cover
- Conduit and wire (12 or 14-gauge, depending on distance)
- Circuit breaker (if adding a new circuit)
Step 5: Install the Mounting Bracket
Now it’s time to secure the mount to your gazebo.
Mark the Mounting Points
Hold the mounting bracket against the wall or beam where you want the TV. Use a level to ensure it’s straight. Mark the screw holes with a pencil.
Drill Pilot Holes
Drill pilot holes at the marked spots. This prevents wood from splitting and makes screw insertion easier. Use a drill bit slightly smaller than your screws.
Secure the Bracket
Attach the bracket using the provided lag bolts or screws. Tighten them firmly with a wrench, but don’t over-tighten, which can strip the wood.
Seal the Screw Holes
Apply a small amount of silicone sealant around each screw head to prevent water from seeping into the wood.
Double-Check Stability
Give the bracket a firm tug to ensure it’s secure. It should not move or wobble.
Step 6: Run and Protect Cables
Running cables safely is crucial for both performance and safety.
Power Cable Setup
You have two main options:
- Use an outdoor-rated extension cord: Simple and quick, but less permanent. Choose a heavy-duty, weatherproof cord rated for outdoor use (look for “SJTW” or “SJTOW” labels).
- Hardwire the TV: For a cleaner, more permanent solution, run electrical wiring from your home’s circuit to the gazebo. This requires installing an outdoor electrical box and weatherproof outlet. Always consult a licensed electrician if you’re not experienced with electrical work.
HDMI and Signal Cables
Use outdoor-rated HDMI cables, which are shielded against moisture and UV rays. Avoid cheap indoor cables—they can degrade quickly outside.
If running cables through walls or under decking, use PVC conduit or flexible cable raceways. Seal all entry and exit points with silicone to keep water out.
Hide and Organize Cables
Use cable clips, zip ties, or raceways to keep wires neat and out of sight. This improves aesthetics and reduces tripping hazards.
Step 7: Attach the TV to the Mount
With the bracket secure and cables in place, it’s time to hang the TV.
Connect Cables First
Before lifting the TV, connect the power, HDMI, and any other cables to the back. This is much easier than trying to reach behind the TV once it’s mounted.
Lift and Secure the TV
With a helper, carefully lift the TV and align the mounting holes on the back with the bracket. Slide the TV onto the mount and secure it with the provided locking screws or pins.
Test the Mount
Gently push and tilt the TV (if using a tilt or articulating mount) to ensure it moves smoothly and locks in place.
Step 8: Power On and Test
Now for the moment of truth—turn it on!
Check Power and Signal
Plug in the TV or turn on the circuit breaker. The screen should light up. If not, double-check connections and power sources.
Test Remote and Inputs
Use the remote to navigate menus and switch between inputs (HDMI, antenna, etc.). Make sure all connected devices (like a streaming stick or cable box) work properly.
Adjust Picture Settings
Outdoor lighting can affect picture quality. Adjust brightness, contrast, and color settings for the best viewing experience. Many outdoor TVs have a “day/night” mode to automatically adjust.
Test Audio
If using built-in speakers, test the volume. For better sound, consider connecting weatherproof outdoor speakers via Bluetooth or audio output.
Step 9: Final Touches and Protection
Once everything works, add the finishing touches.
Seal All Connections
Use silicone sealant around cable entry points and any gaps between the mount and wall to prevent water intrusion.
Install a Weatherproof Cover (Optional)
Even with an outdoor TV, a protective cover can extend its life. Choose a breathable, UV-resistant cover that fits snugly over the screen when not in use.
Add Lighting or Decor
Enhance your gazebo with string lights, outdoor speakers, or comfortable seating to complete the entertainment space.
Troubleshooting Common Issues
Even with careful planning, problems can arise. Here’s how to fix the most common ones:
TV Won’t Turn On
- Check the power source: Is the outlet working? Test with another device.
- Inspect the power cable: Look for damage or loose connections.
- Verify the circuit breaker: Make sure it hasn’t tripped.
Poor Picture Quality or Glare
- Adjust the TV’s position to avoid direct sunlight.
- Clean the screen with a microfiber cloth.
- Enable anti-glare or high-brightness mode in settings.
Remote Not Working
- Replace the batteries.
- Ensure there’s a clear line of sight between the remote and TV sensor.
- Check for interference from other devices.
Cables Getting Wet or Damaged
- Re-seal conduit entries with silicone.
- Replace damaged cables with outdoor-rated ones.
- Use drip loops in cables to prevent water from traveling into connections.
TV Overheating
- Ensure proper ventilation around the TV.
- Avoid mounting in direct sunlight.
- Check if the TV’s internal cooling system is functioning.
Maintenance Tips for Long-Term Use
To keep your outdoor TV in top condition:
- Clean the screen monthly: Use a soft, dry cloth. Avoid harsh chemicals.
- Inspect cables and seals: Check for wear, cracks, or loose connections every few months.
- Cover during storms: Use a protective cover during heavy rain, snow, or high winds.
- Check mount stability: Tighten screws if the TV feels loose.
- Service annually: Have a professional inspect electrical connections and mounting hardware.
Conclusion
Installing an outside TV for gazebo is a rewarding project that enhances your outdoor living space. By choosing a weatherproof TV, using a sturdy mount, running cables safely, and protecting against the elements, you can enjoy high-quality entertainment under the open sky.
Remember, safety and preparation are key. Take your time, follow electrical codes, and don’t hesitate to consult a professional when needed. With the right setup, your gazebo can become the ultimate backyard retreat—perfect for movie nights, game days, or quiet evenings with a view.
So grab your tools, pick out your favorite shows, and get ready to enjoy your new outdoor TV oasis!

