
Transform your deck into an outdoor entertainment hub with a professionally installed outdoor TV. This guide walks you through choosing the right TV, mounting it securely, protecting it from the elements, and setting up audio and streaming for a seamless backyard experience.
Key Takeaways
- Choose an outdoor-rated TV: Standard indoor TVs aren’t built for weather exposure—opt for weatherproof models designed for outdoor use.
- Pick the right location: Install your TV under cover (like a pergola or awning) to protect it from direct rain, snow, and harsh sunlight.
- Use a sturdy, weather-resistant mount: A full-motion or tilt mount made for outdoor use ensures stability and viewing flexibility.
- Protect all connections with conduit and covers: Seal power cords, HDMI cables, and signal lines to prevent moisture damage.
- Plan for power and internet access: Run outdoor-rated electrical wiring and Wi-Fi extenders to support your TV and streaming devices.
- Test and maintain regularly: Check seals, clean the screen, and inspect cables seasonally to extend your TV’s lifespan.
- Enhance the experience with outdoor audio: Add weatherproof speakers or a soundbar for immersive sound without disturbing neighbors.
How to Install Outside TV for Deck Entertainment
Imagine sipping your morning coffee or hosting a summer barbecue while catching the big game or your favorite show—right from your deck. With the right setup, an outdoor TV can turn your backyard into a true entertainment oasis. But installing a TV outside isn’t as simple as mounting one indoors. You need to consider weather, power, signal strength, and safety.
In this comprehensive guide, we’ll walk you through every step of installing an outside TV for deck entertainment—from choosing the perfect model to wiring, mounting, and optimizing your setup for year-round enjoyment. Whether you’re a DIY enthusiast or hiring a pro, this guide will help you do it right the first time.
Step 1: Choose the Right Outdoor TV
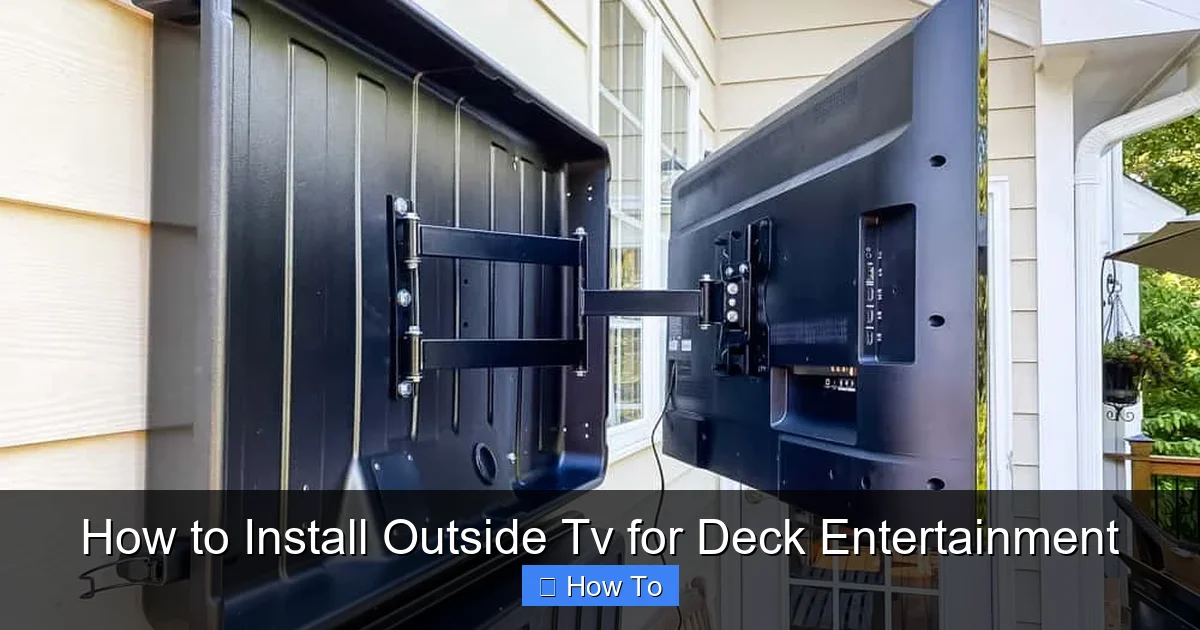
Visual guide about How to Install Outside Tv for Deck Entertainment
Image source: simply2moms.com
Not all TVs are created equal—especially when it comes to outdoor use. Indoor TVs aren’t built to handle temperature swings, humidity, or direct sunlight. That’s why your first step is selecting a TV specifically designed for outdoor environments.
Outdoor vs. Indoor TVs: What’s the Difference?
Outdoor TVs are engineered with weatherproof casings, anti-glare screens, and internal cooling or heating systems to withstand extreme temperatures. They’re rated for outdoor use and often come with IP (Ingress Protection) ratings that indicate resistance to dust and water.
For example, a TV with an IP55 rating can resist low-pressure water jets and dust, making it suitable for covered decks. Higher-end models like the Samsung Terrace or SunBriteTV Veranda series offer full weather protection and bright displays optimized for daylight viewing.
Types of Outdoor TVs
There are three main types of outdoor TVs:
- Partial-Outdoor (Covered Area) TVs: Designed for use under eaves, pergolas, or covered patios. They handle light moisture and temperature changes but shouldn’t be exposed to direct rain.
- Full-Outdoor (All-Weather) TVs: Built for open-air installation. These can withstand rain, snow, and UV exposure. Ideal for decks without full coverage.
- Indoor TVs in Outdoor Enclosures: You can use a standard TV inside a weatherproof outdoor TV enclosure. This is a budget-friendly option, but enclosures can trap heat and may reduce picture quality.
Pro Tip: If your deck is fully exposed, go with a full-outdoor TV. For covered areas, a partial-outdoor model will save you money while still offering durability.
Step 2: Pick the Perfect Location
Where you mount your TV is just as important as the TV itself. The right spot ensures great viewing angles, protects your investment, and minimizes glare.
Consider Viewing Angles and Distance
Sit where you’ll normally watch TV—on your deck chairs, outdoor sofa, or dining set—and look toward potential mounting spots. The ideal viewing distance is 1.5 to 2.5 times the screen’s diagonal size. For a 55-inch TV, that’s about 7 to 11 feet away.
Avoid placing the TV directly opposite a window or in a spot where sunlight hits the screen at peak hours. Glare can ruin the viewing experience, even on bright outdoor displays.
Protect from the Elements
Even with an outdoor-rated TV, it’s best to install it under cover. A pergola, awning, or roof overhang shields the TV from direct rain, snow, and intense midday sun. If your deck isn’t covered, consider adding a retractable awning or shade sail.
Also, avoid mounting near grills, fire pits, or sprinklers. Smoke, grease, and water droplets can damage the TV over time.
Check for Obstructions
Make sure trees, railings, or furniture won’t block the view. You’ll also need clearance for the mount’s movement if you choose a full-motion arm.
Step 3: Choose the Right Mount
A sturdy, weather-resistant mount is essential for safety and performance. Don’t skimp here—cheap indoor mounts can rust, warp, or fail in outdoor conditions.
Types of Outdoor TV Mounts
- Fixed Mount: Keeps the TV flush against the wall. Great for permanent, straight-on viewing. Least expensive option.
- Tilt Mount: Allows you to angle the TV up or down. Useful if mounting high on a wall or under a roof.
- Full-Motion (Articulating) Mount: Lets you pull the TV out, swivel, and tilt. Ideal for decks with multiple seating areas or uneven sightlines.
Pro Tip: Look for mounts labeled “outdoor-rated” or “weatherproof.” Brands like Peerless, Sanus, and MantelMount offer durable options with corrosion-resistant coatings.
Weight and Size Compatibility
Check your TV’s VESA pattern (the screw hole layout on the back) and weight. Your mount must support both. Most outdoor mounts list compatibility ranges—match them carefully.
Wall or Post Mount?
Most deck TVs are wall-mounted on the house or a sturdy post. If mounting to wood siding or stucco, use lag bolts and toggle anchors for a secure hold. For concrete or brick, use masonry anchors.
If you’re mounting to a deck post, ensure it’s structurally sound and anchored deep into the ground. A wobbly post can lead to a fallen TV—safety first!
Step 4: Plan Power and Signal Connections
Running power and signal cables outdoors requires careful planning to ensure safety and functionality.
Power Supply
Your TV needs a reliable power source. Never use indoor extension cords outside—they’re not rated for moisture or UV exposure.
Instead:
- Run outdoor-rated (SJTW or SJTOW) extension cords temporarily for testing.
- Permanently install a weatherproof outdoor outlet (GFCI-protected) near the TV.
- Hire a licensed electrician if you need to extend wiring from your home’s electrical panel.
Safety Note: All outdoor electrical work must comply with local codes. Improper wiring can cause shocks or fires.
HDMI and Signal Cables
To connect streaming devices, cable boxes, or gaming consoles, you’ll need HDMI cables. But standard HDMI cables aren’t built for outdoor use.
Use:
- Outdoor-rated HDMI cables: These have UV-resistant jackets and waterproof connectors.
- Conduit for protection: Run cables through PVC or metal conduit to shield them from moisture, pests, and physical damage.
- Weatherproof cable glands: Seal entry points where cables pass through walls or mounts.
Pro Tip: Use a wireless HDMI transmitter if running cables is too difficult. Just ensure strong signal strength and minimal interference.
Internet and Wi-Fi
Streaming requires a strong internet connection. If your deck is far from your router, Wi-Fi signals may weaken.
Solutions:
- Install a Wi-Fi extender or mesh network node near the deck.
- Use a powerline adapter to send internet through your home’s electrical wiring.
- Run an Ethernet cable through conduit for the most reliable connection.
Test your signal strength with a smartphone or tablet before finalizing the setup.
Step 5: Install the Mount and TV
Now it’s time to get hands-on. Follow these steps carefully to ensure a secure and level installation.
Gather Your Tools
You’ll need:
- Drill and drill bits
- Level
- Tape measure
- Screwdriver or impact driver
- Stud finder (if mounting to wall)
- Ladder or step stool
- Assistant (recommended for heavy TVs)
Mark and Drill Mounting Holes
Hold the mount against the wall or post at your desired height. Use a level to ensure it’s straight. Mark the screw holes with a pencil.
If mounting to a wall, use a stud finder to locate studs. Mounting into studs provides the strongest hold. If no studs are available, use heavy-duty toggle bolts or molly bolts rated for the TV’s weight.
Drill pilot holes slightly smaller than your lag screws to prevent splitting the wood.
Secure the Mount
Attach the mount using corrosion-resistant stainless steel lag screws. Tighten firmly, but don’t over-tighten—this can strip the holes.
Double-check that the mount is level and secure. Give it a gentle shake to test stability.
Attach the TV
Most outdoor TVs come with mounting brackets that attach to the back. Secure these to the TV first, then lift the TV and hook it onto the mount.
Safety First: Always have a helper when lifting a TV. Use a lifting strap if available. Never mount a TV alone.
Once attached, lock the TV in place using the mount’s security screws or pins.
Step 6: Connect and Conceal Cables
A clean, safe cable setup prevents tripping hazards and protects your equipment.
Route Cables Through Conduit
Run power, HDMI, and Ethernet cables through a dedicated outdoor conduit from the TV to your equipment location (e.g., indoor media closet or outdoor cabinet).
Use flexible conduit for corners and rigid PVC for straight runs. Seal all entry and exit points with silicone caulk or rubber grommets.
Use Cable Management Solutions
Outdoor cable raceways or wire channels can hide cords along walls or under deck railings. Choose UV-resistant, waterproof options.
For a sleek look, paint the raceway to match your deck or house color.
Label Cables
Label each cable at both ends (e.g., “HDMI 1 – Fire Stick,” “Power – TV”) to make future troubleshooting easier.
Step 7: Set Up Audio and Streaming
Great picture deserves great sound. While many outdoor TVs have built-in speakers, they’re often quiet and lack depth.
Add Outdoor Speakers
Install weatherproof speakers on deck posts, under eaves, or in planters. Look for models with IPX5 or higher ratings.
Options:
- Wired Speakers: Connect via speaker wire to an outdoor amplifier or AV receiver.
- Wireless Bluetooth Speakers: Easy to set up but may have latency or range issues.
- Outdoor Soundbar: Some brands offer weatherproof soundbars that mount below the TV.
Pro Tip: Use a volume-limiting remote or app to keep noise levels neighbor-friendly.
Connect Streaming Devices
Popular options include:
- Apple TV
- Google Chromecast
- Amazon Fire Stick
- Roku Ultra
Mount the device behind the TV or in a weatherproof outdoor media box. Ensure it’s ventilated to prevent overheating.
Optimize Picture and Sound Settings
Outdoor lighting changes throughout the day. Use your TV’s ambient light sensor (if available) or manually adjust brightness and contrast.
Enable “Outdoor Mode” or “Vivid” picture settings for better visibility in daylight. For sound, boost mid and high frequencies to cut through background noise.
Step 8: Test and Troubleshoot
Before declaring victory, test everything thoroughly.
Power On and Check Connections
Turn on the TV and verify all inputs work. Test HDMI ports, streaming apps, and audio output.
Check for Glare and Viewing Quality
Watch content at different times of day. Adjust the TV angle or add a shade if glare is an issue.
Test Weather Resistance
After installation, simulate rain (with a garden hose) to check for water intrusion around cables and mounts. Look for leaks or moisture buildup.
Common Issues and Fixes
- No Signal: Check HDMI connections and ensure the source device is on. Try a different cable.
- Weak Wi-Fi: Reposition your extender or switch to a wired Ethernet connection.
- Overheating: Ensure vents aren’t blocked. Avoid enclosing the TV in a tight space.
- Rust on Mount: Replace with stainless steel hardware and apply anti-corrosion spray.
Maintenance Tips for Long-Term Use
To keep your outdoor TV in top shape:
- Clean the screen monthly with a microfiber cloth and mild cleaner (no ammonia).
- Inspect seals and cables every season for cracks or wear.
- Cover the TV with a weatherproof cover during off-seasons or extreme weather.
- Check mount tightness annually—vibration and wind can loosen screws.
Conclusion
Installing an outside TV for deck entertainment is a rewarding project that enhances your outdoor living space. By choosing the right TV, mounting it securely, protecting it from the elements, and optimizing your setup, you can enjoy movies, sports, and shows under the open sky.
Remember: safety and weatherproofing are non-negotiable. Invest in quality gear, follow best practices, and don’t hesitate to consult professionals for electrical or structural work.
With this guide, your deck will become the ultimate backyard hangout—rain or shine, day or night. Now grab some popcorn, invite your friends, and press play.

