
Hiding outdoor TV cables on a screened porch doesn’t have to be complicated. With the right tools and techniques, you can keep wires organized, protected, and out of sight. This guide covers step-by-step methods to ensure a clean, safe, and professional-looking setup.
Key Takeaways
- Plan your cable route first: Map out the path from your TV to power and other devices before drilling or installing anything.
- Use weatherproof cable management products: Choose outdoor-rated raceways, conduits, and clips designed to withstand moisture and UV exposure.
- Secure cables along structural elements: Run wires along beams, under railings, or behind trim to keep them hidden and protected.
- Protect connections with outdoor enclosures: Use waterproof junction boxes or surge protectors to safeguard power and signal connections.
- Avoid tripping hazards: Keep low-profile cables flat against surfaces or use cord covers that blend with your flooring.
- Test everything before finalizing: Ensure all devices work properly after installation and make adjustments as needed.
- Maintain accessibility for future repairs: Don’t seal cables in permanently—leave room to access them if upgrades or fixes are needed.
How to Hide Cables Outdoor TV for Screened Porch
So you’ve set up your outdoor TV on the screened porch—great choice! Nothing beats watching your favorite show or the big game while enjoying the fresh air and backyard views. But now you’re staring at a tangled mess of cables snaking across the floor, dangling from the ceiling, or peeking out from behind furniture. Not only does it look messy, but exposed wires can be a tripping hazard and may get damaged by weather, pets, or foot traffic.
The good news? Hiding cables for your outdoor TV on a screened porch is totally doable—and doesn’t require professional help or a huge budget. With a little planning and the right tools, you can create a clean, safe, and stylish setup that keeps your entertainment area looking sharp.
In this guide, we’ll walk you through every step of hiding outdoor TV cables on a screened porch. You’ll learn how to plan your cable route, choose the best weatherproof materials, install cable management systems, protect your connections, and maintain your setup over time. Whether you’re a DIY beginner or a seasoned home improver, these tips will help you achieve a professional-looking result.
Let’s get started!
Step 1: Plan Your Cable Route
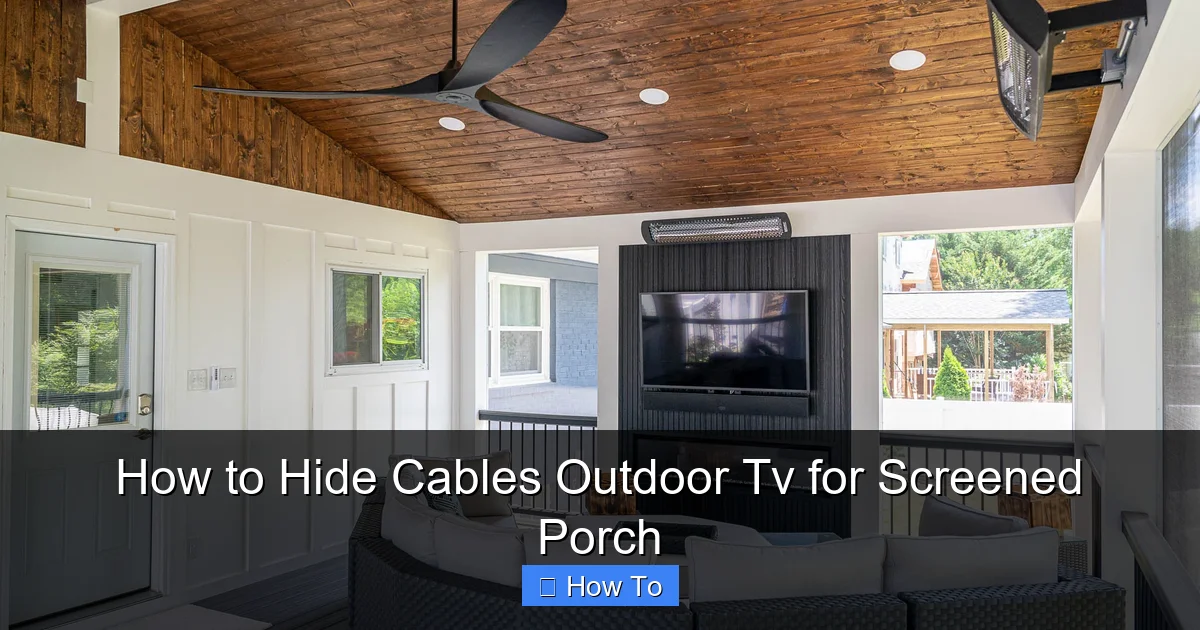
Visual guide about How to Hide Cables Outdoor Tv for Screened Porch
Image source: primeoutdoorliving.com
Before you touch a single cable, take time to plan where everything will go. A little foresight now saves hours of frustration later.
Identify All Devices and Connections
Start by listing every device that needs to connect to your outdoor TV:
– Streaming box (like Roku, Apple TV, or Fire Stick)
– Soundbar or external speakers
– Cable/satellite box
– Gaming console
– Power source
Each of these requires at least one cable—usually HDMI, power, and sometimes Ethernet or audio. Count them up so you know how many wires you’re dealing with.
Map the Shortest, Safest Path
Look at your screened porch layout. Where is the TV mounted? Where are your devices located? Ideally, you want to run cables along walls, under railings, or behind existing structures—not across open floor space.
Avoid high-traffic areas where people walk. If you must cross a walkway, plan to use a low-profile cord cover or route the cable under a rug (though this isn’t ideal for long-term outdoor use).
Also, keep cables away from heat sources (like patio heaters) and direct sunlight, which can degrade plastic over time.
Check for Obstructions and Access Points
Screened porches often have lattice walls, screens, or vinyl siding. Note where you can safely drill or attach hardware without damaging the structure. Look for existing gaps near outlets, under eaves, or along baseboards where cables can pass through.
If your TV is mounted on an exterior wall, see if there’s an interior closet or basement directly behind it. Running cables inside the house and out through a small hole can be the cleanest option.
Step 2: Gather the Right Tools and Materials
Using the wrong products outdoors can lead to rust, melting, or water damage. Always choose weather-resistant, outdoor-rated cable management solutions.
Essential Supplies
Here’s what you’ll likely need:
– Outdoor cable raceway (also called wire mold or conduit)
– Weatherproof cable clips or ties
– Waterproof junction box or outdoor surge protector
– Silicone sealant (for sealing holes)
– Drill with masonry bits (if mounting into concrete or brick)
– Measuring tape and level
– Screwdriver or power drill
– Cable labels (optional but helpful)
Recommended Products
Look for brands that specify “outdoor use” or “UV-resistant.” Some top options include:
– **D-Line Outdoor Cable Raceway**: Flexible, paintable, and easy to cut.
– **Legrand Surface Raceway**: Durable plastic channels that snap together.
– **Southwire Outdoor Conduit**: For running multiple cables through walls.
– **Klein Tools Weatherproof Outlet Box**: Protects power connections.
Avoid cheap indoor cable organizers—they’ll crack, fade, or trap moisture outdoors.
Step 3: Choose the Best Hiding Method for Your Space
There’s no one-size-fits-all solution. Your best method depends on your porch design, TV location, and how permanent you want the setup to be.
Option A: Surface-Mounted Raceways
This is the most popular and beginner-friendly approach. Raceways are plastic or metal channels that attach to walls or ceilings and hold cables inside.
Pros: Easy to install, removable, customizable length
Cons: Slightly visible, may not suit ultra-minimalist designs
How to Install:
1. Measure the distance from your TV to the nearest outlet or device hub.
2. Cut the raceway to size using a hacksaw or utility knife.
3. Use a level to mark where it will go—ideally along a corner, under a railing, or near the ceiling.
4. Drill pilot holes and secure with screws (use wall anchors if needed).
5. Open the raceway, lay in your cables, and snap the cover shut.
Tip: Paint the raceway to match your wall or trim for a seamless look.
Option B: In-Wall Conduit (For Permanent Setups)
If you’re comfortable with minor construction, running cables inside the wall is the cleanest option.
Pros: Completely hidden, professional finish
Cons: Requires drilling, not easily reversible
How to Install:
1. Turn off power to the area.
2. Drill a small hole from the inside (e.g., basement or closet) to the exterior wall where your TV is mounted.
3. Feed flexible conduit (like ENT or LFMC) through the hole.
4. Pull your cables through the conduit using a fish tape or string.
5. Seal the hole with silicone caulk to prevent moisture intrusion.
This method works best if you have access to the space behind the wall. If not, consider hiring an electrician.
Option C: Under-Railing or Behind-Trim Routing
Many screened porches have wooden or metal railings, trim, or lattice panels. You can tuck cables behind these features for a nearly invisible look.
How to Do It:
– Use outdoor-rated adhesive clips to secure cables along the backside of railings.
– If there’s a gap between the screen frame and wall, run cables through it.
– For lattice walls, gently weave thin cables through the openings (avoid bending or kinking).
This method works well for short runs and low-voltage cables like HDMI or speaker wire.
Option D: Cord Covers for Floor Crossings
If you must cross a walkway, use a flat, low-profile cord cover designed for outdoor use.
Recommended: Look for rubber or PVC covers with non-slip backing. Avoid foam or fabric types—they absorb water and degrade quickly.
Install by cleaning the floor, peeling off the adhesive backing, and pressing the cover down firmly. For extra security, use outdoor tape or small screws.
Step 4: Protect Power and Signal Connections
Outdoor environments are tough on electronics. Moisture, temperature swings, and pests can ruin unprotected connections.
Use a Waterproof Junction Box
All power connections should go into a sealed, outdoor-rated enclosure. This includes:
– The TV’s power cord
– Any extension cords
– Surge protectors
Installation Tips:
– Mount the box under an eave or in a shaded area to reduce sun exposure.
– Use silicone sealant around cable entry points to block water.
– Choose a box with a clear lid so you can inspect connections without opening it.
Invest in an Outdoor Surge Protector
Standard power strips aren’t built for outdoor use. Instead, get a surge protector rated for exterior installation (look for “NEMA 3R” or “weatherproof” labels).
Plug all your devices into this protector, then run a single heavy-duty outdoor extension cord from the surge protector to your indoor outlet (if needed). This reduces the number of exposed cables and adds vital protection against lightning and power surges.
Label Your Cables
Once everything is connected, label each cable at both ends with waterproof tags or tape. Write clearly: “HDMI to Soundbar,” “Power to Fire Stick,” etc. This makes troubleshooting and future upgrades much easier.
Step 5: Secure and Organize Cables Neatly
Even the best route looks messy if cables are loose or tangled.
Bunch and Bundle Strategically
Use reusable Velcro straps or outdoor zip ties to group cables together. Don’t overtighten—this can damage insulation or pinch wires.
Keep power cables separate from signal cables (like HDMI) to reduce interference. If they must cross, do so at a 90-degree angle.
Use Cable Clips for Extra Support
Along long runs, add clips every 12–18 inches to prevent sagging. Choose UV-resistant plastic or stainless steel clips with adhesive or screw mounts.
For ceilings or high walls, consider using J-hooks or J-channel raceways to guide cables neatly downward.
Hide Devices Too
Your streaming box or cable box doesn’t have to sit out in the open. Tuck it behind the TV (if there’s space), inside a weatherproof media cabinet, or under a bench with ventilation.
Just ensure it stays dry and has airflow to prevent overheating.
Step 6: Test and Finalize Your Setup
Before you call it done, double-check everything.
Power On and Verify
Turn on your TV and all connected devices. Make sure:
– The picture is clear (no signal loss)
– Audio works through speakers or soundbar
– Remote controls function properly
– No cables are pinched or strained
If something isn’t working, trace the cable path to find kinks, loose connections, or damaged insulation.
Make Final Adjustments
Trim excess zip ties. Reapply sealant if needed. Adjust raceway alignment so it’s straight and flush.
Take a step back and look at the whole setup. Does it feel clean and intentional? If not, tweak the routing or add more clips.
Document Your Layout
Snap a photo of your cable map and store it with your TV manual. Note where conduits enter walls or where junction boxes are located. This helps if you ever need to add a new device or fix a problem.
Troubleshooting Common Issues
Even with careful planning, problems can pop up. Here’s how to handle the most common ones.
Cables Keep Popping Out of Raceways
This usually happens if the raceway is too small or the cables are too stiff. Solution: Use a wider raceway or split bundles into smaller groups. Alternatively, switch to a snap-on cover that holds tighter.
Water Is Getting Into the Junction Box
Check the sealant around cable entries. Reapply outdoor-grade silicone and ensure the box lid closes tightly. If water pools inside, drill a tiny drain hole in the bottom (covered with mesh to keep bugs out).
Signal Loss or Flickering Picture
Long HDMI runs (over 25 feet) can weaken signals. Use an HDMI extender with Ethernet or fiber optic cables for longer distances. Also, avoid running HDMI near power lines.
Animals Are Chewing Cables
Squirrels, raccoons, and mice love chewing on plastic-coated wires. Protect exposed cables with split loom tubing or metal conduit. Sprinkle cayenne pepper (non-toxic to pets) around entry points as a deterrent.
Raceway Is Fading or Cracking
This means it’s not UV-resistant. Replace it with a higher-quality outdoor product. In the meantime, paint it with UV-blocking outdoor paint to slow degradation.
Maintenance Tips for Long-Term Success
Your outdoor cable setup won’t stay perfect forever—but a little upkeep goes a long way.
Inspect Every Season
Check cables, raceways, and seals in spring and fall. Look for:
– Cracks or brittleness
– Loose mounts
– Moisture buildup
– Pest activity
Tighten screws, reseal holes, and replace damaged parts promptly.
Clean Gently
Wipe raceways and boxes with a damp cloth to remove dirt and pollen. Avoid harsh chemicals that can degrade plastic.
Upgrade Smartly
When adding new devices, reuse existing raceways if possible. If not, plan the new route to match your current system for consistency.
Conclusion
Hiding cables for your outdoor TV on a screened porch might seem like a small detail—but it makes a big difference in safety, aesthetics, and functionality. By planning your route, using weatherproof materials, protecting connections, and organizing neatly, you can create a setup that’s both beautiful and built to last.
Remember: The goal isn’t perfection—it’s practicality. You don’t need invisible cables, just ones that are out of the way, secure, and safe. With the steps in this guide, you’ll enjoy your outdoor entertainment space without the eyesore of dangling wires.
So grab your tools, map out your plan, and get started. Your porch—and your peace of mind—will thank you.

