
Hiding cables for an outdoor television at your outdoor bar improves safety, enhances aesthetics, and protects wiring from weather damage. This guide covers step-by-step methods using raceways, conduits, and creative concealment to keep your setup clean and functional.
Key Takeaways
- Use weatherproof cable management products: Always choose outdoor-rated raceways, conduits, and clips to protect cables from rain, UV rays, and temperature changes.
- Plan your cable route before installation: Map out the shortest, safest path from the TV to power and signal sources to minimize exposure and tripping hazards.
- Secure cables with proper fasteners: Use stainless steel or UV-resistant zip ties, clips, and adhesive mounts designed for outdoor use to prevent sagging or detachment.
- Conceal cables behind furniture or decor: Strategically place bar stools, planters, or outdoor cabinets to hide visible wiring without blocking access for maintenance.
- Install in-wall or underground conduits for permanent setups: For a clean, professional look, run cables through walls or bury them in protective tubing below ground level.
- Label and organize cables: Use color-coded tags or labels to identify power, HDMI, and audio cables for easier troubleshooting and future upgrades.
- Regularly inspect and maintain cable systems: Check for wear, corrosion, or animal damage every few months to ensure long-term safety and performance.
How to Hide Cables Outdoor Television for Outdoor Bar
Setting up an outdoor bar with a television is a fantastic way to entertain guests, watch the big game, or enjoy a movie under the stars. But one of the biggest challenges? Managing all those unsightly and potentially hazardous cables. Exposed wires not only ruin the sleek look of your outdoor space but also pose safety risks and can be damaged by weather, pests, or foot traffic.
The good news? Hiding cables for your outdoor television is easier than you think—especially when you use the right tools and techniques. Whether you’re working with a permanent setup or a seasonal installation, this comprehensive guide will walk you through every step to keep your outdoor bar looking clean, safe, and professional.
In this guide, you’ll learn how to plan your cable layout, choose the best outdoor-rated concealment products, and install them securely. We’ll cover everything from surface-mounted raceways to in-wall solutions, creative hiding spots, and maintenance tips. By the end, your outdoor TV will look sleek, your cables will be protected, and your guests will never know the wiring is even there.
Let’s get started!
Why Hiding Outdoor TV Cables Matters
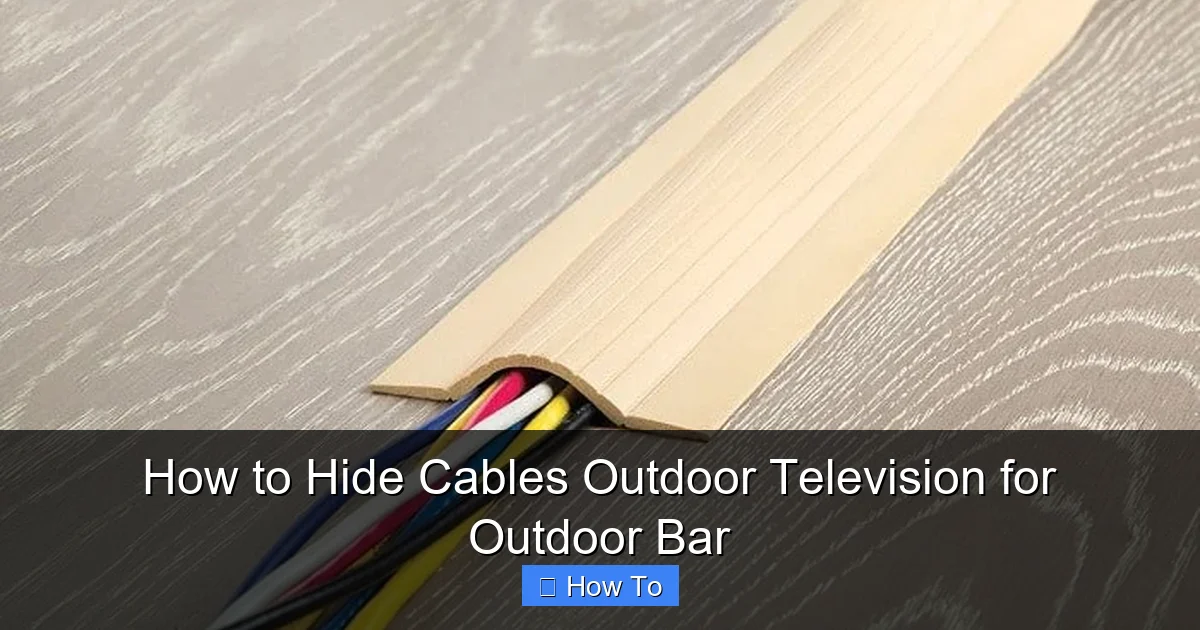
Visual guide about How to Hide Cables Outdoor Television for Outdoor Bar
Image source: galvinpower.org
Before diving into the how-to, it’s important to understand why proper cable management is essential for outdoor setups.
First, safety is a top concern. Loose cables can create tripping hazards, especially in dimly lit areas or when guests are mingling around the bar. Wet conditions increase the risk of electrical shock if cables are damaged or improperly insulated.
Second, weather resistance is critical. Outdoor cables are exposed to rain, snow, UV rays, and temperature swings. Without protection, insulation can crack, connectors can corrode, and performance can degrade over time.
Third, aesthetics play a big role in outdoor entertaining. A tangled mess of wires detracts from the ambiance you’ve worked hard to create. A clean, cable-free look makes your outdoor bar feel more inviting and high-end.
Finally, durability and longevity improve when cables are properly concealed. Protected wiring lasts longer, requires less maintenance, and reduces the need for costly repairs or replacements.
In short, hiding your outdoor TV cables isn’t just about looks—it’s about safety, functionality, and peace of mind.
Planning Your Cable Route
The first step in hiding outdoor TV cables is planning. A well-thought-out layout saves time, reduces material waste, and ensures a cleaner final result.
Assess Your Setup
Start by identifying all the components that need power and signal connections. This typically includes:
– The outdoor television
– Streaming devices (e.g., Roku, Apple TV)
– Sound system or soundbar
– Power source (outlet or extension)
– Optional: Lighting, Wi-Fi extender, or camera
Next, determine where each device will be located. Is the TV mounted on a wall, under a pergola, or on a freestanding stand? Where is the nearest outdoor electrical outlet? Is there a source for HDMI or Ethernet signals?
Map the Shortest Path
Once you know where everything goes, map the shortest and safest route for your cables. Avoid high-traffic areas, sharp edges, and places where water might pool. If possible, run cables along walls, under decking, or behind furniture.
For example, if your TV is mounted on the side of your house near the bar, you might run cables down the wall, across the back of the bar counter, and into a nearby outlet. If the outlet is far away, consider using a weatherproof extension cord or installing a new outdoor-rated outlet (consult an electrician if needed).
Consider Future Access
Think ahead: Will you need to replace a cable or upgrade your system later? Make sure your concealment method allows for easy access. Avoid sealing cables in ways that make removal difficult.
Measure and List Materials
Measure the total length of cable you’ll need, plus extra for slack and connections. Then, list the materials you’ll need based on your chosen method (e.g., raceways, conduits, clips). We’ll cover these in detail below.
Choosing the Right Cable Management Products
Not all cable management solutions are created equal—especially for outdoor use. You need products that are durable, weather-resistant, and easy to install.
Outdoor Raceways
Raceways are plastic or metal channels that snap or screw onto walls to hide cables. They’re one of the most popular options for outdoor TV setups because they’re affordable, easy to install, and come in various sizes and colors.
Look for raceways labeled “outdoor-rated” or “UV-resistant.” These are designed to withstand sun exposure and moisture. White or gray raceways blend well with most outdoor walls and ceilings.
Popular brands include Legrand, D-Line, and Wiremold. Some models even have adhesive backs for quick mounting, though screw-mounted versions are more secure for long-term use.
Conduit Systems
For a more permanent and professional look, consider using electrical conduit. This is a rigid or flexible tube that protects cables and can be surface-mounted or buried.
– Rigid PVC conduit is ideal for straight runs along walls or under decks. It’s durable, weatherproof, and easy to paint.
– Flexible conduit (like LFMC or liquid-tight flexible metal conduit) is great for tight spaces or curved paths.
Conduit requires more effort to install but offers superior protection and a clean, industrial look. It’s especially useful if you’re running multiple cables or planning to expand your system later.
Cable Clips and Ties
For smaller setups or temporary installations, cable clips and zip ties can do the trick. Use stainless steel or UV-resistant plastic clips to secure cables to walls, beams, or under counters.
Avoid regular zip ties—they become brittle in sunlight. Instead, opt for outdoor-rated versions with UV inhibitors. You can also use adhesive cable mounts with strong outdoor tape (like 3M VHB) for a no-drill option.
Underground Cable Protection
If you’re running cables from a distant outlet or signal source, consider burying them in protective tubing. Use direct-burial-rated cables and install them inside PVC conduit buried at least 18 inches deep (check local codes).
This method is ideal for permanent setups and keeps cables completely out of sight. Just be sure to mark the route to avoid accidental damage during future landscaping.
Decorative Covers and Furniture Integration
For a creative touch, use outdoor furniture or decor to hide cables. For example:
– Run cables behind a bar cabinet or storage bench.
– Use a planter box with a hollow base to conceal wiring.
– Install a false back panel on a shelf or cabinet to create a hidden channel.
These methods work best when combined with other concealment techniques for full protection.
Step-by-Step Installation Guide
Now that you’ve planned your route and chosen your materials, it’s time to install. Follow these steps for a clean, secure cable setup.
Step 1: Gather Your Tools and Materials
You’ll need:
– Outdoor-rated raceways, conduit, or clips
– Screwdriver or drill
– Measuring tape
– Level
– Cable ties or clips
– Outdoor extension cord (if needed)
– Label maker or colored tape
– Safety gloves and goggles
Step 2: Mount the Television
Before running cables, mount your outdoor TV securely. Use a weatherproof mounting bracket rated for your TV’s size and weight. Ensure the mount is level and anchored to a solid surface like a wall stud or concrete.
Step 3: Run Cables from the TV
Start by connecting all necessary cables to the TV (power, HDMI, audio, etc.). Leave enough slack to route them neatly.
If using a raceway:
– Measure and cut the raceway to length.
– Use a level to mark the installation path.
– Screw or adhesive-mount the raceway to the wall, starting at the TV and working toward the outlet.
– Open the raceway, place the cables inside, and snap it shut.
If using conduit:
– Cut the conduit to size and deburr the edges.
– Attach fittings and elbows as needed.
– Secure the conduit to the wall with straps every 3–4 feet.
– Pull cables through using a fish tape or string.
Step 4: Route Cables Along the Bar
If your bar is separate from the TV wall, run cables along the back or underside of the counter. Use cable clips or raceways to keep them tidy.
For a seamless look, drill a small hole through the bar counter (if made of wood or composite) and feed cables through. Seal the hole with silicone to prevent water ingress.
Step 5: Connect to Power and Signal Sources
Plug cables into the appropriate outlets or devices. Use a weatherproof outlet cover if the connection is exposed. For HDMI or Ethernet, consider using outdoor-rated extenders or wireless alternatives to reduce cable clutter.
Step 6: Secure and Organize Cables
Use zip ties or clips to bundle cables together and prevent sagging. Avoid over-tightening, which can damage insulation.
Label each cable with a tag or colored tape (e.g., red for power, blue for HDMI). This makes troubleshooting and upgrades much easier.
Step 7: Test the System
Turn on the TV and all connected devices to ensure everything works. Check for signal loss, loose connections, or interference.
Creative Ways to Hide Cables
Sometimes, standard raceways aren’t enough—or they don’t fit your design. Here are some creative solutions to keep cables out of sight.
Use Outdoor Decor
Place large potted plants, outdoor sculptures, or trellises near cable runs to block the view. Just make sure they don’t obstruct airflow or access.
Install a False Wall or Panel
Build a simple wooden or composite panel behind the TV to create a hidden channel for cables. Paint it to match your wall or add decorative trim.
Integrate with Lighting
If you have outdoor string lights or LED strips, run cables alongside them. Use the same raceway or clips to keep everything unified.
Hide Under Decking or Pavers
For ground-level runs, tuck cables under deck boards or between pavers. Use conduit for protection and avoid areas with heavy foot traffic.
Troubleshooting Common Issues
Even with careful planning, problems can arise. Here’s how to handle common cable management issues.
Cables Are Still Visible
If raceways or clips aren’t hiding cables completely, try painting them to match your wall. Use outdoor spray paint for a seamless blend.
Water Is Getting Into Connections
Ensure all outdoor outlets and connections are covered with weatherproof enclosures. Use silicone sealant around entry points to prevent leaks.
Cables Are Sagging or Detaching
Add more support points. Use additional clips or shorter raceway sections. Avoid long, unsupported spans.
Signal Loss or Interference
Check for damaged cables or loose connections. Keep power and signal cables separated to reduce interference. Use shielded cables for HDMI and Ethernet.
Animals Are Chewing Cables
Bury cables deeper or use metal conduit. Apply a bitter-tasting spray (pet-safe) to deter chewing.
Maintenance Tips for Long-Term Success
To keep your outdoor cable system in top shape, follow these maintenance tips:
– Inspect cables and raceways every 3–6 months for cracks, fading, or damage.
– Clean raceways with a damp cloth to remove dirt and debris.
– Re-tighten loose clips or screws.
– Replace any corroded or brittle components.
– Update labels if you add new devices.
Regular care extends the life of your setup and prevents unexpected failures.
Conclusion
Hiding cables for your outdoor television doesn’t have to be complicated or expensive. With the right planning, tools, and techniques, you can create a clean, safe, and stylish setup that enhances your outdoor bar experience.
Start by assessing your layout and choosing weatherproof cable management products like raceways, conduits, or clips. Plan your route carefully, install with precision, and use creative solutions to blend cables into your decor. Don’t forget to label and maintain your system for long-term reliability.
A well-managed cable setup not only looks great—it also protects your investment, reduces hazards, and lets you focus on what really matters: enjoying time with friends and family outdoors.
So grab your tools, follow this guide, and say goodbye to cable clutter. Your outdoor bar will thank you.

