
Transform your covered patio into a sleek, clutter-free entertainment zone by learning how to hide garden TV cables effectively. This guide covers practical, weather-safe methods to conceal cords while maintaining easy access and a polished look.
Key Takeaways
- Plan your cable route first: Map out the path from your TV to power and signal sources before installing anything to avoid mistakes and ensure a clean layout.
- Use outdoor-rated cable management products: Always choose weatherproof raceways, conduits, and clips designed for exterior use to protect cables from moisture and UV damage.
- Blend cables with your patio design: Paint raceways to match walls or use decorative covers that complement your outdoor décor for a seamless look.
- Prioritize safety and code compliance: Keep cables away from foot traffic, water sources, and heat, and follow local electrical codes to prevent hazards.
- Label and organize cables: Use color-coded tags or labels so you can easily identify HDMI, power, and audio cables during setup or troubleshooting.
- Test everything before finalizing: Power on your TV and connected devices after routing cables to ensure all connections work properly before securing everything in place.
- Maintain accessibility: Choose removable covers or access panels so you can upgrade or repair cables without tearing down your entire setup.
How to Hide Cables for Garden TV on a Covered Patio
If you’ve set up a TV on your covered patio, you know how amazing it is to enjoy your favorite shows, movies, or sports outdoors. But let’s be honest—those dangling cables can quickly ruin the vibe. Power cords, HDMI cables, and audio wires snaking across your deck or hanging from the ceiling look messy and can even be a tripping hazard. The good news? You don’t have to live with the clutter. With a little planning and the right tools, you can hide garden TV cables neatly and safely, giving your outdoor space a clean, professional finish.
In this guide, we’ll walk you through step-by-step methods to conceal cables for your garden TV on a covered patio. Whether you’re working with a wall-mounted TV, a freestanding outdoor display, or a projector setup, these techniques will help you achieve a sleek, wire-free look. We’ll cover everything from planning your cable route to choosing the best outdoor-rated products, installing cable raceways, and maintaining easy access for future upgrades. By the end, your patio will look stylish, organized, and ready for year-round entertainment.
Why Hiding Cables Matters
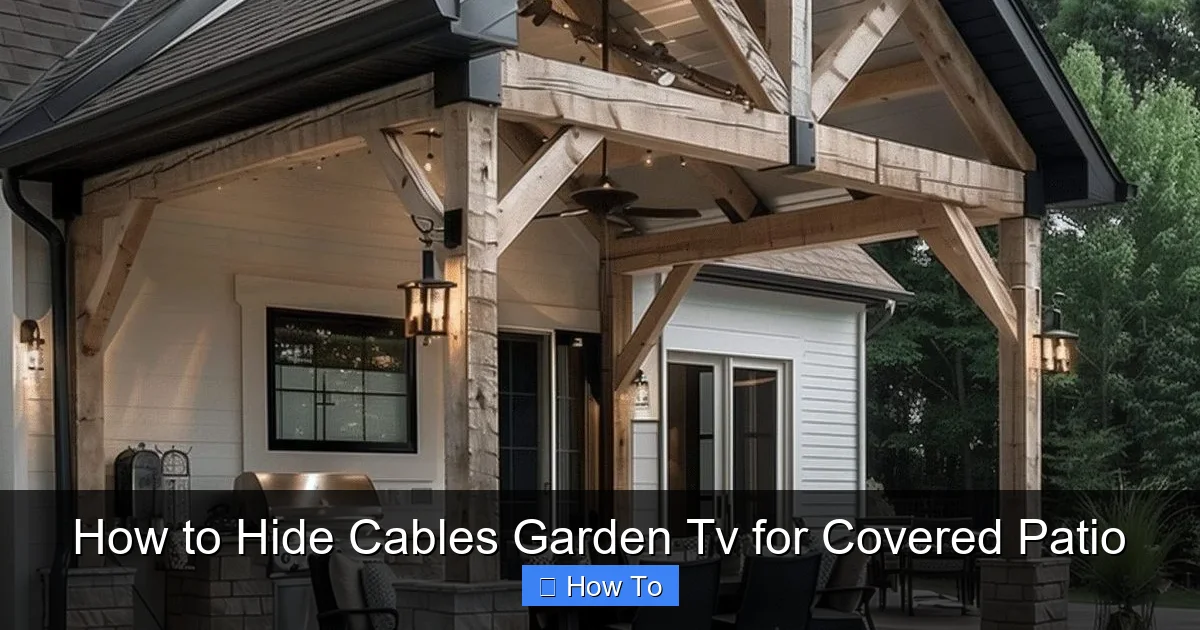
Visual guide about How to Hide Cables Garden Tv for Covered Patio
Image source: i.pinimg.com
Before diving into the how-to, let’s talk about why hiding cables is so important—especially in an outdoor setting like a covered patio.
First, aesthetics. A clean, wire-free space instantly elevates the look of your outdoor living area. No one wants to see a tangled mess of cords when they’re trying to relax with a movie under the stars. Hiding cables creates a more inviting and polished environment.
Second, safety. Exposed cables can be a tripping hazard, especially in low-light conditions or when guests are moving around. They can also get damaged by weather, pets, or foot traffic. Water and electricity don’t mix, so protecting your cables from moisture is crucial.
Third, durability. Outdoor environments expose cables to sun, rain, temperature changes, and pests. Without proper protection, cables can degrade quickly, leading to signal loss, power issues, or even electrical hazards.
Finally, maintenance. A well-organized cable setup makes it easier to troubleshoot problems, upgrade equipment, or clean your space. When everything is labeled and neatly stored, you save time and frustration.
Step 1: Plan Your Cable Route
The first and most important step in hiding garden TV cables is planning. Rushing into installation without a clear plan can lead to messy results, damaged walls, or unsafe setups.
Start by identifying all the devices connected to your TV. This typically includes:
– The TV itself
– Streaming device (like Roku, Apple TV, or Fire Stick)
– Soundbar or external speakers
– Gaming console (if applicable)
– Power source (outlet or extension cord)
Next, map out the shortest and safest path from each device to the TV and to the power source. Consider these factors:
– Distance: Longer cables mean more slack to manage.
– Obstacles: Avoid areas with heavy foot traffic, water sources (like sprinklers or drains), or heat sources (like grills or fire pits).
– Access: Make sure you can reach outlets and signal sources without stretching cables too far.
Use a tape measure to determine how much cable you’ll need. It’s better to have a little extra than to come up short. Also, note where you’ll mount the TV—on a wall, under a pergola, or on a stand—as this affects how cables will run.
Sketch a simple diagram of your patio layout. Mark the TV location, power outlets, and the path each cable will take. This visual guide will help you stay organized during installation.
Tip: Use a Cable Length Calculator
If you’re unsure about cable lengths, use an online cable length calculator. Input the distance between devices, and it will recommend the right size. Always add 10–15% extra for slack and routing flexibility.
Step 2: Choose the Right Cable Management Products
Not all cable organizers are created equal—especially for outdoor use. You need products that can withstand the elements while keeping your cables secure and hidden.
Here are the best options for hiding garden TV cables on a covered patio:
Outdoor Cable Raceways
These are plastic or metal channels that attach to walls, ceilings, or under eaves. They’re perfect for running multiple cables in a straight line. Look for raceways labeled “weatherproof” or “UV-resistant.” Popular brands include Legrand, D-Line, and Wiremold.
Flexible Conduit
Flexible conduit is a corrugated tube that protects individual cables. It’s ideal for curved paths or areas where raceways won’t fit. Choose PVC conduit for moisture resistance or metal conduit for added durability.
Cable Clips and Adhesive Mounts
Use outdoor-rated clips to secure loose cables along railings, beams, or under tables. Adhesive mounts with strong 3M tape work well on smooth surfaces, but for rough or painted wood, use screws for a more secure hold.
Decorative Cable Covers
For a stylish touch, consider decorative covers that double as cable hides. Options include:
– Wooden trunk-style covers that look like planters or garden boxes
– Fabric sleeves that blend with outdoor cushions
– Paintable raceways that match your wall or ceiling color
Weatherproof Junction Boxes
If you need to connect multiple cables or use an outdoor power strip, a weatherproof junction box protects connections from rain and dust. Look for NEMA-rated boxes (NEMA 3R or 4X) for outdoor use.
Tip: Buy Extra
Always purchase a little more material than you think you’ll need. It’s frustrating to run out mid-project, and having spare parts on hand is useful for future repairs.
Step 3: Prepare the Area and Gather Tools
Before installing anything, prepare your workspace and gather the necessary tools. A little prep goes a long way in ensuring a smooth installation.
Tools You’ll Need
– Measuring tape
– Level
– Drill and drill bits
– Screwdriver or impact driver
– Utility knife or cable cutter
– Wire strippers (if splicing cables)
– Painter’s tape (for marking)
– Ladder (if working on high walls or ceilings)
– Safety glasses and gloves
Materials Checklist
– Outdoor cable raceways or conduit
– Cable clips or mounts
– Screws and anchors (if not using adhesive)
– Weatherproof junction box (if needed)
– Cable labels or colored tape
– Extension cord or outdoor power strip (if outlet is far)
– Cable ties or Velcro straps
Pre-Installation Steps
1. Turn off power to any outlets you’ll be working near.
2. Clean the surface where you’ll attach raceways or clips. Remove dust, grease, or loose paint.
3. Test all cables and devices indoors to make sure they work before installing them outside.
4. Lay out your cables along the planned route to check for fit and length.
Step 4: Install Cable Raceways or Conduit
Now it’s time to install your chosen cable management system. We’ll focus on raceways first, as they’re the most common and effective solution.
Mounting Raceways to Walls or Ceilings
1. Use painter’s tape to mark the centerline of your cable route.
2. Hold the raceway in place and use a level to ensure it’s straight.
3. Drill pilot holes if using screws, or clean the surface if using adhesive.
4. Attach the raceway base to the wall or ceiling. For adhesive mounts, press firmly for 30 seconds and wait 24 hours before loading cables.
5. Open the raceway cover and lay in your cables. Group similar cables together (e.g., power, HDMI, audio).
6. Close the cover and secure it with clips or screws.
Running Conduit Along Beams or Under Eaves
1. Measure the length of conduit needed and cut it with a hacksaw or pipe cutter.
2. Feed cables through the conduit before attaching it to the structure.
3. Use conduit straps or clips to secure the tube every 12–18 inches.
4. For corners, use pre-bent elbows or heat the conduit gently to shape it.
Blending Raceways with Your Décor
To make raceways less noticeable:
– Paint them to match your wall, ceiling, or trim color. Use outdoor-grade paint for durability.
– Install them along natural lines, such as where the wall meets the ceiling or under a beam.
– Use raceways with a low-profile design that sits flush against the surface.
Tip: Use Corner Guards
If your raceway turns a corner, use a corner guard or elbow piece for a clean, professional look. Avoid sharp bends that can damage cables.
Step 5: Secure Loose Cables with Clips and Ties
Not all cables can fit inside raceways—especially if you have a freestanding TV or multiple devices on a table. For these, use clips and ties to keep things tidy.
Using Adhesive Cable Clips
1. Clean the surface with rubbing alcohol.
2. Peel off the adhesive backing and press the clip firmly into place.
3. Thread the cable through the clip and close the latch.
4. Space clips every 6–12 inches to prevent sagging.
Using Screw-On Clips
For heavier cables or rough surfaces:
1. Mark the clip positions with a pencil.
2. Drill pilot holes and screw the clips into place.
3. Insert the cable and secure the clip cover.
Organizing with Cable Ties and Velcro Straps
– Use reusable Velcro straps to bundle cables together. They’re easier to adjust than plastic zip ties.
– Avoid over-tightening, which can damage cable insulation.
– Label each bundle with a tag or colored tape for easy identification.
Tip: Hide Cables Under Furniture
If your TV is on a console or shelf, route cables behind or underneath the furniture. Use adhesive mounts on the back of the unit to keep wires in place.
Step 6: Protect Connections and Power Sources
Power and signal connections are vulnerable to moisture and wear. Protecting them is essential for safety and performance.
Using a Weatherproof Junction Box
1. Mount the box near your power source or under the TV.
2. Run cables into the box through sealed grommets or conduit fittings.
3. Connect devices inside the box using waterproof connectors.
4. Close the box and ensure the seal is tight.
Using an Outdoor Power Strip
– Choose a power strip rated for outdoor use with a built-in GFCI (ground fault circuit interrupter).
– Mount it inside a weatherproof enclosure or under an eave.
– Plug all devices into the strip and secure the cord with a clip.
Sealing Cable Entry Points
If cables pass through walls or ceilings, seal the holes with silicone caulk or foam gaskets to prevent water and pests from entering.
Tip: Use Surge Protectors
Outdoor electronics are at risk of power surges from lightning or grid fluctuations. Always use a surge protector to safeguard your TV and devices.
Step 7: Test and Finalize the Setup
Once everything is installed, it’s time to test your system.
Power On and Check Connections
1. Turn on the power and plug in all devices.
2. Test the TV, sound system, and streaming devices.
3. Check for video, audio, and internet connectivity.
4. Adjust settings if needed (e.g., input source, volume).
Secure Loose Ends
– Tuck any excess cable into the raceway or junction box.
– Use cable ties to bundle slack neatly.
– Make sure no cables are pinched or bent sharply.
Label Everything
Use a label maker or colored tape to mark each cable at both ends. For example:
– “HDMI 1 – Apple TV”
– “Power – Soundbar”
– “Ethernet – Router”
This makes future troubleshooting or upgrades much easier.
Troubleshooting Common Issues
Even with careful planning, problems can arise. Here’s how to fix the most common issues:
Signal Loss or Interference
– Check that HDMI and Ethernet cables are fully seated.
– Avoid running power cables parallel to signal cables, which can cause interference.
– Use shielded cables for long runs.
Cables Sagging or Coming Loose
– Add more clips or supports along the route.
– Use heavier-duty raceways for long spans.
– Reapply adhesive mounts if they’ve lost grip.
Water Getting Into Junction Boxes
– Ensure the box is properly sealed and mounted with the opening facing down.
– Use silicone around cable entry points.
– Consider adding a drip loop to cables before they enter the box.
Paint Peeling Off Raceways
– Use outdoor-grade paint and primer.
– Lightly sand the surface before painting for better adhesion.
– Apply two thin coats instead of one thick coat.
Difficulty Accessing Cables for Upgrades
– Choose raceways with removable covers.
– Install access panels in strategic locations.
– Keep a diagram of your cable layout for reference.
Maintaining Your Cable Setup
To keep your garden TV cables hidden and functional, regular maintenance is key.
Seasonal Checks
– Inspect raceways, clips, and junction boxes for damage or wear.
– Clean dust and debris from covers.
– Re-tighten screws or reapply adhesive if needed.
Cable Health
– Look for frayed insulation, kinks, or corrosion.
– Replace damaged cables immediately.
– Avoid dragging cables across rough surfaces.
Upgrades and Changes
– When adding new devices, plan the cable route in advance.
– Use modular systems that allow easy expansion.
– Keep spare cables and connectors on hand.
Conclusion
Hiding cables for your garden TV on a covered patio doesn’t have to be complicated or expensive. With the right planning, tools, and products, you can create a clean, safe, and stylish outdoor entertainment space. From choosing weatherproof raceways to securing connections and labeling cables, every step contributes to a polished final result.
Remember, the goal isn’t just to hide the wires—it’s to enhance your outdoor experience. A clutter-free patio looks better, feels safer, and lasts longer. Whether you’re hosting a movie night, watching the big game, or just relaxing with a show, you’ll enjoy it more when your space is organized and inviting.
So grab your tools, follow this guide, and say goodbye to tangled cables. Your garden TV setup will look professional, perform reliably, and stand up to the elements—all while keeping your patio beautiful and functional for years to come.

